Rigid Body Tracking
This page provides detailed instructions to create rigid bodies in Motive, and covers other useful features associated with rigid body assets.
Was this helpful?
This page provides detailed instructions to create rigid bodies in Motive, and covers other useful features associated with rigid body assets.
Was this helpful?
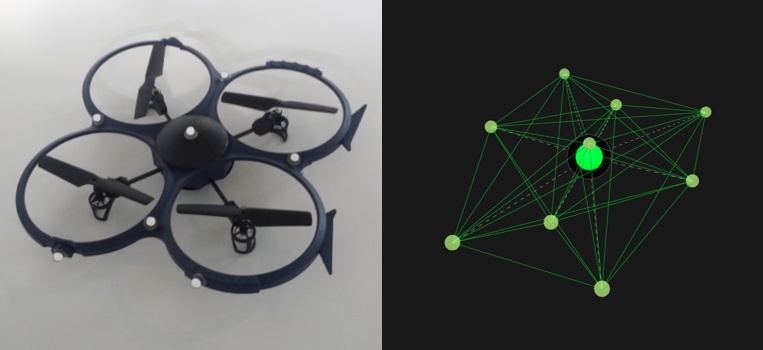
In Motive, Rigid Body assets are used for tracking rigid, unmalleable, objects. A set of markers is securely attached to tracked objects, and respective placement information is used to identify the object and report 6 Degree of Freedom (6DoF) data. Thus, it's important that the distances between placed markers stay the same throughout the range of motion. Either passive retro-reflective markers or active LED markers can be used to define and track a Rigid Body.
A Rigid Body in Motive is a collection of three or more markers on an object that are interconnected to each other with an assumption that the tracked object is unmalleable. More specifically, Motive assumes the spatial relationship among the attached markers remains unchanged and the marker-to-marker distance does not deviate beyond the allowable deflection tolerance defined under the corresponding Rigid Body properties. Otherwise, involved markers may become unlabeled. Cover any reflective surfaces on the Rigid Body with non-reflective materials and attach the markers on the exterior of the Rigid Body where cameras can easily capture them.
Tip: If you wish to get more accurate 3D orientation data (pitch, roll, and yaw) of a Rigid Body, it is beneficial to spread markers as far as you can within the same Rigid Body. By placing the markers this way, any slight deviation in the orientation will be reflected from small changes in the position.
In a 3D space, a minimum of three coordinates are required for defining a plane using vector relationships. Likewise, at least three markers are required to define a Rigid Body in Motive. Whenever possible, it is best to use 4 or more markers to create a Rigid Body. Additional markers provide more 3D coordinates for computing positions and orientations of a rigid body, making overall tracking more stable and less vulnerable to marker occlusions. When any of markers are occluded, Motive can reference other visible markers to solve for the missing data and compute the position and orientation of the rigid body.
However, placing too many markers on one Rigid Body is not recommended. When too many markers are placed in close vicinity, markers may overlap on the camera view, and Motive may not resolve individual reflections. This can increase the likelihood of label-swaps during capture. Securely place a sufficient number of markers (usually less than 10), just enough to cover the main frame of the Rigid Body.
Tip: The recommended number of markers per Rigid Body is 4 ~ 12 markers.
You may encounter limits if using an excessive number of markers, or experience system performance issues when using the refine tool on such an asset.
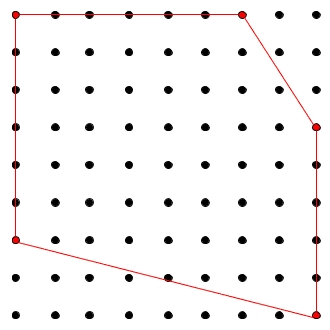
Within a Rigid Body asset, the markers should be placed asymmetrically because this provides a clear distinction of orientations. Avoid placing the markers in symmetrical shapes such as squares, isosceles, or equilateral triangles. Symmetrical arrangements make asset identification difficult and may cause the Rigid Body assets to flip during capture.
When tracking multiple objects using passive markers, it is beneficial to create unique Rigid Body assets in Motive. Specifically, you need to place retroreflective markers in a distinctive arrangement between each object, which will allow Motive to more clearly identify the markers on each Rigid Body throughout capture. In other words, their unique, non-congruent, arrangements work as distinctive identification flags among multiple assets in Motive. This not only reduces processing loads for the Rigid Body solver, but it also improves the tracking stability. Not having unique Rigid Bodies could lead to labeling errors especially when tracking several assets with similar size and shape.
Note for Active Marker Users
If you are using OptiTrack active markers for tracking multiple Rigid Bodies, it is not required to have unique marker placements. Through the active labeling protocol, active markers can be labeled individually, and multiple rigid bodies can be distinguished through uniquely assigned marker labels. Please read through Active Marker Tracking page for more information.
The key idea of creating unique Rigid Body is to avoid geometrical congruency within multiple Rigid Bodies in Motive.
Unique Marker Arrangement. Each Rigid Body must have a unique, non-congruent, marker placement creating a unique shape when the markers are interconnected.
Unique Marker-to-Marker Distances. When tracking several objects, introducing unique shapes could be difficult. Another solution is to vary Marker-to-marker distances. This will create similar shapes with varying sizes and make them distinctive from the others.
Unique Marker Counts Adding extra markers is another method of introducing uniqueness. Extra markers will not only make the Rigid Bodies more distinctive, but they will also provide more options for varying the arrangements to avoid the congruency.
Having multiple non-unique Rigid Bodies may lead to mislabeling errors. However, in Motive, non-unique Rigid Bodies can also be tracked fairly well as long as the non-unique Rigid Bodies are continuously tracked throughout capture. Motive can refer to the trajectory history to identify and associate corresponding Rigid Bodies within different frames.
Even though it is possible to track non-unique Rigid Bodies, we strongly recommend making each asset unique. Tracking of multiple congruent Rigid Bodies could be lost during capture either by occlusion or by stepping outside of the capture volume. Also, when two non-unique Rigid Bodies are positioned in vicinity and overlap in the scene, their marker labels may get swapped. If this happens, additional efforts are required to correct the labels in post-processing of the data.
Depending on the object, there could be limitations on marker placements and number of variations of unique placements that could be achieved. The following list provides sample methods for varying unique arrangements when tracking multiple Rigid Bodies.
Create Distinctive 2D Arrangements. Use distinctive, non-congruent, marker arrangements as the starting point for producing multiple variations, as shown in the examples above.
Vary marker height. Use marker bases or posts of different heights to introduce variations in elevation to create additional unique arrangements.
Vary Maximum Marker to Marker Distance. Increase or decrease the overall size of the marker arrangements.
Add Two (or more) Markers Lastly, if an additional variation is needed, add extra markers. We recommended adding at least two extra markers in case any become occluded.
In creating a Rigid Body asset, a set of markers attached to a rigid object are grouped and auto-labeled as a Rigid Body. This Rigid Body definition can be used in multiple takes to continuously auto-label the same asset markers. Motive recognizes the unique spatial relationship in the marker arrangement and automatically labels each marker to track the Rigid Body.
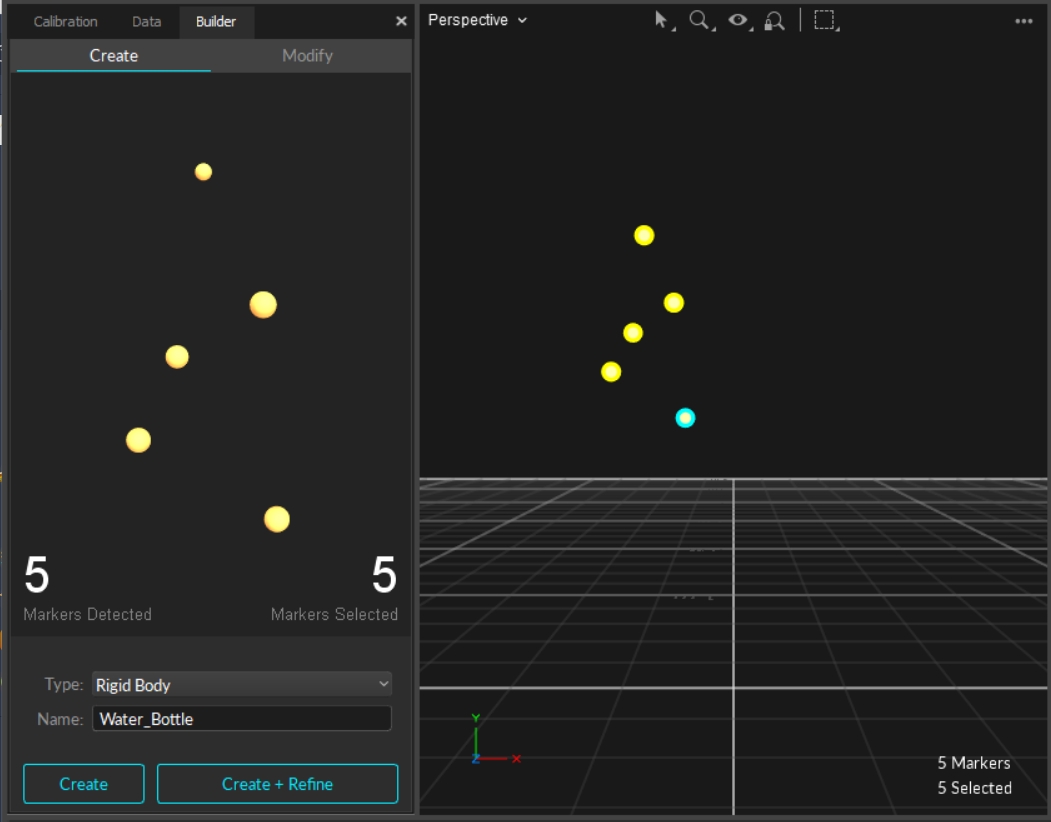
Step 1: Select all associated Rigid Body markers in the 3D viewport.
Step 2: On the Builder pane, confirm that the selected markers match those on the object you want to define as the Rigid Body.
Step 3: Click Create to define a Rigid Body asset from the selected markers.
You can also create a Rigid Body by doing the following actions while the markers are selected:
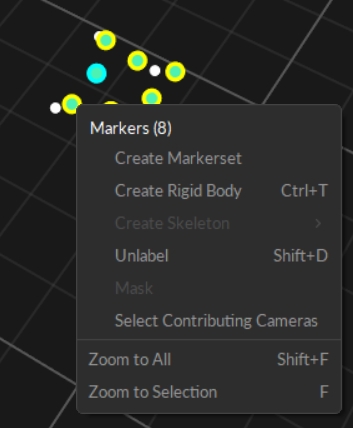
Perspective View (3D viewport): Right-click the selection in the perspective view to access the context menu. Under the Markers section, click Create Rigid Body.
Hotkey: While the markers are selected, use the create Rigid Body hotkey (Default: Ctrl +T).
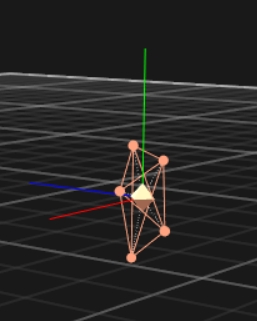
Step 4: Once the Rigid Body asset is created, the markers will be colored (labeled) and interconnected to each other. The newly created Rigid Body will be listed under the Assets pane.
Motive can detect and pair a rigid body to its associated IMU. See the IMU Sensor Fusion page for more details.
Defining Assets in Edit mode:
If Rigid Bodies are created in Edit mode, the corresponding Take needs to be auto-labeled. The Rigid Body markers will be labeled using the Rigid Body asset and positions and orientations will be computed for each frame. If the 3D data have not been labeled after edits on the recorded data, the asset may not be tracked.
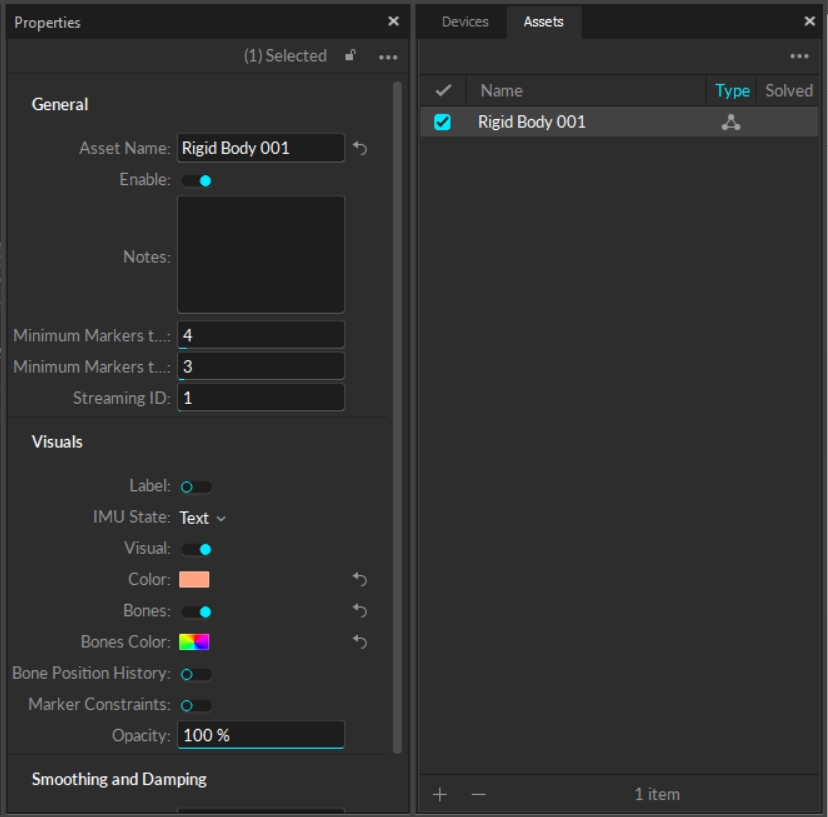
Rigid Body properties define the specific configurations of Rigid Body assets and how they are tracked and displayed in Motive. For more information on each property, read the Properties: Rigid Body page.
Properties for existing Rigid Body assets can be changed from the Properties pane.
There are multiple ways to add or remove markers on a Rigid Body.
From the Assets pane, select the Rigid Body that needs markers added or removed.
In the 3D Viewport, select the marker(s) to be added or removed.
From the Constraints Pane:
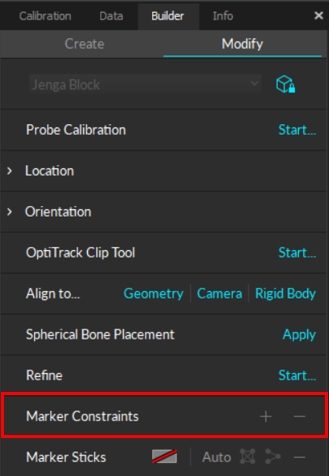
From the Builder pane:
Select the Modify tab.
The pivot point or bone of a Rigid Body is used to define both its position and orientation. The default position of the bone for a newly created rigid body is at its geometric center and its orientation axis will align with the global coordinate axis. To view the pivot point in the 3D viewport, enable the Bone setting in the Visuals section of the selected Rigid Body in the Properties pane.
The location of a pivot point can be adjusted by assigning it to a marker or by translating along the Rigid Body axis (x, y, z). For the most accurate pivot point location, attach a marker at the desired pivot location, set the pivot point to the marker, and apply the translation for precise adjustments.
Edit Mode is used for playback of captured Take files. In this mode, you can playback and stream recorded data and complete post-processing tasks. The Cameras View displays the recorded 2D data while the 3D Viewport represents either recorded or real-time processed data, as described below.
There are two modes for editing:
Edit: Playback in standard Edit mode displays and streams the processed 3D data saved in the recorded Take. Changes made to settings and assets are not reflected in the Viewport until the Take is reprocessed.
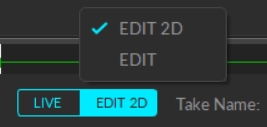
Edit 2D: Playback in Edit 2D mode performs a live reconstruction of the 3D data, immediately reflecting changes made to settings or assets. These changes are displayed in real-time but are not saved into the recording until the Take is reprocessed and saved. To playback in 2D mode, click the Edit button and select Edit 2D.
Regardless of the selected Edit mode, you must reprocess the Take to create new 3D data based on the modifications made.
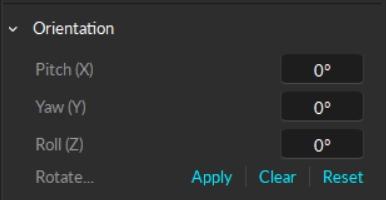
By default, the orientation axis of a Rigid Body is aligned with the global axis when the Rigid Body is first created. Once it's created, its orientation can be adjusted, either by editing the Rigid Body orientation through the Builder pane or by using the GIZMO tools.
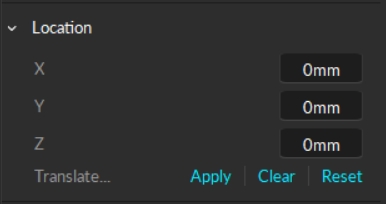
Use the Location tool to enter the amount of translation (in mm) to apply along the (x, y, z) coordinates then click Apply. Clicking Apply again will add to the existing translation and can be used to fine-tune the adjustment of the bone.
Click Clear to reset the fields to 0mm.
Reset will position the pivot point at the geometric center of the Rigid Body according to its marker positions.
Use this tool to apply rotation to the local coordinate system of a selected Rigid Body. You can also reset the orientation to re-align the Rigid Body coordinate axis and the global axis. When resetting the orientation, the Rigid Body must be tracked in the scene.
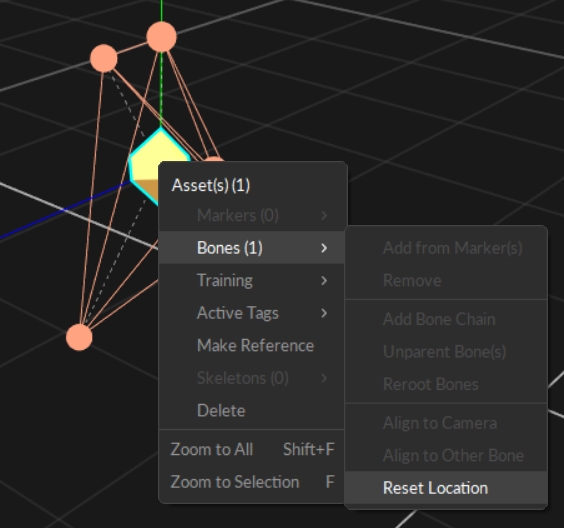
In addition to the Reset buttons on the Builder pane, you can right-click a selected rigid body to open the Asset(s) context menu. Select Bones (#) --> Reset Location.
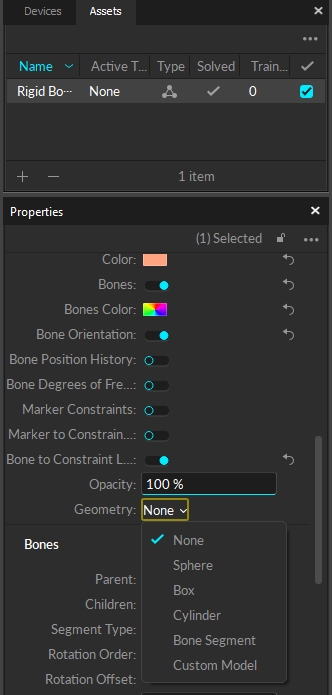
The Align to Geometry feature provides an option to align the pivot of a rigid body to a geometry offset. Motive includes several standard geometric objects that can be used, as well as the ability to import custom objects created in other applications. This allows for consistency between Motive and external rendering programs such as Unreal Engine and Unity.
Scroll to the Visuals section of the asset's properties. Under Geometry, select the object type from the list.
To import your own object, select Custom Model. This will open the Attached Geometry field. Click on the file folder icon to select the .obj or .fbx file to import into Motive.
To align an asset to a specific camera, select both the asset and the camera in the 3D ViewPort. Click Camera in the Align to... field in the Modify tab.
To align an asset to an existing Rigid Body, you must be in 2D edit mode. Click the Edit button at the bottom left and select EDIT 2D from the menu.
This feature is useful when tracking a spherical object (e.g., a ball). Motive will assume all of the markers on the selected Rigid Body are placed on the surface of a spherical object and will calculate and re-position the pivot point accordingly. Simply select a Rigid Body in Motive, open the Builder pane to edit Rigid Body definitions, and then click Apply to place the pivot point at the center of the spherical object.
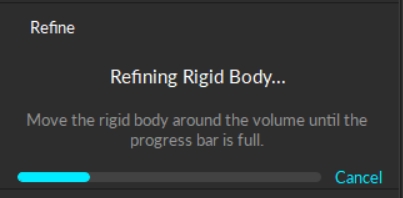
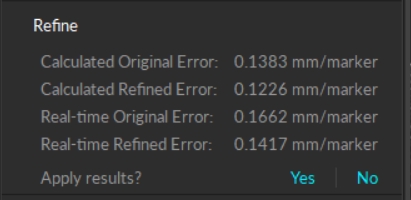
The Rigid Body refinement tool improves the accuracy of the Rigid Body calculation in Motive. When a Rigid Body asset is initially created, Motive references only a single frame to define it. The Rigid Body refinement tool allows Motive to collect additional samples, achieving more accurate tracking results by improving the calculation of expected marker locations of the Rigid Body as well as the position and orientation of the Rigid Body itself.
Click the Modify tab.
Select the Rigid Body to be refined in the Asset pane.
To refine the asset in Live mode, hold the selected Rigid Body at the center of the capture volume so as many cameras as possible can clearly capture its markers.
In the Refine section of the Modify tab of the Builder pane, click Start...
Slowly rotate the Rigid Body to collect samples at different orientations until the progress bar is full.
You can also refine the asset in Edit mode. Motive will automatically replay the current take file to complete the refinement process.
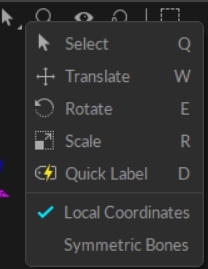
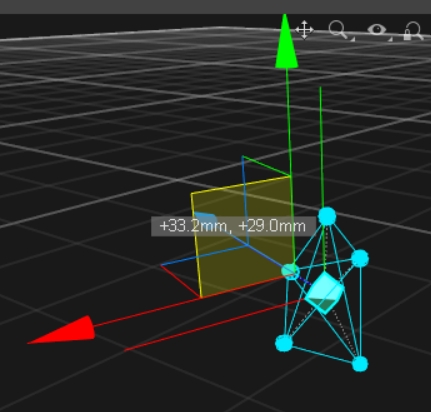
The gizmo tools under the mouse options button in the perspective view of the 3D Viewport are another option to easily modify the position and orientation of Rigid Body pivot points.
Select Tool (Hotkey: Q): The Default option. Used for selecting objects in the Viewport. Return to this mode when you are done using the Gizmo tools.
Translate Tool (Hotkey: W): Translate tool for moving the Rigid Body pivot point.
Rotate Tool (Hotkey: E): Rotate tool for reorienting the Rigid Body coordinate axis.
Scale Tool (Hotkey: R): Scale tool for resizing the Rigid Body pivot point.
Please see the Gizmo tools page for detailed information.
Rigid Body tracking data can be exported or streamed to client applications in real-time:
Captured 6 DoF Rigid Body data can be exported into CSV, or FBX files. Please read the Data Export page for more details.
You can also use one of the streaming plugins or use NatNet client applications to receive tracking data in real-time. See: NatNet SDK.
You can disable assets and hide their associated markers once you are finished labeling and editing them to better focus on the remaining unedited assets.
To Hide Markers:
Select Markers > Hide for Disabled Assets.
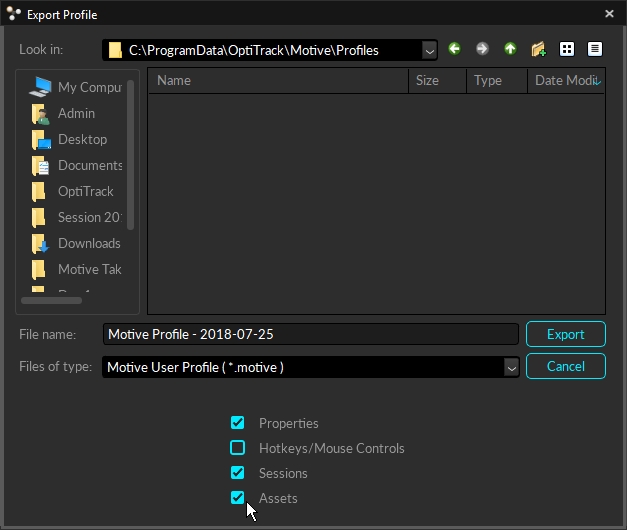
Assets can be exported into the Motive user profile (.MOTIVE) file if they need to be re-imported. The user profile is a text-readable file that contains various configuration settings in Motive. This can include asset definitions.
When an asset definition is exported to a user profile, Motive stores marker arrangements calibrated to the asset, which allows the asset to be imported into different takes without being rebuilt each time in Motive.
Profile files specifically store the spatial relationship of each marker. Only the identical marker arrangements will be recognized and defined with the imported asset.
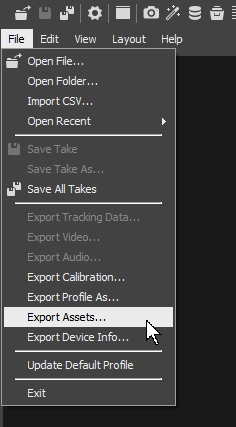
To export all of the assets in Live or in the current TAKE file, go to the File menu → Export Assets.
You can also select Export Profile from the File menu to export other software settings, in addition to the assets.
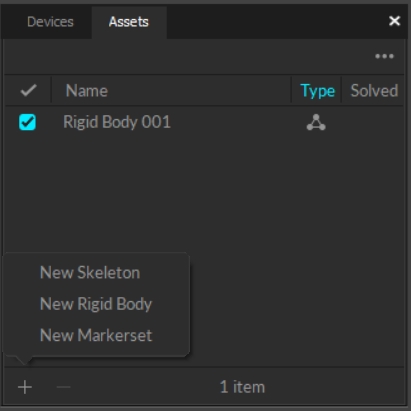
Assets pane: Click the add button at the bottom of the Assets pane.
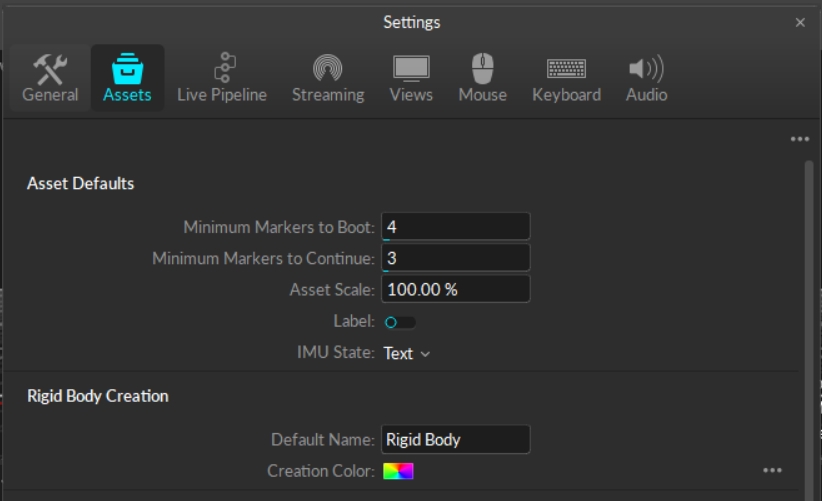
Default properties are applied to any newly created asset, such as minimum markers to boot or continue, asset scale, and asset name and color. Default properties are configured under the Assets section in the Application Settings panel. Click the button to open.
At the bottom of the pane, click to add or to remove the selected marker(s).
In the Marker Constraints section, click to add or to remove the selected marker(s).
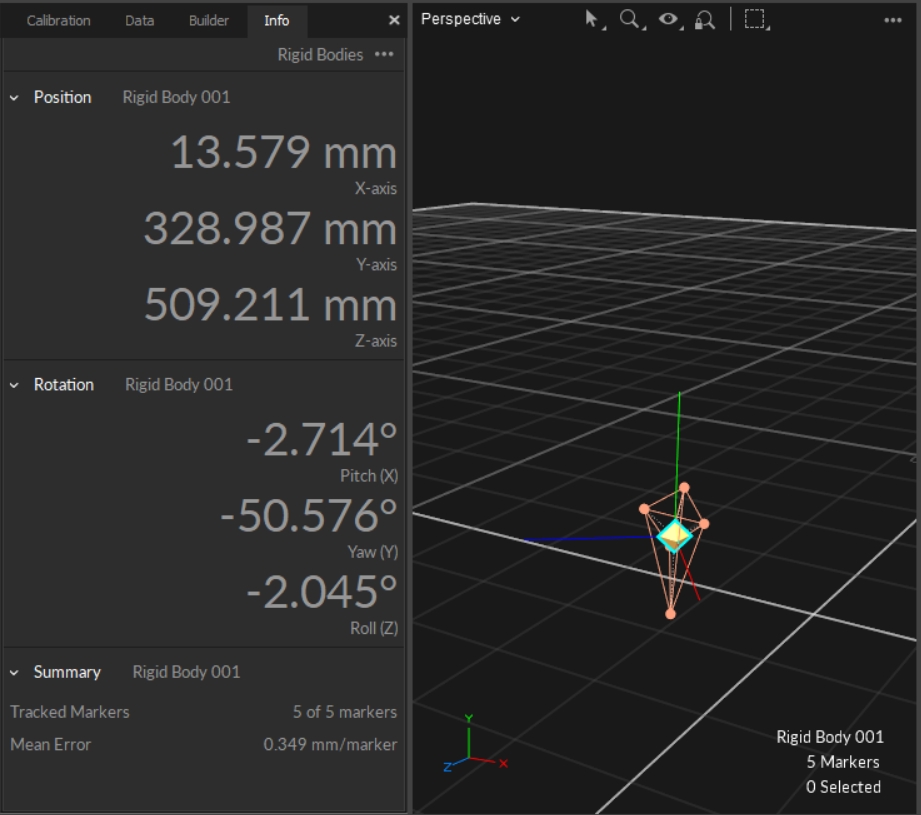
Position and orientation of a tracked Rigid Body can be monitored in real-time from the Info pane. Select a Rigid Body in Motive, open the Info pane by clicking the button on the toolbar. Click the button in the top right corner and select Rigid Bodies from the menu to view respective real-time tracking data of the selected Rigid Body.
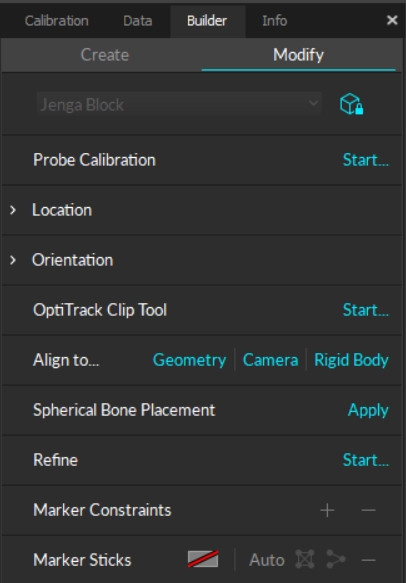
Several tools are available on the Builder pane to align Rigid Bodies. Click to open the builder pane then click on the Modify tab. Select a Rigid Body in the 3D Viewport to see the Rigid Body tools.
To use this feature, select the rigid body from the Assets pane. In the Properties pane, click the button and select Show Advanced if it is not already selected.
From the View menu, open the Builder pane, or click the button on the toolbar.
To disable an asset, uncheck the box to the left of the asset name in the Asset pane.
Click the button in the 3D Viewport.
