Assets
Learn how to work with different types of trackable assets in Motive.
Overview
In Motive, an Asset is a set of markers that define a specific object to be tracked in the capture. Asset tracking data can be sent to other pipelines (e.g., animations and biomechanics) for extended applications.
When an asset is created, Motive automatically applies a set of predefined labels to the reconstructed trajectories (markers) using Motive's tracking and labeling algorithms. Motive calculates the position and orientation of the asset using the labeled markers.
There are three types of assets, covering a full range of tracking needs:
Rigid Bodies: used to track rigid, unmalleable, objects.
Skeletons: used to track human motions.
Trained Markersets: used to track any object that is not a Rigid Body or a pre-defined Skeleton.
This article provides an introduction to working with existing assets. For information specific to each asset type, click the links in the list above. Visit the Builder pane page for detailed instructions to create and modify each asset type.
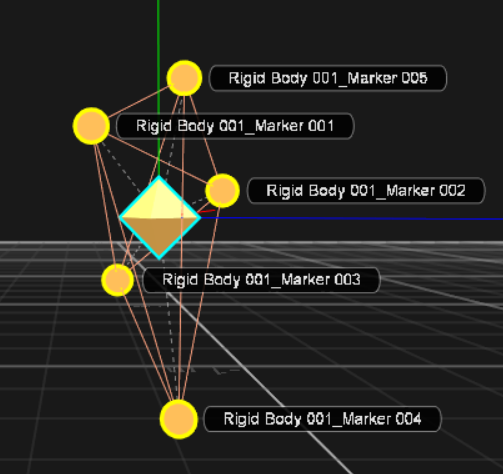
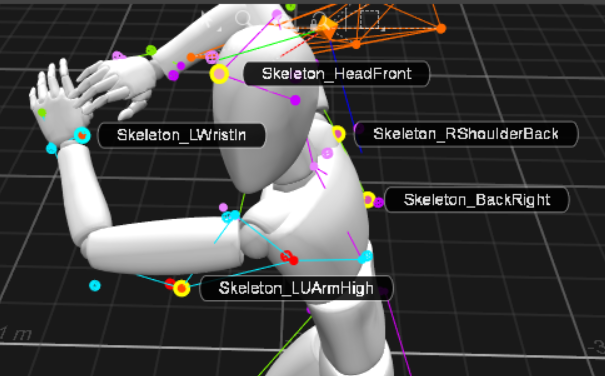
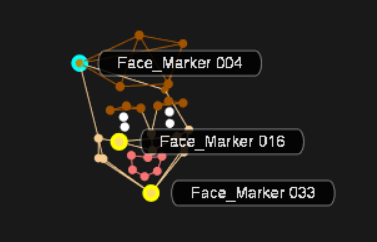
Assets can be created in Live mode (before capture) or in post-production (Edit mode, using a loaded TAKE).
If new assets are created during post-production, the take must be reconstructed and auto-labeled to apply the changes to the 3D data.
Video Quick Start Guide: Asset Creation
The following video demonstrates the asset creation workflow.
Assets Pane
Assets used in the current TAKE are displayed in and managed from the Assets pane. To open the Assets pane, click the ![]() icon.
icon.
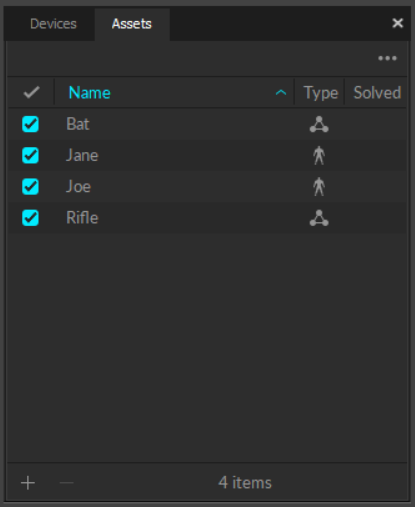
When an asset is selected, either from the Assets pane or from the 3D Perspective view, its related properties are displayed in the Properties pane.
Copying Assets
Follow these steps to copy an asset to other recorded TAKES or to the Live capture.
Copy Assets to a Recorded Take
Right-click the desired Take to open the context menu.
Select Copy Assets to Takes.
This will bring up a dialog window to select the assets to move.
Select the assets to copy and click Done.
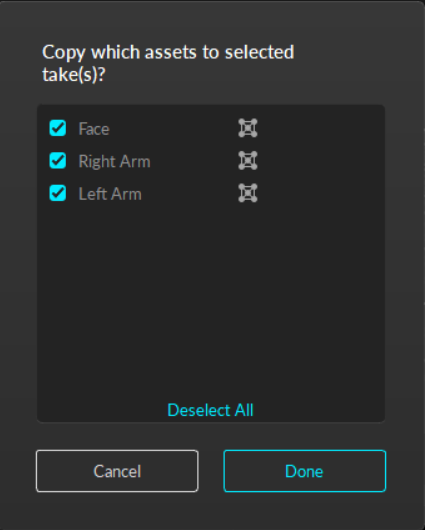
Copy Assets to Multiple Recorded Takes
Use shift-click or ctrl-click to select Takes from the Data pane until all the desired Takes are selected.
Right-click any of the selected Takes. This should copy the assets you selected to all the selected Takes in the Data pane to open the context menu.
Select Copy Assets to Takes.
This will bring up a dialog window to select the assets to move.
Select the assets to copy and click Done.
Copy Assets from a Recorded Take to the Live Capture
To copy multiple assets, use shift-click or ctrl-click to select all of them in the Assets pane.
Right-click (one of) the asset(s).
Select Copy Assets to Live.
The asset(s) will now appear in the Assets pane in Live mode. Motive will recognize the asset when it enters the volume, based on its unique marker placement.
Exporting Assets
Assets can be exported into the Motive user profile file (.MOTIVE), where they can then be imported into different takes without creating a new asset.
The user profile is a text-readable file that contains various configuration settings, including the asset definitions. With regard to assets, profiles specifically store the spatial relationship of each marker in the asset, ensuring that only the identical marker arrangement will be recognized and defined with the imported asset.
To Export Assets:
From the File menu, select Export Assets...
This will copy all the asset definitions in either Live-mode or in the current Take file into the user profile.
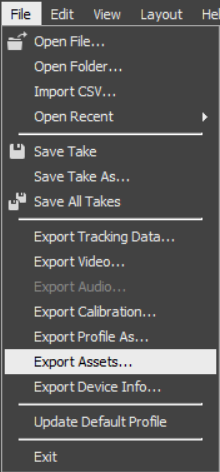
Export User Profile
The option to export the user profile allows Motive users to save custom profiles as part of their project folders.
To export a user profile:
From the File menu, select Export Profile As...
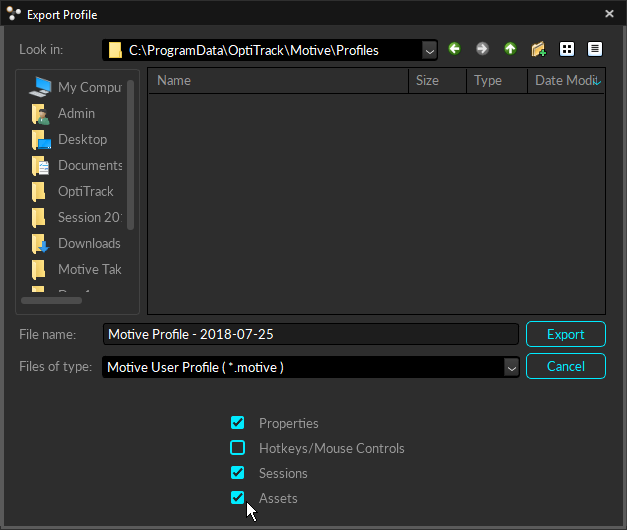
The Export Profile window will open.
Navigate to the folder where you want the exported profile stored, or use the Motive default folder.
Select the profile elements to export. Options are: Properties, Hotkeys/Mouse Controls, Sessions, and Assets.
Name the file, using the File Type: Motive User Profile (*.motive).
Click Export.
Was this helpful?

