LogoLogo
WebsiteSupportDownloadsForumsQuick LinksContact Us
v3.3
v3.3
  • OptiTrack Documentation
  • WHAT'S NEW
    • What's New in Motive 3.3
  • QUICK START GUIDES
    • Quick Start Guide: Getting Started
    • Quick Start Guide: Prime Color Camera Setup
    • Quick Start Guide: Precision Capture
    • Quick Start Guide: Tutorial Videos
    • Quick Start Guide: Active Marker Tracking
    • Quick Start Guide: Outdoor Tracking Setup
  • HARDWARE
    • Cameras
      • Ethernet Cameras
        • PrimeX 120
        • PrimeX 41
        • PrimeX 22
        • PrimeX 13
        • PrimeX 13W
        • SlimX 13
        • Prime Color
        • VersaX 22
        • VersaX 41
        • VersaX 120
      • USB Cameras
        • Slim 3U
        • Flex 13
        • Flex 3
        • Duo 3
        • Trio 3
        • Adjusting Global Origin for Tracking Bars
    • Prepare Setup Area
    • Camera Mount Structures
    • Camera Placement
    • Ethernet Camera Network Setup
      • General Overview and Specs
      • Windows 10 Network Settings
      • Cabling and Load Balancing
      • Switch Configuration for PrimeX 120
      • NETGEAR ProSafe GSM7228S: Disabling the Broadcast Storm Control
      • White/Blacklisting Cameras
    • USB Camera System Setup
      • USB Camera Network Overview and Specs
      • Duo 3 and Trio 3 Setup
      • Tracking Bar Coordinate System
        • Transforming Coordinate System: Global to Local
    • Aiming and Focusing
    • Camera Status Indicators
  • MOTIVE
    • Installation and License Activation
    • Motive Basics
    • Calibration
      • .mcal XML Calibration Files
      • Continuous Calibration
      • Continuous Calibration (Info Pane)
      • Calibration Squares
    • Markers
    • Assets
      • Gizmo Tool: Translate, Rotate, and Scale
    • Rigid Body Tracking
      • Aligning Rigid Body Pivot Point with a Replicated 3D Model
    • Skeleton Tracking
    • Trained Markersets
    • IMU Sensor Fusion
    • Data Recording
      • Data Types
    • Labeling
    • Data Editing
    • Data Export
      • Data Export: BVH
      • Data Export: C3D
      • Data Export: CSV
      • Data Export: FBX
      • Data Export: TRC
    • Data Streaming
    • Camera Video Types
    • Audio Recording
    • Motive HotKeys
    • Measurement Probe Kit Guide
    • Motive Batch Processor
    • Reconstruction and 2D Mode
  • MOTIVE UI PANES
    • Settings
      • Settings: General
      • Settings: Assets
      • Settings: Live Pipeline
      • Settings: Streaming
      • Settings: Views
      • Settings: Mouse and Keyboard
      • Settings: Audio
    • Assets Pane
    • Builder Pane
    • Constraints Pane
      • Constraints XML Files
    • Calibration Pane
    • Data Pane
    • Devices Pane
    • Edit Tools Pane
    • Graph View Pane
    • Info Pane
    • Labels Pane
    • Log Pane
    • Probe Pane
    • Properties Pane
      • Properties Pane: Camera
      • Properties Pane: Force Plates
      • Properties Pane: NI-DAQ
      • Properties Pane: OptiHub2
      • Properties Pane: Rigid Body
      • Properties Pane: Skeleton
      • Properties Pane: Take
      • Properties Pane: Trained Markerset
      • Properties Pane: eSync2
    • Status Panel
    • Toolbar/Command Bar
    • Control Deck
    • Viewport
  • PLUGINS
    • OptiTrack Blender Plugin
      • OptiTrack Blender Plugin
    • OptiTrack Unreal Engine Plugin
      • Unreal Engine: OptiTrack Live Link Plugin
        • Quick Start Guide: Real-Time Retargeting in Unreal Engine with Live Link Content
        • Unreal Editor for Fortnite (UEFN): OptiTrack Plugin for Live Link Hub
        • Unreal Engine: Live Link Camera Stream Setup
        • Live Link Content: Active Puck Static Meshes
      • Unreal Engine: MotionBuilder Workflow
      • Unreal Engine: HMD Setup
      • Unreal Engine VCS Inputs
    • OptiTrack Unity Plugin
      • Unity: HMD Setup
    • OptiTrack OpenVR Driver
    • OptiTrack MATLAB Plugin
    • Autodesk Maya
      • Autodesk Maya: OptiTrack Insight VCS Plugin
    • Autodesk MotionBuilder
      • Autodesk MotionBuilder Plugin
      • Autodesk MotionBuilder: OptiTrack Skeleton Plugin
      • Autodesk MotionBuilder: OptiTrack Optical Plugin
      • Autodesk MotionBuilder: OptiTrack Insight VCS Plugin
      • Autodesk MotionBuilder: Timecode Data
    • OptiTrack Peripheral API
    • External Plugins
      • Houdini 19 Integration
  • ACTIVE COMPONENTS
    • Active Components Hardware
      • Active Puck
      • Wired AnchorPuck
      • CinePuck
      • Wired CinePuck
      • BaseStation
      • Information for Assembling the Active Tags
      • Manus Glove Setup
    • Configuration
      • Active Batch Programmer
      • Active Hardware Configuration: PuTTY
      • Active Component Firmware Compatibility
    • Active Marker Tracking
      • Active Finger Marker Set
  • SYNCHRONIZATION
    • Synchronization Hardware
      • External Device Sync Guide: eSync 2
      • External Device Sync Guide: OptiHub2
    • Synchronization Setup
    • OptiTrack Timecode
  • VIRTUAL PRODUCTION
    • Unreal Engine: OptiTrack InCamera VFX
    • Entertainment Marker Sets
    • PrimeX 41
  • MOVEMENT SCIENCES
    • Movement Sciences Hardware
      • General Motive Force Plate Setup
      • AMTI Force Plate Setup
      • Bertec Force Plate Setup
      • Kistler Force Plate Setup
      • Delsys EMG Setup
      • NI-DAQ Setup
      • Multiple Device Setup
    • Movement Sciences Marker Sets
      • Biomechanics Marker Sets
      • Biomech (57)
      • Rizzoli Marker Sets
    • For Visual3D Users
    • Prime Color Camera Setup
      • Prime Color Setup: Required Components
      • Prime Color Setup: Hardware Setup
      • Prime Color Camera Setup: Camera Settings
      • Prime Color Camera Setup: Prime Color FS Calibration
      • Prime Color Setup: Data Recording / Export
      • Prime Color Camera Setup: FAQ / Troubleshooting
      • Prime Color Camera Setup: Windows Network Settings
  • VIRTUAL REALITY
    • VR Plugins
      • VR Unreal Engine
        • OptiTrack Unreal Engine Plugin
        • Unreal Engine: OptiTrack Live Link Plugin
          • UE5.1 Live Link Retarget External Workaround
        • Unreal Engine VCS Inputs
      • VR Unity
        • OptiTrack Unity Plugin
      • VR OpenVR
        • OptiTrack OpenVR Driver
    • VR HMD Setup
      • Unreal Engine: HMD Setup
      • Unity: HMD Setup
      • Manually Calibrating the HMD Pivot Point
      • Sync Configuration with an HTC Vive System
    • SlimX 13
    • Active Marker Tracking
      • Active Finger Marker Set
    • Synchronization Hardware
      • External Device Sync Guide: eSync 2
      • External Device Sync Guide: OptiHub2
  • ANIMATION
    • Autodesk Maya
      • Autodesk Maya: OptiTrack Insight VCS Plugin
    • Autodesk MotionBuilder
      • Autodesk MotionBuilder Plugin
      • Autodesk MotionBuilder: OptiTrack Skeleton Plugin
      • Autodesk MotionBuilder: OptiTrack Optical Plugin
      • Autodesk MotionBuilder: OptiTrack Insight VCS Plugin
      • Autodesk MotionBuilder: Timecode Data
  • ROBOTICS
    • MoCap4ROS2 Setup
    • OptiTrack Robot Applications
    • Outdoor Tracking Setup
  • DEVELOPER TOOLS
    • Developer Tools Overview
    • Camera SDK
      • Class: cCameraModule
      • Class: cUID
    • Motive API
      • Motive API: Quick Start Guide
      • Motive API Overview
      • Motive API: Function Reference
      • Motive API Camera Calibration
    • NatNet SDK
      • NatNet 4.1
      • NatNet: Class/Function Reference
      • NatNet: Creating a Managed (C sharp) Client Application
      • NatNet: Creating a Native (C++) Client Application
      • NatNet: Data Types
      • NatNet: Matlab Wrapper
      • NatNet: Migration to NatNet 3.0 libraries
      • NatNet: Remote Requests/Commands
      • NatNet: Sample Projects
      • NatNet: Unicast Data Subscription Commands
      • Latency Measurements
    • VRPN Sample
    • Peripheral API: Glove Devices
  • SKELETON MARKER SETS
    • Full Body
      • Baseline (41)
      • Core (50)
      • Biomech (57)
      • Conventional (39)
    • Full Body + Fingers
      • Baseline + Passive Fingers (49)
      • Baseline + Active Fingers (57)
      • Core + Passive Fingers (54)
      • Core + Active Fingers (62)
    • Upper
      • Baseline Upper (25)
      • Conventional Upper (27)
    • Lower
      • Baseline Lower (20)
      • Helen Hayes Lower (19)
      • Conventional Lower (16)
    • Hand and Fingers
      • Left/Right Hand (4) Active
      • Left/Right Hand (10) Active + Passive
      • Active Finger Marker Set
    • Glove Device Setup
      • Manus Glove Setup
      • StretchSense Glove Setup
    • Rizzoli Marker Sets
    • Entertainment Marker Sets
    • Rigid Body Skeleton Marker Set
  • GENERAL TROUBLESHOOTING
    • Licensing Troubleshooting
    • Windows 11 Optimization for Realtime Applications
    • Network Troubleshooting
    • Troubleshooting Q&A
    • Running Motive on High DPI Displays
    • Firewall Settings
Powered by GitBook
On this page
  • Overview
  • VRPN Sample Contents
  • Streaming Settings
  • Run the Simple VRPN Test
  • Run Again
  • Output Files
  • Troubleshooting
  • Connection Issues
  • No Response

Was this helpful?

Export as PDF
  1. DEVELOPER TOOLS

VRPN Sample

Use the VRPN Sample to verify that OptiTrack data is streaming through the VRPN protocol.

PreviousLatency MeasurementsNextPeripheral API: Glove Devices

Was this helpful?

Overview

Mocap data can be livestreamed through the Virtual Reality Peripheral Network (VRPN). To confirm that live OptiTrack data is streaming through this protocol, download and run the VRPN Sample available on our .

VRPN Sample Contents

Once downloaded, the VRPN Sample provides the following content:

  • SimpleVRPNTest folder, which includes all the files needed to run the VRPN test.

  • thirdparty folder, which includes files needed to stream VRPN to third-party applications, such as Python or Java.

  • License file for VRPN.

Streaming Settings

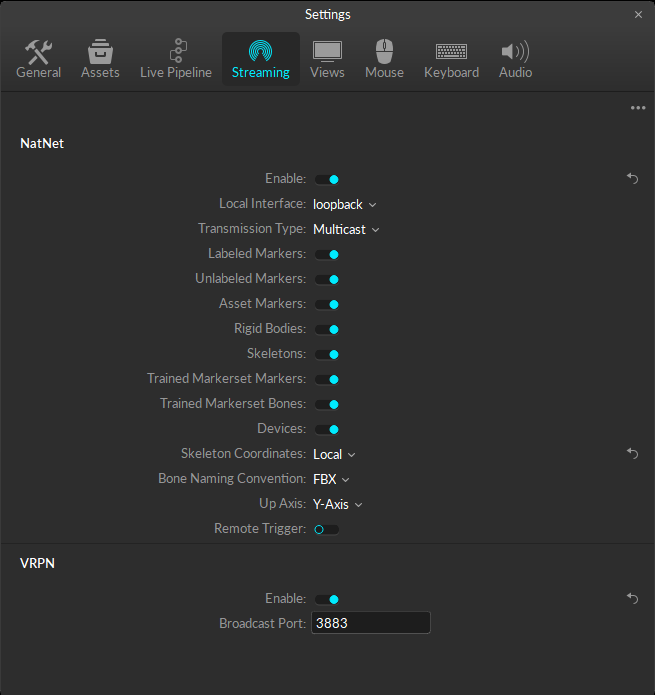
Click the Streaming Settings button in the lower left corner of the Control Deck to open the of the panel.

The Streaming Settings button is gray when streaming is disabled and white when streaming is enabled.

NatNet Settings

Enable NatNet streaming to access the Local Interface setting. If streaming mocap data to the same computer as Motive, select Loopback. Otherwise, select the IP address for the network that the data should stream to.

VRPN Settings

Enable VRPN and ensure the correct Broadcast Port is selected.

Run the Simple VRPN Test

  • Open the SimpleVRPNTest folder and browse to x64 > release.

  • Run SimpleVRPNTest.exe. The script will request the required input. Press Enter at any prompt to select the default value, noted in parentheses.

    • Motive IP: enter the IP address for the Motive computer. This is the same address used in the NatNet settings in Motive.

    • Local IP: enter the IP address of the computer that the data is streaming to. Use localhost if the data is streaming to the same computer.

    • Port Number: enter the VRPN port number used in the VRPN settings.

    • Object Name: enter the name of an asset in the mocap volume to track for the test. Make sure to precisely match the case and spacing in Motive when entering the name, or the VRPN test will fail.

Run Again

Once a connection has been successfully made between the local PC and the Motive server, the sample allows three (3) options for running the test again.

Repeat with the Same Values (r)

Prompt to Change Values (P)
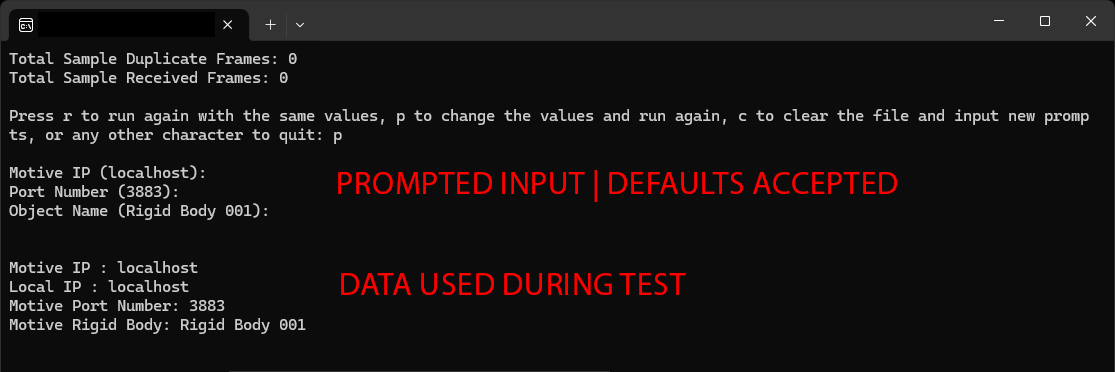
The P key allows you to input new data for the Motive IP, Port Number, and Object Name, but does not allow you to change the local IP. This maintains the connection once established rather than dropping and re-connected each time new data is selected to stream.

Clear for New Input (C)

Output Files
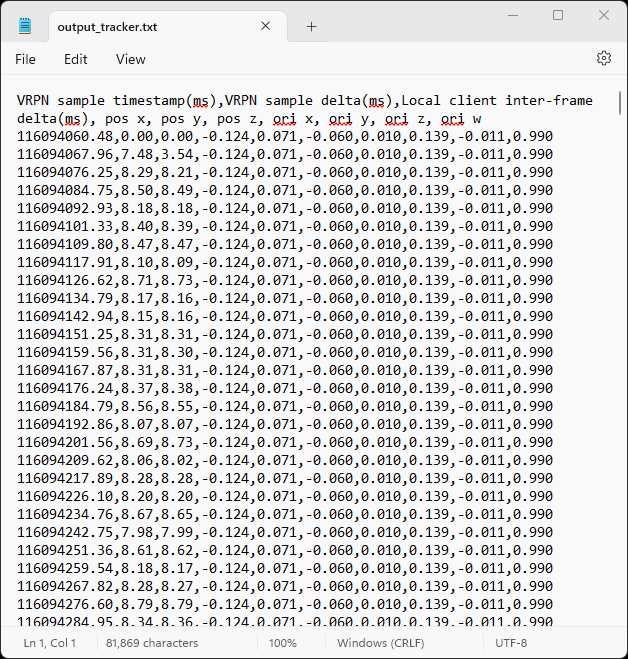
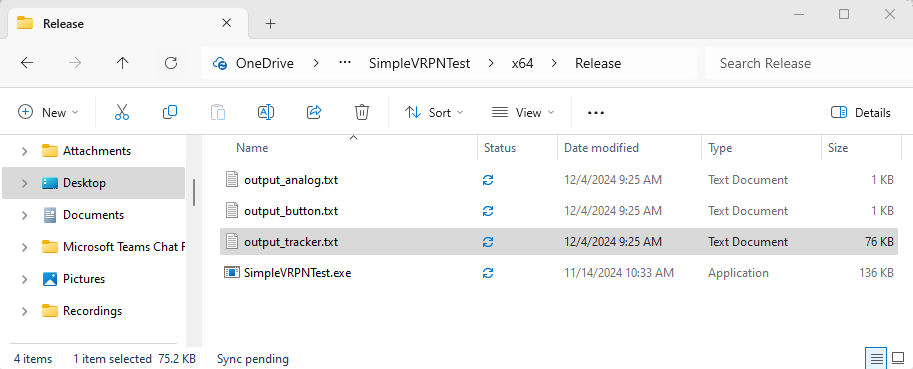
The Simple VRPN Test creates three output files in the same folder where the sample is located, overwriting any existing files with the same name:

  • output_analog.txt includes the analog data of the selected asset, if applicable.

  • output_button.txt includes the button data of the selected asset, if applicable.

  • output_tracker.txt includes the tracking data of the selected asset.

Analog and Button data are only available when the test tracks a VRPN asset that contains this type of data. For example, a Navigation Controller includes both analog and button data, whereas a puck, skeleton, or trained markerset will have neither.

Troubleshooting

The VRPN test will fail if it is unable to establish a connection between the host pc and the Motive server, or if any of the input data does not match the data in Motive.

The images below show the various errors that can occur.

Connection Issues

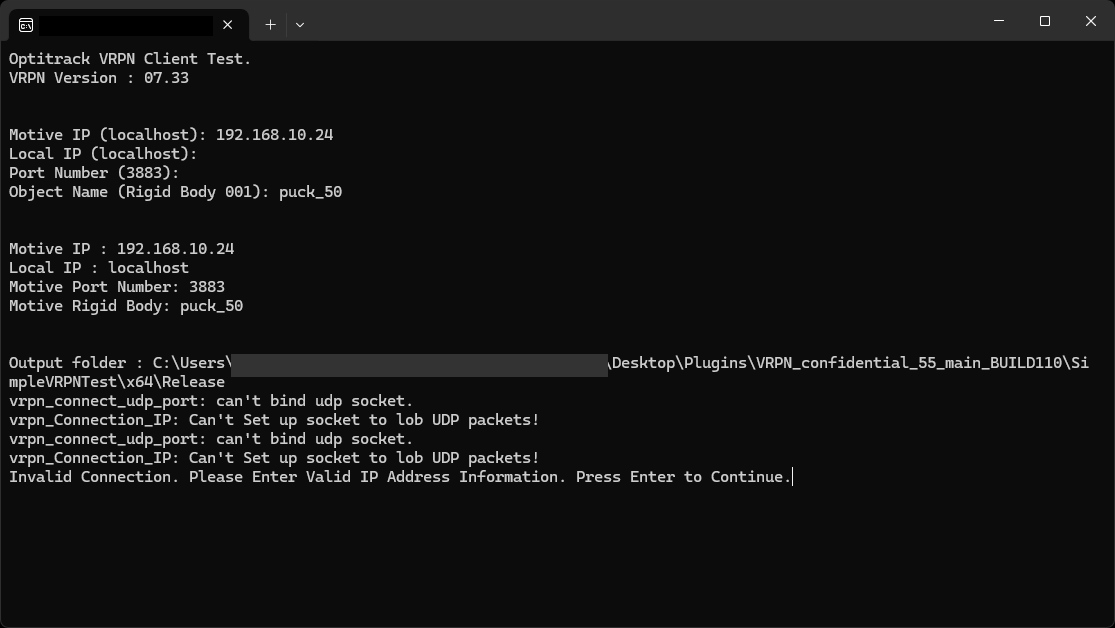
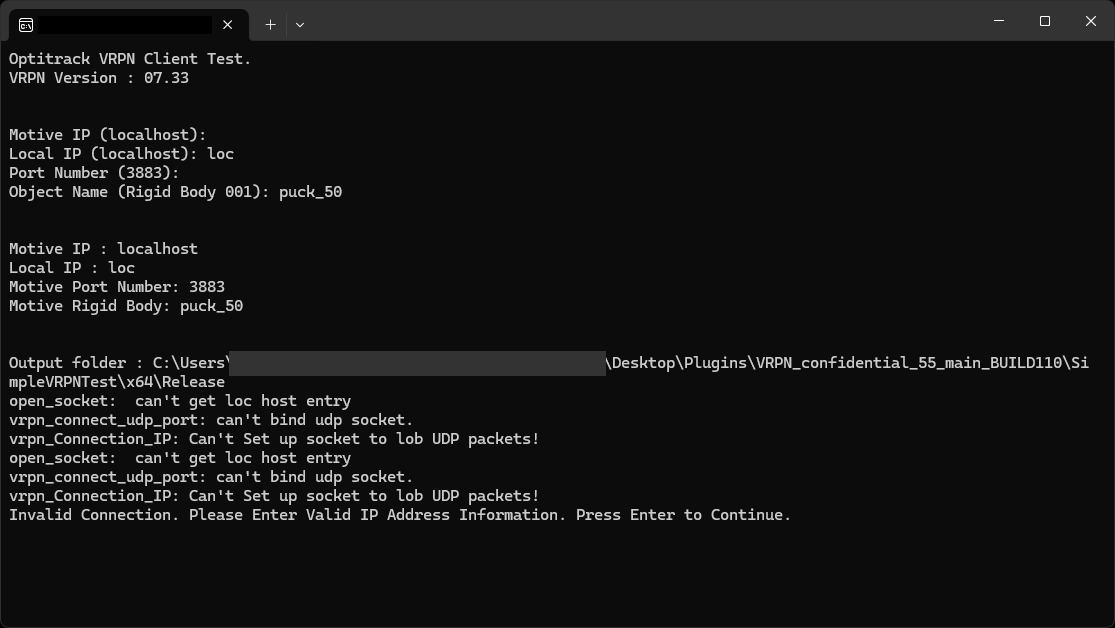
Connection issues arise when either the Motive IP or the Local IP information is entered incorrectly or when there is a problem with the network.

  • Ensure that the Motive IP address entered matches the Local Interface address in Motive's NatNet settings.

  • If the Local Interface address in Motive is set to loopback, use the default localhost option for both the Motive IP and the Local IP.

  • If all entered values are correct, contact your IT department to ensure you have sufficient privileges to stream data on the selected network.

Wrong Motive IP Entered

Wrong Local IP Entered
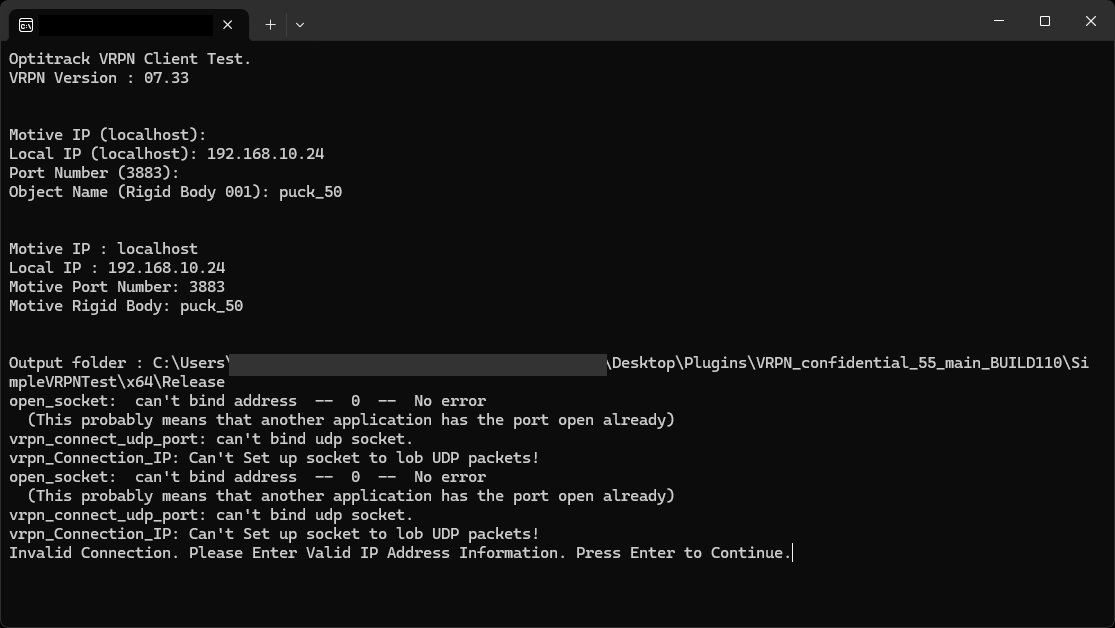
Example 1 shows the error when an IP address is used:

Example 2 shows the error when an incorrect server name is entered rather than an IP address:

No Response

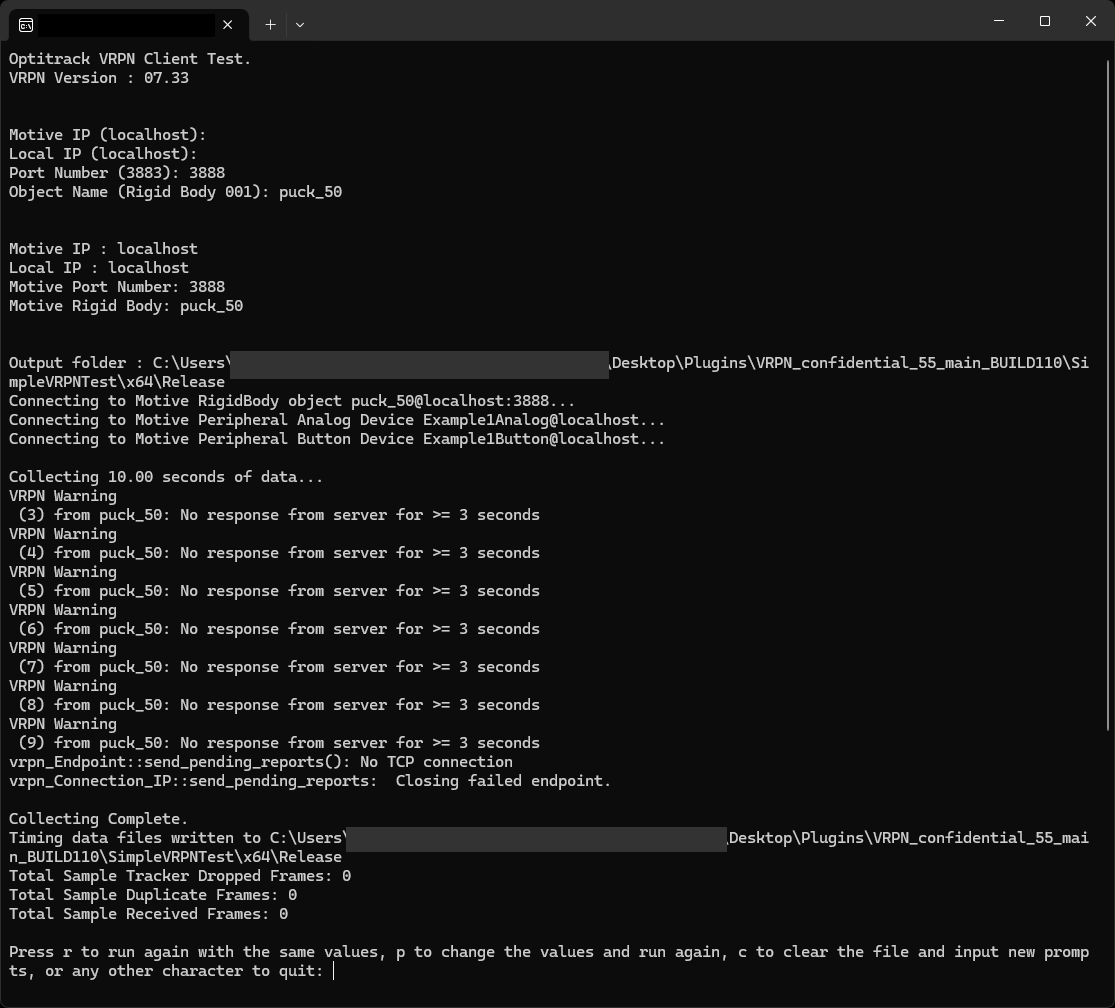
Once a connection is made, the VRPN test will attempt to connect to the Rigid Body in Motive using the port number entered. If the test is unsuccessful, the test will return VRPN warning messages stating there was no response from server.

Incorrect Port Number

  • Ensure that the Port Number entered matches the VRPN Port Number in Motive and correct as necessary.

  • Verify with your IT department that the selected port number is open and allows streaming data.

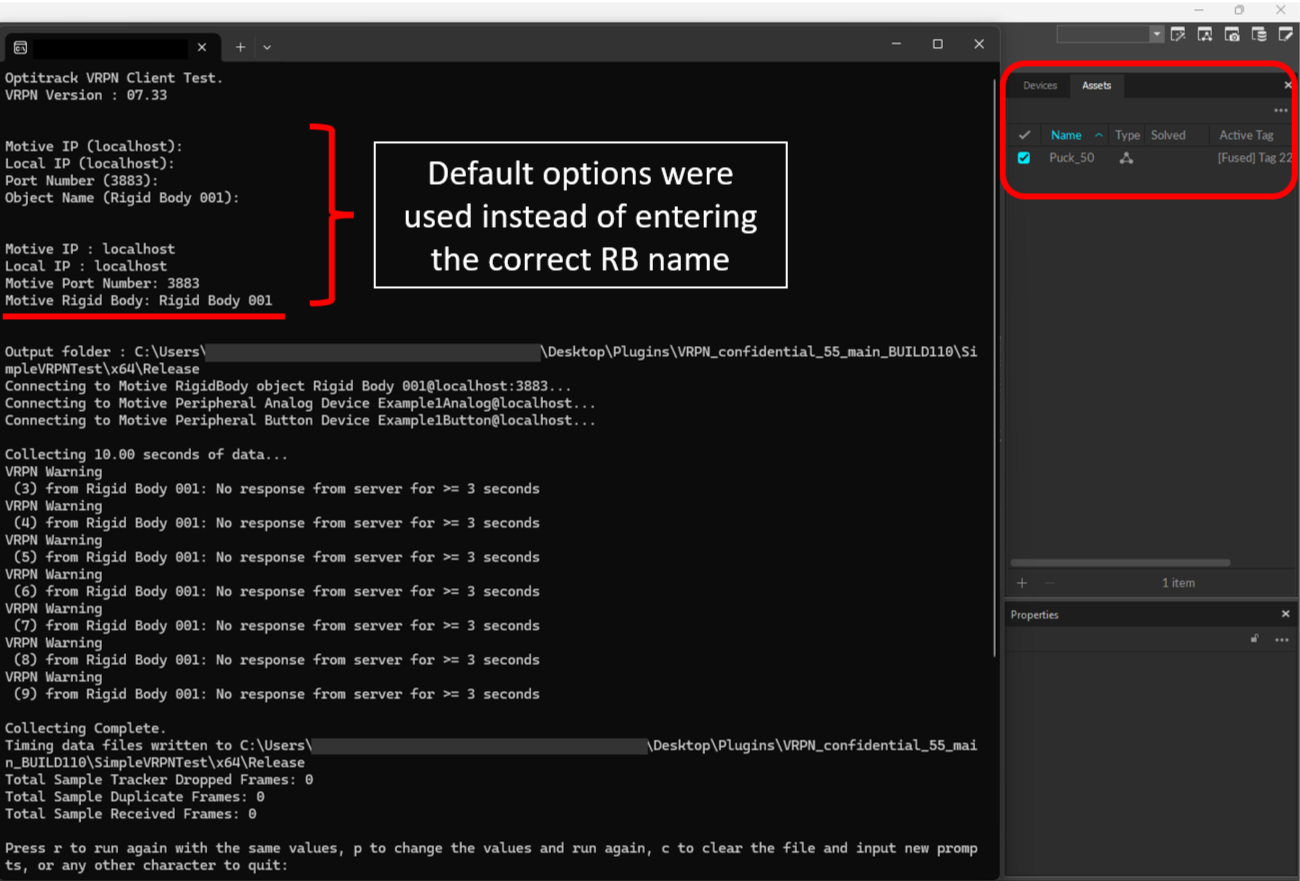
Rigid Body Not Found

If the asset selected is not found in the live capture volume (or if the name is misspelled), the VRPN Test will return errors during data collection.

  • Ensure that the Object Name entered in the test is an enabled Rigid Body currently being streamed from Motive.

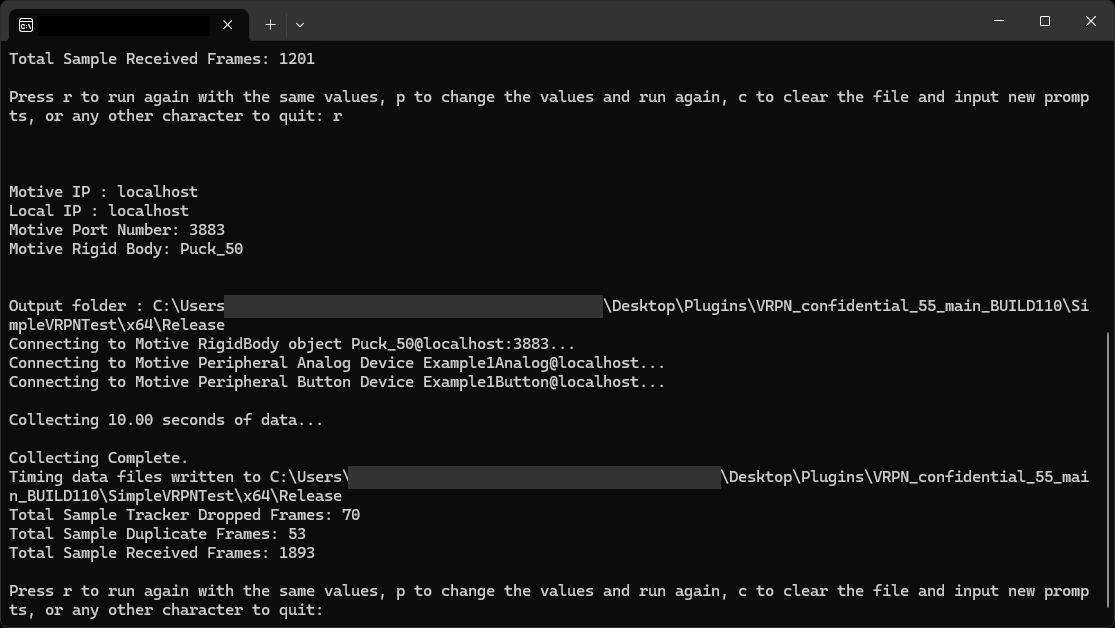
Once the requested parameters are entered, the script creates 3 and reports on the status of the test. A successful test will note the number of Tracker Dropped Frames, Duplicate Frames, and Received Frames collected.

The Run Again options are not available if the local PC does not successfully connect to the Motive server. See the section below for more information.

Use the R key to re-run the test using the same values. Data will append to the existing .

Data is appended to the existing when this option is selected.

The C key clears all of the entered data, including the Local IP address with an existing connection. This option overwrites the existing in the default directory.

Once the issue is identified, use the commands to re-run the test with the appropriate inputs.

output files
troubleshooting
output files
output files
output files
Run Again
downloads page
Streaming tab
Application Settings
Streaming Settings for VRPN
A successful VRPN test.
Output results from the VRPN Test are saved in the Release folder.
output_tracker.txt data
Connection failed - wrong Motive IP address entered.
Connection failed - wrong Local IP entered.
Connection failed - incomplete Local IP name entered.
Test failed - incorrect Port Number entered.
VRPN Test - Selected asset is not found.