OptiTrack Blender Plugin

Learn to setup and use the OptiTrack Blender plugin.

Overview

The OptiTrack Blender Plugin enables streaming of real-time Rigid Body data from Motive to Blender.

Version Requirements

  • Blender Version: 4.1 or above (recommended)

  • Motive Version: 3.1.0 or higher

Blender Setup (Client)

To install the plugin:

  • Download the Blender Plugin from the OptiTrack downloads site.

  • DO NOT unzip the downloaded file.

Import Plugin Package into Blender

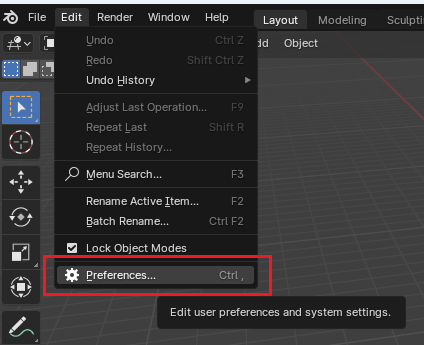
  • In Blender, select Preferences from the Edit menu.

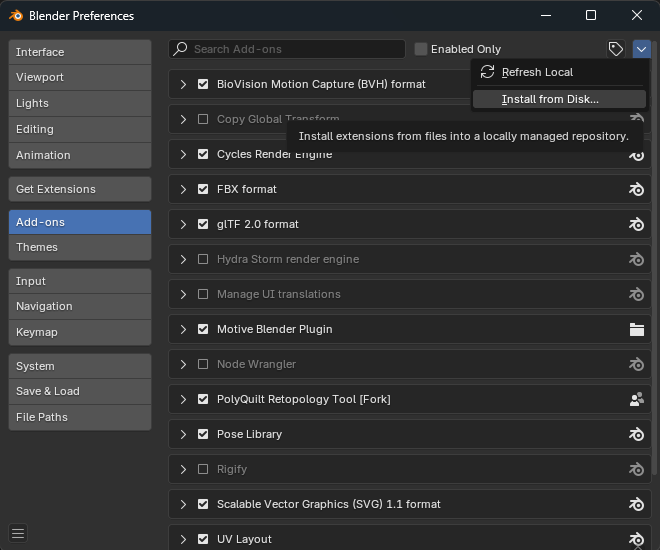
  • Select Add-ons from the menu on the left.

  • Use the dropdown arrow in the upper right corner to select Install from Disk...

  • Browse to the downloaded zip file and Install from Disk.

Enable the Plugin

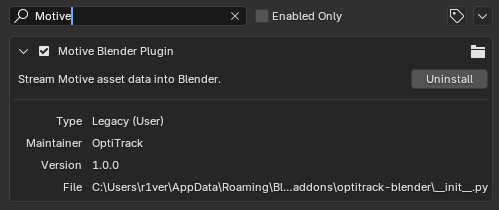
  • Click in the Search bar at the top of the Preferences pane and search for Motive.

  • Search will return the Motive Blender Plugin. Check the checkbox to enable it.

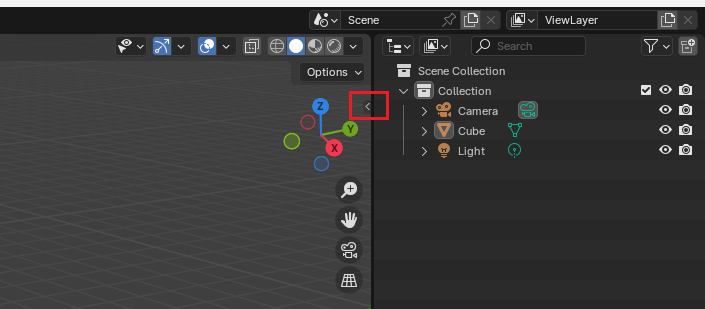
  • Once the plugin is successfully enabled, it appears as a tab in the Sidebar.

If the Sidebar is not visible, click the small arrow (highlighted, below) in the upper right corner of the 3D Viewport, or use the hotkey "N" to toggle it open or closed.

Motive Data Streaming Setup (Server)
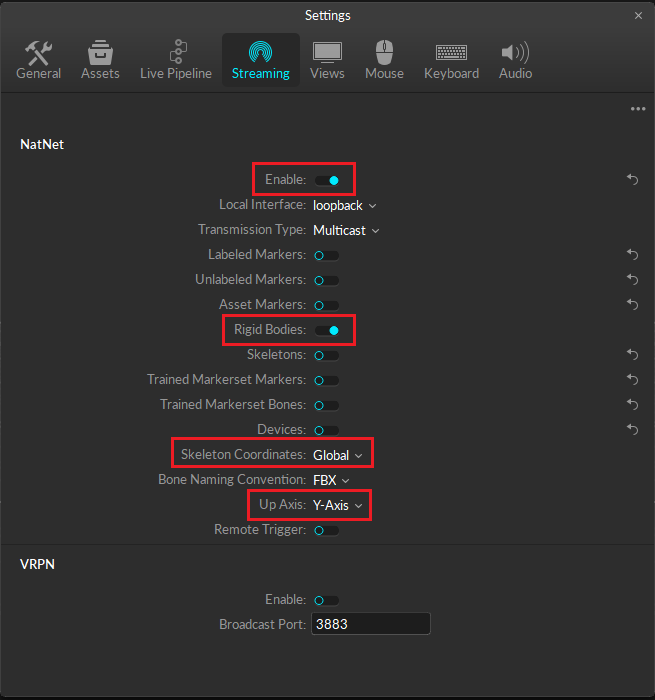
Start by configuring the data streaming settings in Motive. Once configured and enabled, Motive broadcasts tracking data to the designated network interface where client applications can receive it.

The OptiTrack Blender Plugin is designed to configure the necessary streaming settings automatically. This section covers the Motive settings needed for the Plugin to work effectively.

  • Enable - Toggle this setting on to enable streaming in Motive.

  • Local Interface - This is the Local Host IP address. Motive is the Server and Blender is the client.

    • When running Motive and Blender on the same machine, select loopback. This sets the IP address for both Server and Client to 127.0.0.1.

    • When streaming to a different PC, select the IP address that connects the Motive (server) computer to the network where the Blender (client) computer is located.

  • Transmission type - Set to Multicast. The Blender Plugin is currently unable to use Unicast.

  • Rigid Bodies- Enable Rigid Bodies.

  • Skeleton coordinates - Set to Global.

  • Bone Naming Convention - Set to FBX.

  • Up Axis - Set to Y-Axis. The plugin automatically converts the Up-Axis to the Z-axis.

  • Remote Trigger - Keep this setting disabled.

Once these settings are configured correctly, prepare your live Motive session or a Take to get ready to stream data into Blender.

Blender 1.0.0 only supports Rigid Body data.

Blender Plugin Connection Setup

The Blender Plugin panel includes a Properties section for assigning assets.

Apply Motive Streaming Data to Objects

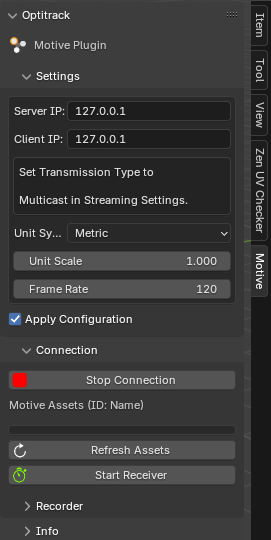
Assign the Server IP and Client IP

  • Server IP: enter the IP address for the Motive PC.

  • Client IP: enter the IP address for the Blender PC.

  • Enter 127.0.0.1 in both fields when Motive and Blender are running on the same computer.

Set Transmission Type

The Motive Blender plugin works in Multicast only. Make sure that Multicast is set in both Blender and Motive, as noted above.

Update Blender Configuration (optional)
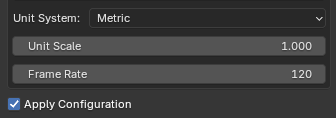
As needed, Blender settings can be changed in the plugin panel for the following settings:

  • Unit System

  • Unit Scale

  • Frame Rate

Once changes are made, click the Apply Configuration checkbox to override Blender's settings with those selected. Deselect the checkbox to revert settings back to Blender's default.

Start Connection

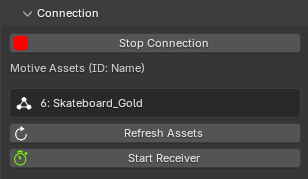
Select Start Connection to obtain the data stream from Motive.

When connected, the Connection settings will display the assets streaming from Motive. Assets will be labeled by Streaming ID: Asset Name.

  • Use the Refresh Assets button to update the asset data after switching Takes in Motive.

  • Click Stop Connection to stop streaming data entirely.

Assign Assets - Rigid Bodies

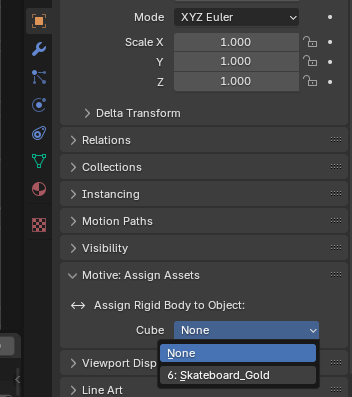
  • Open the Object Properties for the 3D Mesh you wish to link to the Rigid Body.

  • In the Motive: Assign Assets section, select the Rigid Body that you want to track with the mesh from the Cube dropdown list.

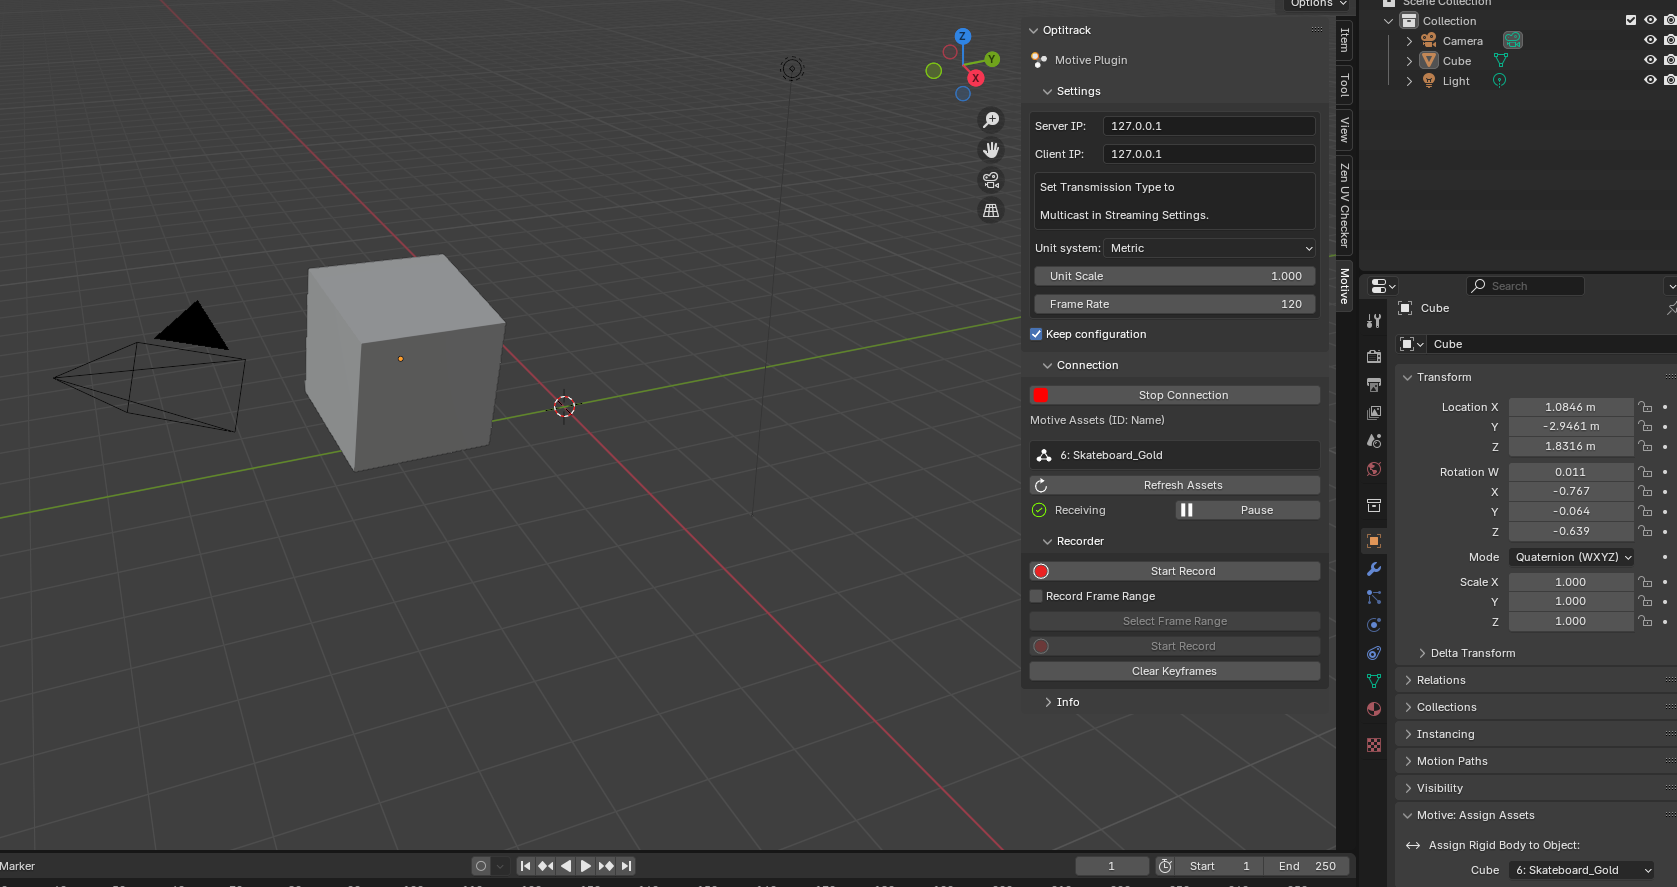
  • In the Motive plugin panel, select Start Receiver. The 3D Mesh will start ingesting the Rigid Body data directly from Motive.

  • Use the Pause button to stop the data from streaming into the object, and the data will stop being written to the 3D mesh.

Using the Recorder

The Recorder function of the plugin allows you to plot keyframes on the tracked object in Blender's timeline. Keyframes will plot on the Location and Rotation Transform values of the object's properties.

Rotation values are plotted in Quaternion angles. Data can still be modified in post-processing in Blender using the rotation gizmo, which uses Euler angles.

Recording

  • Keyframes will begin moving forward and plotting on the timeline.

Record a Frame Range

Use the Record a Frame Range function when data needs to be recorded within a set time limit.

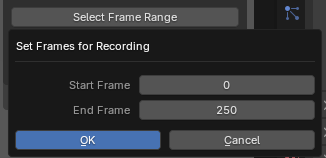
  • Click Select Frame Range, input the desired start and end frames to record within, and click OK.

  • Whenever this option is toggled on, Blender will record the data only within the selected Frame Range when recording is in progress.

  • Uncheck the box to toggle the Record Frame Range function off.

Record Multiple Actions

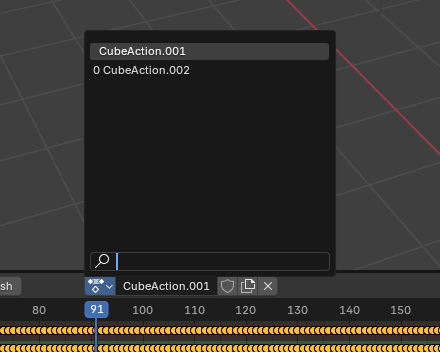
The Create New Action function allows you to record multiple actions in one Blender session. This function swaps the current action and keyframes in the timeline with a new action containing no keyframes. To start recording in the new timeline, click Start Record.

Managing Actions with Dope Sheet

The Dope Sheet Action Editor shows all of the Actions in the file.

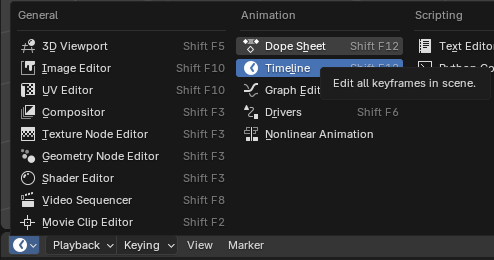
  • Select the dropdown clock icon in the upper left of the Timeline window.

  • Select Dope Sheet from the popup menu.

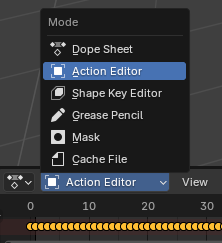
  • In the Mode dropdown, select Action Editor.

  • The preferred method for making new actions is to use the “Create New Action” button in the plugin’s panel rather than creating them through the Action Editor.

  • When moving to the next action, select Key > Delete Key Frames to remove all the key frames from the previous recorded action (see image, below).

Access Help

The Info section of the plugin includes linked buttons to access the OptiTrack website and the Blender documentation in our online user guide (coming in release 1.1).

Last updated