Unity: HMD Setup
This page provides instructions on setting up the OptiTrack OpenVR driver for integrating OptiTrack system with Vive HMDs within SteamVR applications; including Unreal Engine and Unity.
Overview
For integrating Vive / Vive Pro / Valve Index HMDs, the OptiTrack OpenVR Driver must be used. This driver lets you track the head-mounted display (HMD) and the VR controllers using OptiTrack motion capture system and stream the tracking data from Motive directly into SteamVR. In other words, this will basically override the tracking from the lighthouse stations. The plugin ships as an installer package (MSI) which will set up the driver along with a utility tool for configuring client streaming settings. Once integrated, the streamed tracking data can be used in any application platform that utilizes SteamVR. For tracking of objects other than the HMDs, please read through the OptiTrack Unity Plugin page for details.
Supported Systems
VIVE
VIVE Pro 1 and 2
Valve Index
HP Reverb G2
HMD Setup
First of all, setup and optimize the motion capture volume as explained in the Getting Started guide or the Hardware Setup documentation. If you plan to install any obstacles (e.g. walls) within the capture volume, make sure they are non-reflective, and place and orient the cameras so that every corner is thoroughly captured by multiple cameras.
General Setup Steps
Attach the markers on the HMD
Create a Rigid Body asset
Calibrate the Pivot Point of the Rigid Body
Configure the Rigid Body settings in Motive
Place Markers on the HMD
For the camera system to track the HMD, a set of markers must be attached to the HMD. You can either use the active markers (Active HMD clip or Active Tags) or the passive markers. Passive markers are retroreflective markers that reflect infrared light emitted from the IR LEDs on the camera. On the other hand, the active markers are LED markers that emit the IR light and has the intelligence to be uniquely identified.
In general, for most VR applications, using active markers is recommended for better tracking stability and ease of use. Active markers also have advantages over passive markers when tracking a large number of objects. For applications that are sensitive to the accuracy of the tracking data, using passive marker may have more benefits. To get more help with finding the best solution for your tracking application, please contact us.
When using the active markers, you can conveniently put a set of 8 markers onto the HMD by using the HMD Clip, or you can attach the markers from the Tag manually onto the HMD using adhesives and marker posts.
Active HMD Clip
Active HMD Clip is an HMD enclosure with a total of 8 active markers embedded for tracking. At the time of writing, there are active HMD clips for Vive Pro / Valve Index HMDs available on the webstore. The clips can be mounted easily by pushing it onto the HMD until the latches click, and you can detach it by gently lifting the three latches located at the top, left, and right side of the clip.
Once the clip has been mounted, next step is to import the provided Rigid Body asset into Motive and refine the definition to get the calibrated pivot point position and orientation, which will be explained on the next section.
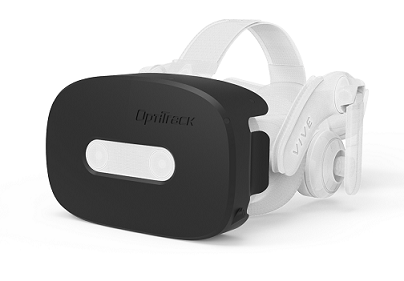
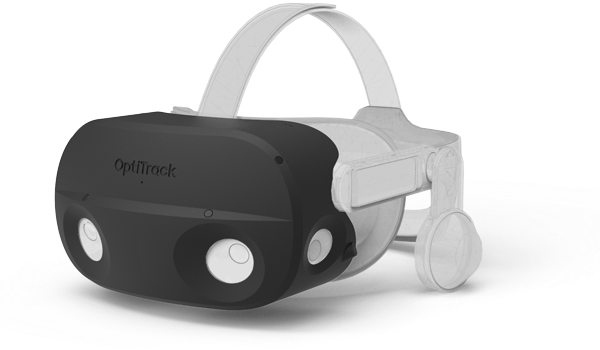
Marker Types
You can either use the passive retro-reflective type markers or the active LED markers to track the HMD. Passive markers are retroreflective markers that reflect infrared light emitted from the IR LEDs on the camera. On the other hand, the active markers are LED markers that emit the IR light which gets uniquely identified in Motive. Either type of marker can be used to track HMDs. Using active marker is recommended especially for applications that involve tracking of multiple HMDs in the scene.
Marker Placement
Make sure the markers are attached securely and do not move. If the markers happen to move even slightly after a Rigid Body is defined, it will negatively affect the tracking and the Rigid Body definition may need to be updated.
Avoid placing multiple markers in close vicinity as they may overlap in the camera view in certain orientations.
Using marker posts to extend out the markers is recommended to improve marker visibility from more angles.
If you are using the active markers, there is an extra USB port on the HMD that you could draw the power from.
Please read through the Rigid Body Tracking page for additional information on the marker placement on a Rigid Body.
Create HMD Rigid Body in Motive
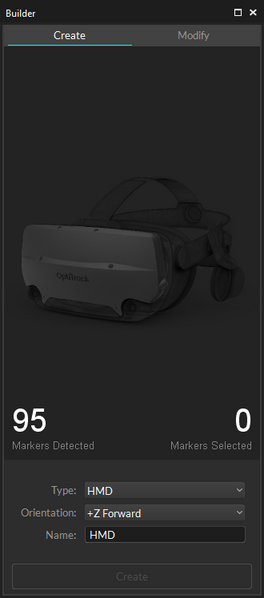
This feature can be used only with HMDs that have the OptiTrack Active HMD clips mounted.
For using OptiTrack system for VR applications, it is important that the pivot point of HMD Rigid Body gets placed at the appropriate location, which is at the root of the nose in between the eyes. When using the HMD clips, you can utilize the HMD creation tools in the Builder pane to have Motive estimate this spot and place the pivot point accordingly. It utilizes known marker configurations on the clip to precisely positions the pivot point and sets the desired orientation.
HMDs with passive markers can utilize the External Pivot Alignment tool to calibrate the pivot point.
Steps
First of all, make sure Motive is configured for tracking active markers.
Open the Builder pane under View tab and click Rigid Bodies.
Under the Type drop-down menu, select HMD. This will bring up the options for defining an HMD Rigid Body.
If the selected marker matches one of the Active clips, it will indicate which type of Active Clip is being used.
Under the Orientation drop-down menu, select the desired orientation of the HMD. The orientation used for streaming to Unity is +Z forward and Unreal Engine is +X forward, or you can also specify the expected orientation axis on the client plugin side.
Hold the HMD at the center of the tracking volume where all of the active markers are tracked well.
Select the 8 active markers in the 3D viewport.
Click Create. An HMD Rigid Body will be created from the selected markers and it will initiate the calibration process.
During calibration, slowly rotate the HMD to collect data samples in different orientations.
Once all necessary samples are collected, the calibrated HMD Rigid Body will be created.
Setting up the OpenVR driver
SteamVR Required: The VR driver streams tracking data through SteamVR. Please make sure SteamVR is installed on the computer before setting up the driver.
Setup Steps
Download and run the installer
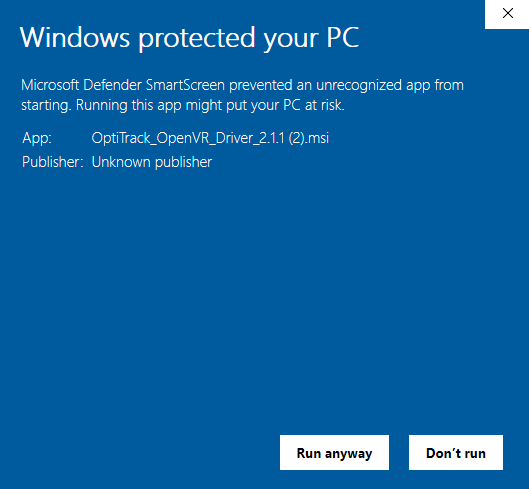
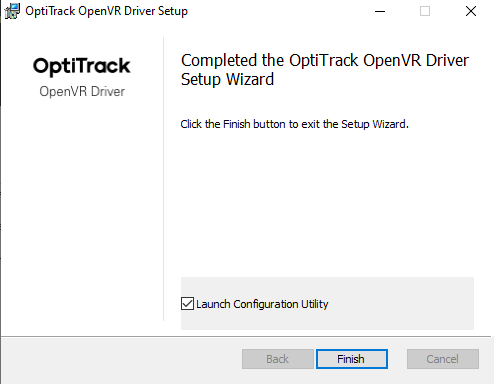
Download the OpenVR driver from the downloads page. Once downloaded, launch the installer and follow the prompts to set up the driver. On the last window, make sure to select Launch Configuration Utility before clicking Finish. This will open the Configuration options to setup your HMD with Motive.
You may receive a warning window prior to the installation wizard. To circumvent this, select More info and then Run Anyway.
Open the configuration program
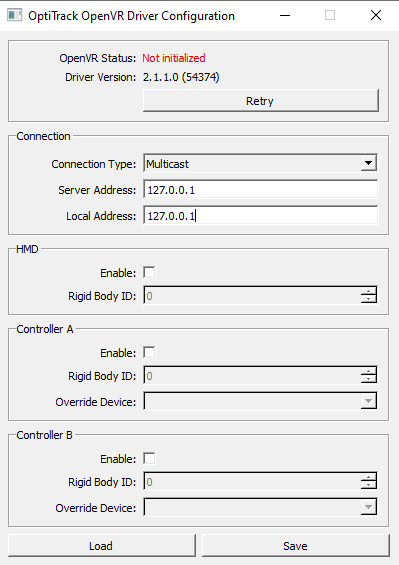
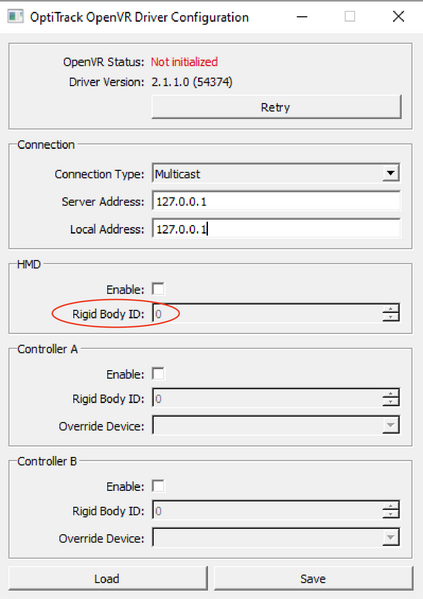
Once the driver has been successfully installed, launch the configuration utility software (C:\Program Files\OptiTrack\OpenVR Driver\ConfigUtil). Using this tool, you can load and check existing configurations and make changes to the settings as needed. To import current settings, click Load and to save out the changes, click Save.
Please make sure you are running this tool with admin privileges; if not, it might not be able to modify the settings properly. If the configuration software detects a running instance of SteamVR through OpenVR, it will be indicated as Initialized at the very top as shown in the image. Please note that when the settings get modified while SteamVR is running, the SteamVR must be restarted to apply the changes.
Configure connection settings
First, configure the connection settings so that the driver listens to the Motive server where the tracking data is streamed from. The server address must match the address where Motive is streaming the data to, and the local address must match the IP address of the computer on the network where the driver is installed.
Set up the HMD
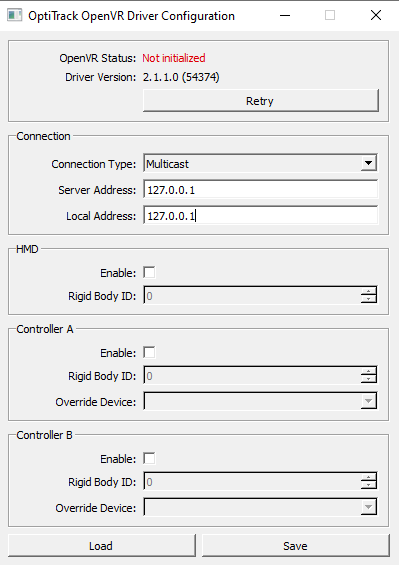
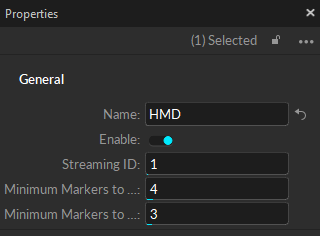
In the HMD section, enable the HMD and input the Rigid Body ID of the HMD. The Rigid Body ID must match the Streaming ID property of the HMD Rigid Body definition in Motive.
Save out the configuration
Save the configurations by clicking on Save. This will modify the set of configurations in the steamvr.settings file in the steam installation directory and they will override the HMD tracking with the tracking data from Motive. If you already had an instance of OpenVR or SteamVR running, restart the application to apply the changes.
Configuration File
The configuration tool basically imports and modifies the contents in the steamvr.settings file (C:\Program Files (x86)\Steam\config\steamvr.settings). When needed, the driver related settings can be changed directly from this file also, but it will be easier to configure the settings using the provided configuration tool.
Confirm the setup
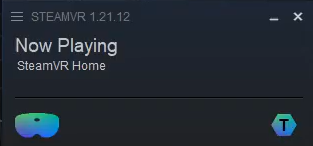
Launch SteamVR. If the driver is successfully set up, you should see a tracker icon added to the right of the HMD icon and the HMD will now be using the motion capture system instead of the base stations. Here, please make sure all of the lighthouse base stations are powered off.
VIVE Controllers
VIVE controllers are a Beta feature and may not work for every device. Support for this particular feature is limited.
Setting up the controller (optional)
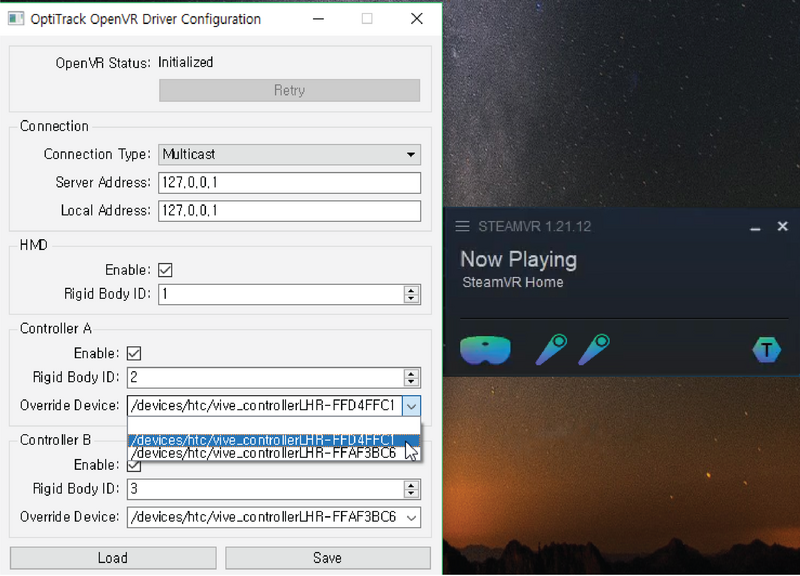
When needed, the Vive controllers can be configured as well. To do so, open the configuration utility tool while SteamVR is running. At the top of the configuration tool, it should indicate OpenVR status as Initialized and the controllers must be showing up in SteamVR. Then, in the controller sections, enable the controllers, specify the override device using the drop-down menu, and input the corresponding streaming ID of the controller Rigid Bodies in Motive. Once everything has been configured, save the changes and restart SteamVR. When the override is configured properly, SteamVR will have an additional tracker icon per each enabled controller.
Data Streaming
Now that the driver is set up, the HMD tracking will be overridden by tracking data from the mocap camera system, and you can integrate HMDs into the game engine through their own VR integration.
Streaming settings in Motive
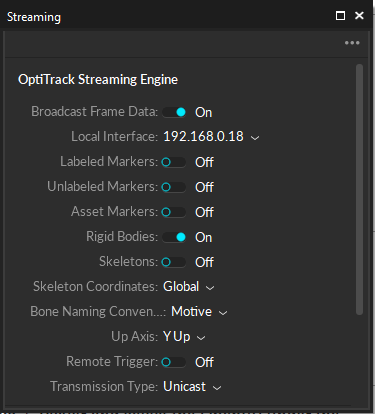
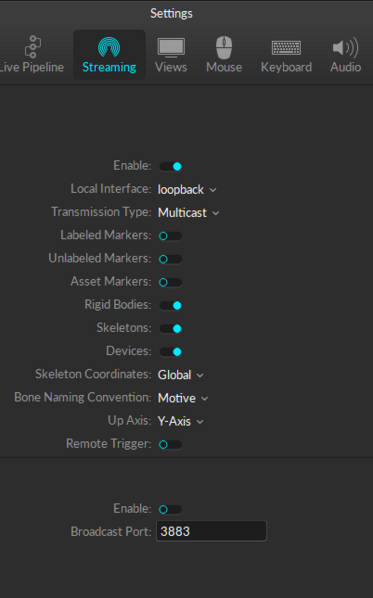
First, make sure the streaming settings are configured in Motive for streaming out the data. For more information on streaming in Motive please visit our Streaming page:
Broadcast Frame Data must be set to true.
Local interface must be set to the desired IP address to stream the tracking data from.
Streaming of Rigid Bodies must be set to True
For wireless streaming, use Unicast streaming type.
Confirm the Connection
Once Motive is configured for streaming, launch SteamVR home to check the connection. If everything is setup correctly, you should be able to move around, or translate, within the scene freely. You may also need to check the ground plane to make sure it's well aligned.
If you experience any unexpected rotations in the view as you move your head, it could indicate that the HMD pivot point has not been calibrated properly. Please revisit the HMD Setup section and make sure the HMD Rigid Body pivot point is positioned and oriented at the expected pivot; which is at the root of nose with z-forward.
Unity SteamVR Setup
Notes for Unity users
Once this has been set up, the motion capture system will be used to drive the HMD in SteamVR. In Unity, you should be able to setup development for SteamVR applications and use our system.
Starting from Unity version 2019 and above, official support for OpenVR in Unity has been deprecated. However, Valve made a plugin for the new Unity XR which can be used instead. Please follow the below steps to set up the Unity XR plugin and get the HMD working inside the Unity project:
OpenVR Unity XR plugin setup
1) Download the OpenVR Unity XR package found on the following Github page. 2) Download the OptiTrack OpenVR driver found on our website and configure the settings as described in the above section. 3) Open an Unity project 4) [Unity] Open the package manager from Window → Package manager. 5) [Unity] In the package manager, click on the "+" icon at the top and choose Add package from tarball. Then select the downloaded OpenVR Unity XR package.
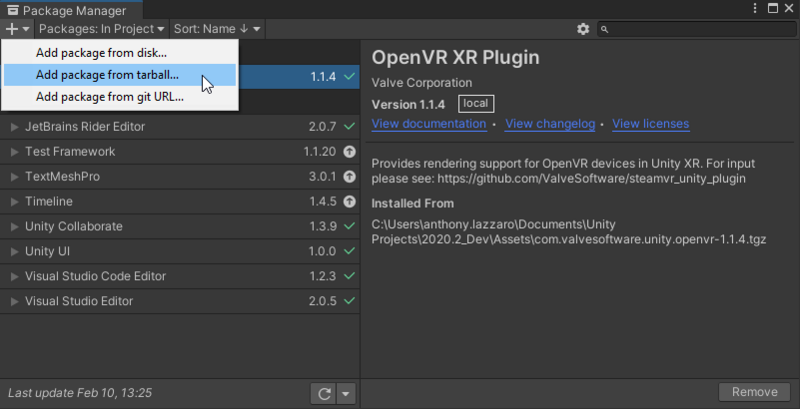
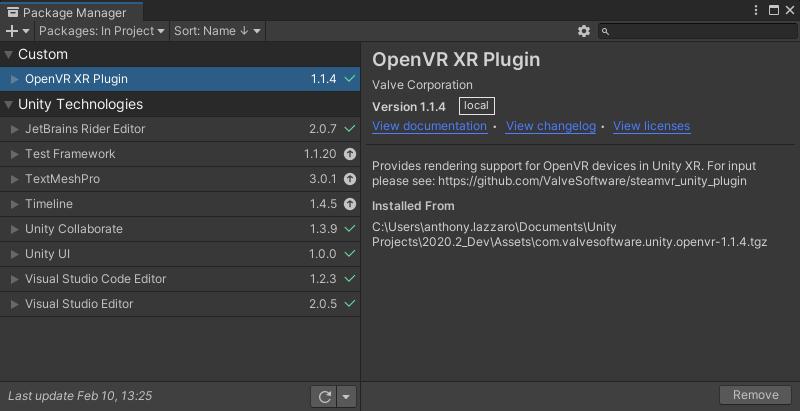
6) [Unity] Check to make sure that the OpenVR XR plugin has been installed within your project.
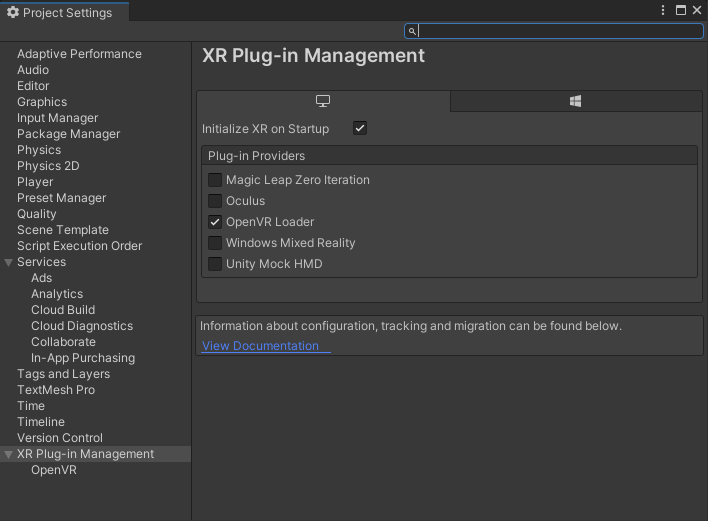
7) [Unity] Now, follow the instructions on Unity's website to configure your project for XR development. Install the XR Plug-in manager which can be found under Edit → Project Setting → XR Plug-in Management.
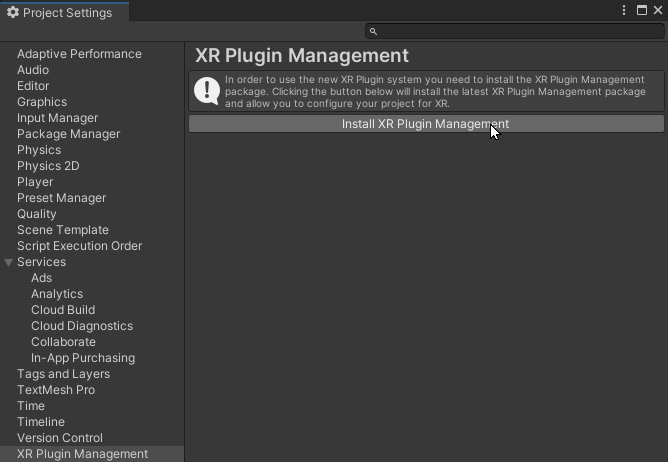
8) [Unity] Enable the OpenVR Loader under the list of providers in the XR Plug-in Manager. If OpenVR Loader is not listed in there, make sure the plugin was installed properly from step 5) above.
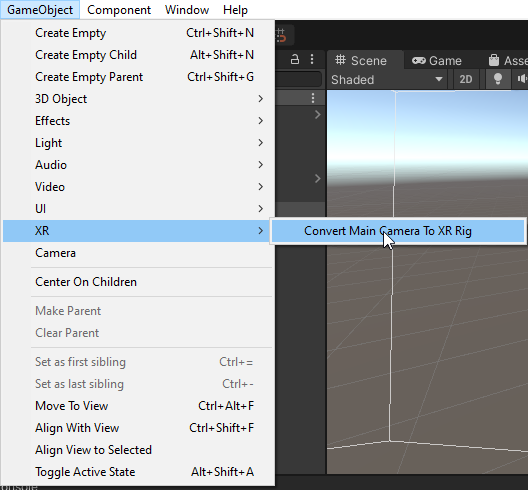
9) [Unity] Once the plugin is configured, go to GameObject → XR → Add XR Rig.
10) Play the scene, and make sure the HMD is playing and tracking as well.
Please keep in mind that these steps are subject to change from Unity. You can find detailed instruction from the following page: https://docs.unity3d.com/Manual/configuring-project-for-xr.html
In Unity version 2018 and earlier, you can enable SteamVR by configuring the project setting. Please go to Edit → Project Settings → Player, open the XR Settings panel, and enable the Virtual Reality Supported property. You can also follow the instruction in the Unity Documentation:
Streaming Rigid Body/Skeleton data
This driver is designed for streaming of HMD and controller tracking data only. For streaming tracking data of other Rigid Body objects, you will need to use the corresponding plugins (Unreal Engine or Unity). In other words, the HMD tracking data will be streamed through the SteamVR using the driver you've installed, and all other tracking data will be streamed through the plugin.
Aligning world coordinates with the plugin
Client Origin
When using the OpenVR driver along with the OptiTrack Unity Plugin for streaming of tracking data other than the HMD, such as Rigid Bodies and/or Skeletons, it is important that the OptiTrack Client Origin object is located at the global origin without any rotations. In other words, the position must be set to (0,0,0) and the rotation must be set to (0,0,0) on the client origin. This is important because the driver does not use the OptiTrack Unity Plugin but instead streams the HMD tracking data directly onto SteamVR through a separate channel.
Was this helpful?

