Quick Start Guide: Real-Time Retargeting in Unreal Engine with Live Link Content

Step-by-Step instructions for retargeting Live Link content in Unreal Engine.

Requirements

  • Motive 3.1 or higher

  • Unreal Engine 5.5

  • OptiTrack Live Link Plugin 5.5

Setup

This step is completed once per computer.

  • Download and unzip the latest version of the OptiTrack Live Link Plugin from the OptiTrack Download site.

  • Place the plugin files into one of the following directories:

    • A global engine plugin can be placed in C:\Program Files\Epic Games\ [Engine Version]\ Engine\ Plugins

    • A project-specific plugin can be placed in [Project Directory]\Plugins

Enable Plugin in Unreal Engine

This step is completed with each new project.

Go to Edit → Plugins and enable the two required plugins:

  • OptiTrack - Live Link plugin, located under the Installed group. This is the plugin downloaded in the previous step.

  • Unreal Engine's built-in Live Link plugin.

Search for Live Link on the plugins window to find these and other Live Link related plugins.

Allow Unreal Engine to restart, then close the plugin window when the project reloads.

Show Content

To show the OptiTrack plugins folder in the Content Browser, click the Settings button in the Browser's top right corner and check the boxes to Show Engine Content and Show Plugin Content.

Motive Streaming Settings

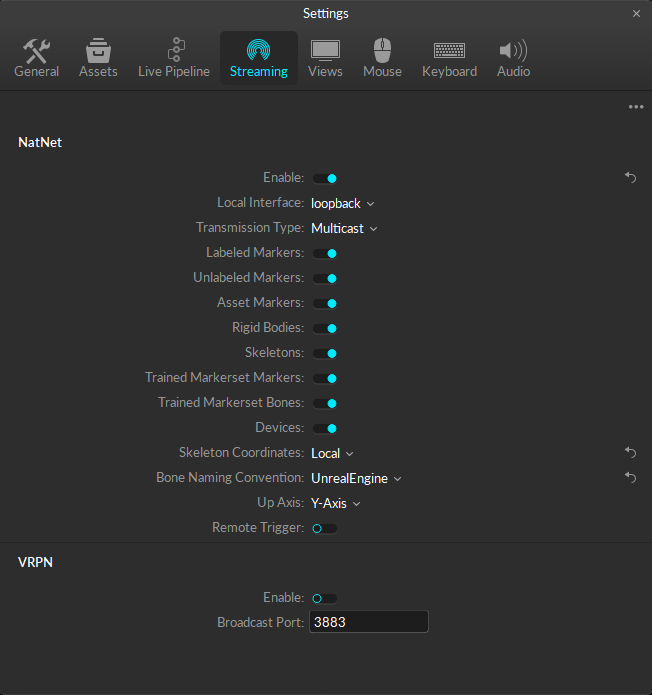
  • In the NatNet section, select Enable to begin streaming.

  • Select the Local Interface. Use Loopback if streaming to the same computer, otherwise select the IP address for the network where the client application resides.

  • Set the Bone Naming Convention to UnrealEngine.

  • Set the Up Axis to Y-Axis. The plugin will bring the data in with a Y-Forward orientation.

Please see the Data Streaming page for more details on all settings available for streaming.

Connect Motive to Unreal Engine

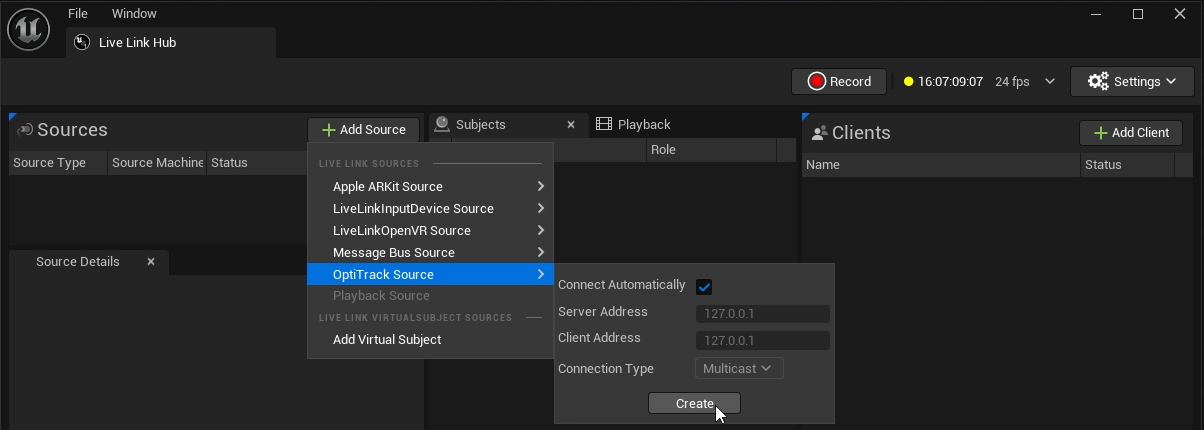
  • In Unreal Engine, open Live Link Hub from the Tools menu on the toolbar, if it's not open already. Under Virtual Production, select Live Link Hub.

  • Select OptiTrack Source, check Connect Automatically, or enter the IP address for the Motive PC in the Server Address field, the IP address for the Unreal PC in the Client Address field. Enter 127.0.0.1 in both fields if running both on the same PC. Click create.

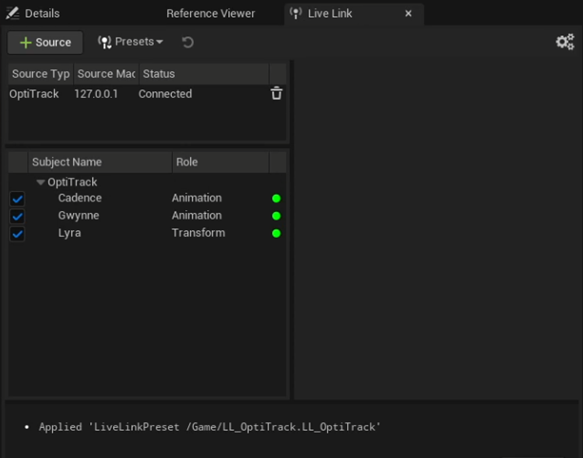
Live Link will display information about the connection, including a list of assets streaming from Motive:

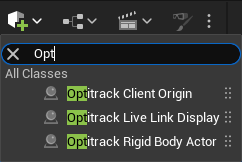
The OptiTrack Live Link Display provides validation that the data is streaming in correctly from Motive. In the Unreal Engine Outliner pane, all assets in the Motive volume should nest under the OptiTrack Live Link Display.

Play the Take file when working with recorded data to see the Live Link assets in the Viewport. Once the assets are available, you can pause playback and the assets will still be displayed.

Once you have validated the Live Link connection, we recommend turning off Live Link asset visibility to improve performance as you work through the rest of the pipeline.

  • Select OptitrackLiveLinkDisplay in the Outliner panel.

  • The properties for the OptitrackLiveLinkDisplay will populate in the Details pane.

  • In the Assets section, uncheck Display Assets.

Turn the Display Assets setting on or off as needed throughout the workflow.

Retargeting to MetaHumans

Retargeting is the process of applying an existing animation model to a character, at the correct scale.

In this section, we'll demonstrate the retargeting workflow using skeleton data streaming from Motive and retarget it to a MetaHuman in Unreal Engine in real-time. For each MetaHuman, we'll create the following in Unreal Engine:

  • A Retargeter to map the Motive Animation data to the correct Skeletal Meshes in Unreal.

  • An Animation Blueprint for the Motive Avatar.

  • An Animation Blueprint for the MetaHuman.

  • A Blueprint for a MetaHuman character.

For more information and tutorials about working with MetaHumans in Unreal Engine, please visit Epic Games' MetaHuman community.

This workflow is fine-tuned specifically for MetaHumans, but it can also be used for other characters with unique custom skeletons.

Y-Forward vs. X-Forward Axis

MetaHuman joints use a Y-Forward axis, and the plugin brings the data in using this orientation.

Prior versions of the plugin used an X-Forward axis for the skeletal mesh, with adjustments made to the linked asset in Unreal Engine. To work with legacy assets configured for an X-Forward axis:

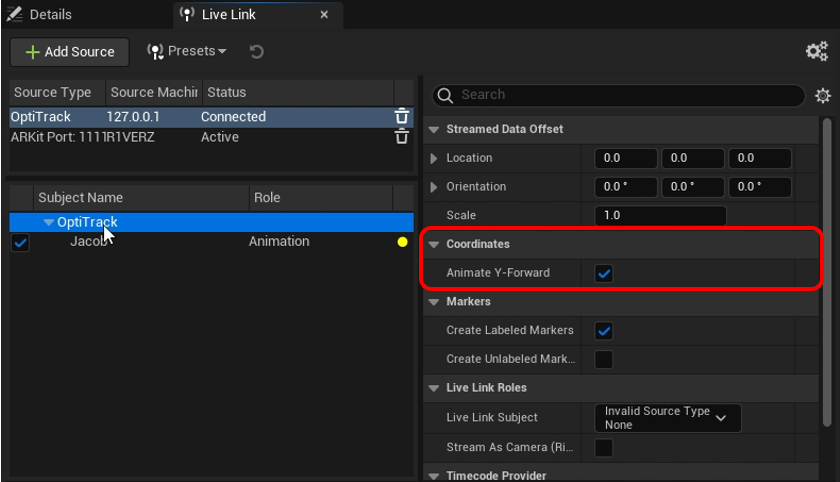
  • From the LiveLink tab, select OptiTrack to display the LiveLink properties.

  • In the Coordinates section, uncheck Animate Y-Forward.

Add MetaHuman

We'll start the workflow by adding the MetaHuman to the project. This will create a folder structure in the project to consolidate the content related to each individual MetaHuman. We'll use these folders to save the Retargeter and the two Animation Blueprints we need to complete the retarget.

Add the MetaHuman to the Project

To add a new MetaHuman to your project:

  • Select either a new MetaHuman from a preset to download or browse the local collection for any previously downloaded MetaHumans.

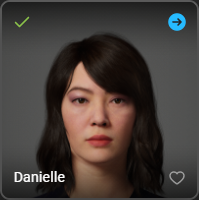
  • Once the MetaHuman is downloaded, a green arrow will appear in the upper left corner of the profile picture. Click the blue arrow in the upper right corner to add the MetaHuman to your project.

  • The DNA Import Options window will open. Select the appropriate Skeletal Mesh for the new MetaHuman. All OptiTrack skeletal meshes end with _Opti, making them easily searchable. Gender-specific meshes include an "F" or an "M" in the name. Legacy meshes using an X-Forward axis include "Xforward."

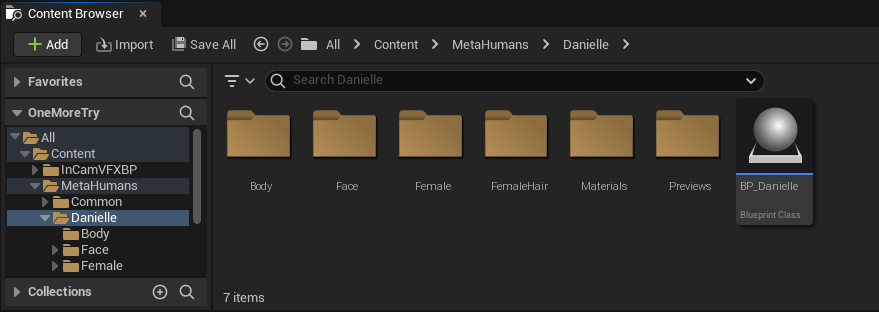
  • The Content Browser will have a new MetaHumans folder within the Content folder. Each MetaHuman has their own folder, which contains their Blueprint and all the content needed to render them.

Copy the MetaHuman Blueprint

We recommend using a copy of the MetaHuman when setting up the retarget. This allows you to take the data that comes from the MetaHuman in the retarget during production and add it to the original MetaHuman later in post-production.

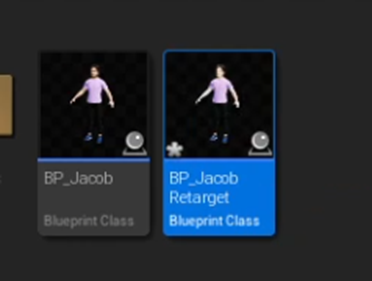
To create a copy, right-click the Blueprint and select Duplicate, or use the keyboard shortcut Ctrl + D.

We suggest using a simple convention such as BP_<MetaHumanName>_Retarget for all copies.

Now that the file structure for the MetaHumans is setup, we can create the Retargeter and the two Animation Blueprints. We'll update the MetaHuman Blueprint once these are done.

Create Retargeter

  • In the Content Browser, browse to and open the folder for the MetaHuman.

  • Right-click the Content Browser and select Animation -> Retargeting -> IK retargeter.

  • Name the retargeter. We recommend a name such as IKR_Motive_to_Meta.

Set Retargeter Source and Target

Open the newly created retargeter. In the Details pane, update the Source and Target values as follows:

  • Source IKRig Asset: IK_MotiveAvatar_Opti

  • Source Preview Mesh:

    • Female avatars: SKM_F_MotiveAvatar_Opti

    • Male avatars: SKM_M_MotiveAvatar_Opti

  • Target IKRig Asset: IK_metahuman

  • Target Preview Mesh:

    • Female avatars: f_med_nrw_body

    • Male avatars: m_med_nrw_body

The Preview Mesh fields will auto-complete once the IKRig Asset is selected.

Align Skeletons

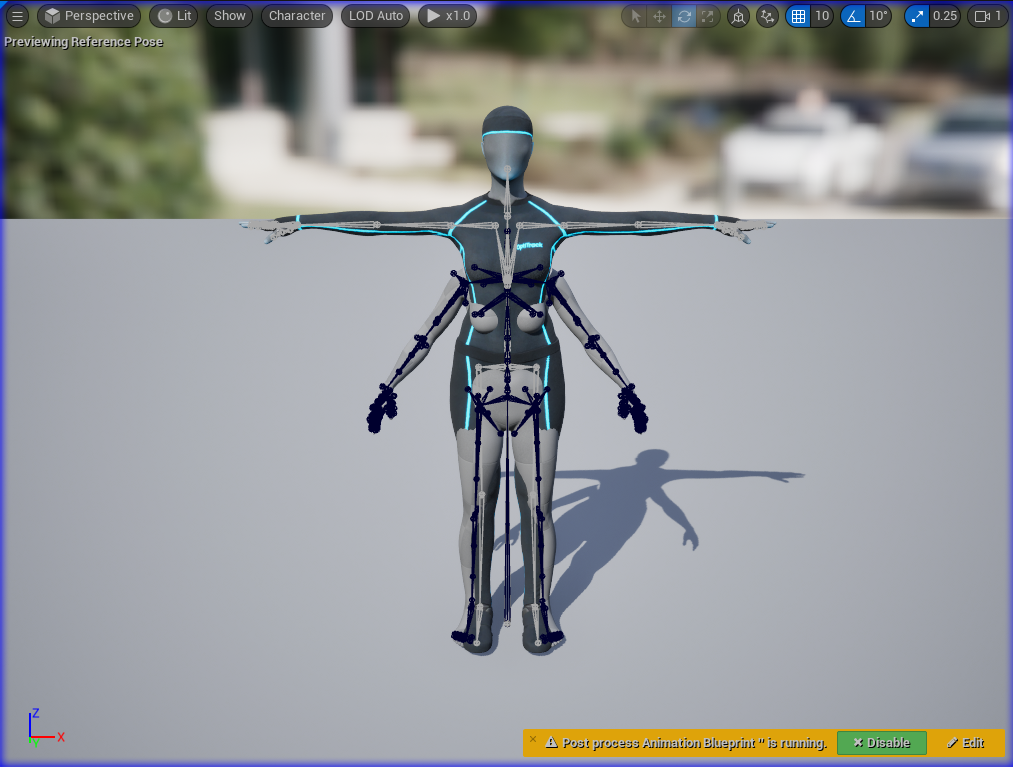
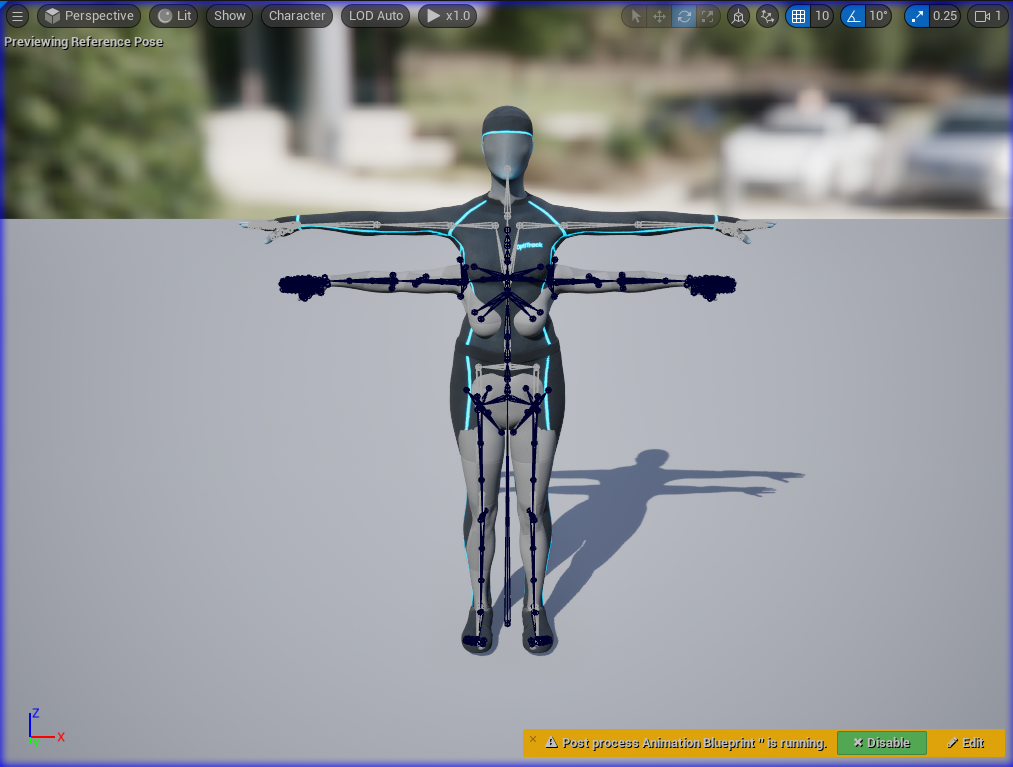
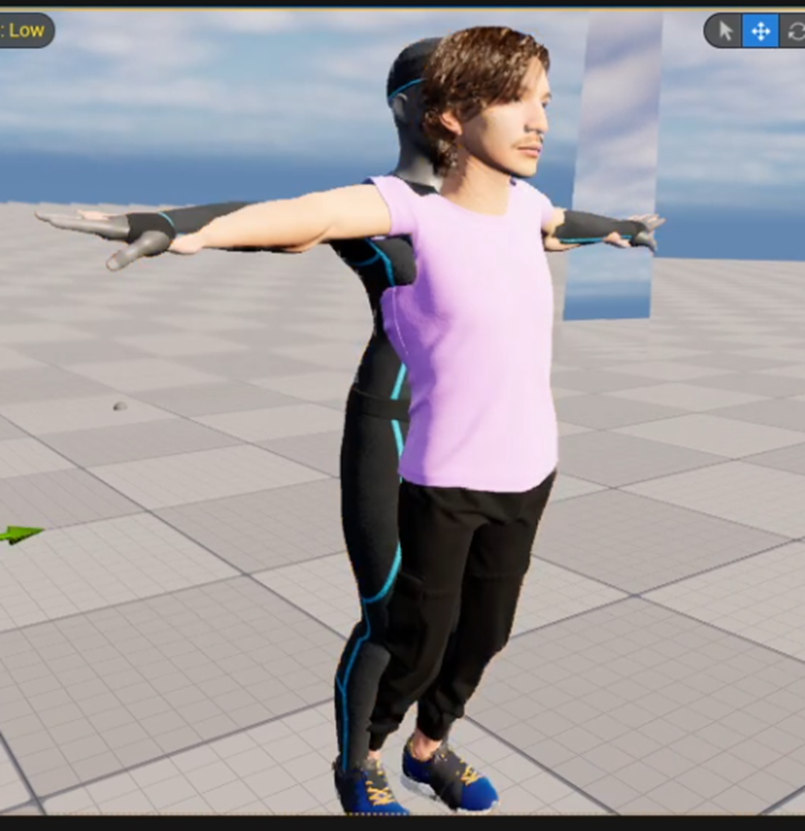
The Viewport will show that the two skeletons are not properly aligned. This occurs because the skeletons are in different poses.

Click the Running Retargeter button in the upper left corner to stop the retargeter and switch to edit mode. The button will update to Editing Retarget Pose.

The retarget will now display correctly in the Viewport.

Motive Avatar Animation Blueprint
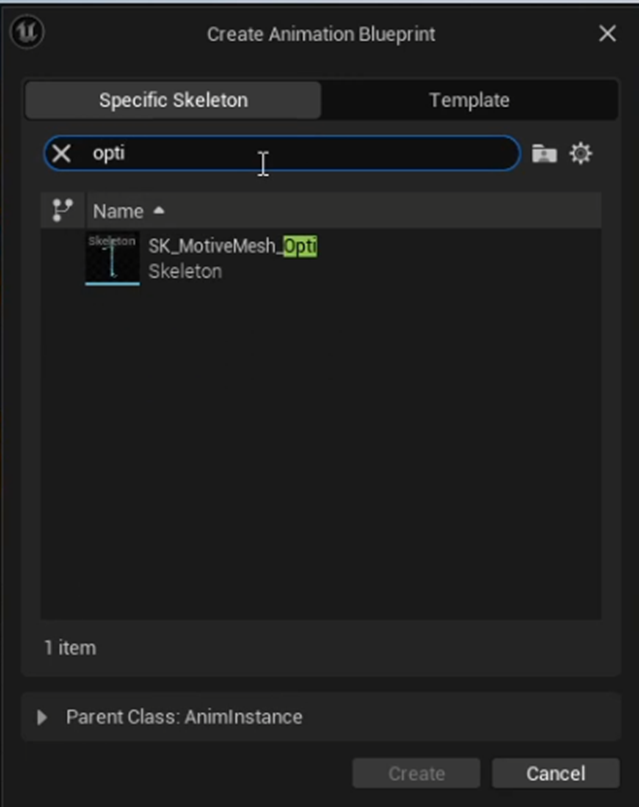
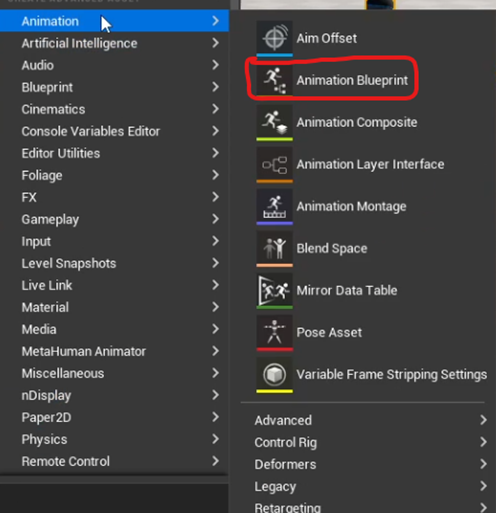
  • Right-click the Content Browser and select Animation -> Animation Blueprint.

In the Create Animation Blueprint Search bar, type Opti, then select the SK_MotiveAvatar_Opti skeleton. Give the newly created Animation Blueprint a name, such as ABP_MotiveAvatar.

  • Double-click the new Animation Blueprint to open the AnimGraph window.

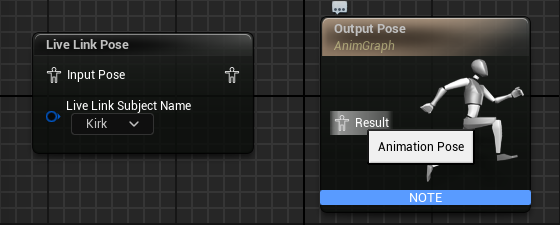
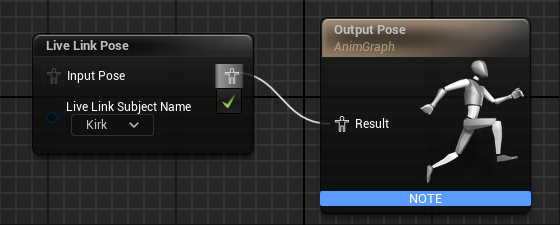
  • Right-click in the graph area and type Live Link Pose in the Search field, then select the node that appears.

  • In the Live Link Pose node, use the dropdown list under Live Link Subject Name to select the actor whose skeleton will be used for the Motive avatar.

  • To connect the two nodes, click the Result icon in the Output Pose and drag it to the corresponding icon on the Live Link Pose.

  • Click the Compile button, then Save. The Compile button will update as all changes are incorporated:

MetaHuman Animation Blueprint
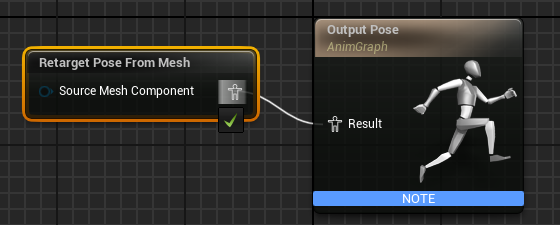
  • Right-click the Content Browser and select Animation -> Animation Blueprint.

  • On the Create Animation Blueprint window, select the metahuman_base_skel skeleton.

  • We suggest a naming convention such as ABP_<MetaHumanName>_Meta. Name, then open the newly created animation blueprint.

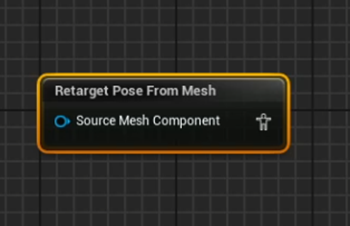
  • Right click the AnimGraph. From the list of All Actions, search for and select Retarget Pose From Mesh.

  • Select Retarget Pose from Mesh in the AnimGraph to display its properties in the Details pane.

  • Find IKRetargeter Asset in the Settings section.

  • Drag the Output Pose Result icon to the corresponding icon on the Retarget Pose From Mesh node to link the two.

  • Click the Compile button, then save.

Update MetaHuman Blueprint

Add Skeletal Mesh and Skeletal Animation
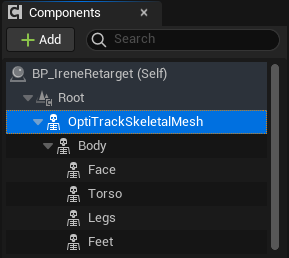
  • Open the MetaHuman Blueprint created in a prior step.

  • Click the Viewport tab to see the MetaHuman character.

  • Name the new mesh something distinct, such as OptiTrackSkeletalMesh.

  • Drag the body component of the MetaHuman under the new skeletal mesh.

  • The Components should now look like this:

  • Next, add the Live Link Skeletal Animation component. This will allow playback to start once the animation blueprint is attached.

  • To improve performance while streaming to MetaHumans, click the LODSync component. In the Details pane, go to LOD -> Forced LOD and change the setting to 1.

  • Click Compile to update the Blueprint, then save.

Apply Animation Blueprints to Skeletal Meshes

  • With the OptiTrack skeletal mesh still selected, go to Mesh -> Skeletal Mesh Asset.

  • Type Opti in the dropdown's search bar to quickly find the applicable Motive Avatar. This should match the the Source Preview Mesh used in the IK Retargeter created earlier:

    • Female avatar: SKM_F_MotiveAvatar_Opti

    • Male avatar: SKM_M_MotiveAvatar_Opti

  • In the Components pane, select the skeletal mesh for the MetaHuman. This is the Body previously moved to nest directly below the OptiTrack Skeletal mesh.

  • In the Details pane, go to Animation -> Anim Class.

  • Use the drop-down to search for and select the MetaHuman Animation Blueprint created earlier.

  • With the MetaHuman (body) skeletal mesh still selected, go to Mesh -> Skeletal Mesh Asset.

  • Select the same mesh used in the Target Preview Mesh in the IK Retargeter created earlier:

    • Female avatar: f_med_nrw_body

    • Male avatar: m_med_nrw_body

Animation should now be playing in the viewport of the MetaHuman blueprint.

Disregard any visual issues with the animation in this view. They will not appear in the environment when you add the MetaHuman to your scene.

Add MetaHuman to Scene

  • Now that the MetaHuman blueprint is configured correctly, drag it from the Content Browser into the scene.

  • In the Outliner pane, drag the newly added blueprint to the OptiTrackLiveLinkDisplay component created earlier. The mouse tip will display the drop location with a green checkmark as you drag the component, to show exactly where it will nest when the mouse is released.

  • Once the MetaHuman is nested under the OptiTrackLiveLinkDisplay, its location coordinates will update to reflect the OptiTrack global origin.

If you previously disabled the display of assets after setting up the OptiTrack Live Link Display, re-enable the display now to validate that the retarget is running correctly.

MetaHuman Animation Tips

The MetaHuman may not be animating exactly as intended. At this point, the rest of retargeting is much more of a trial-by-error artistic process.

We achieved the best standard results using the following settings for all the Hand and Foot Goals, however, we recommend testing other values and changing other fields to get the best results for your project:

  • FK

    • Rotation Mode: One to One

    • Translation Mode: Absolute

  • IK

    • Blend to Source: 1

Legacy Content with an X-Forward Axis

Prior versions of the plugin used an X-Forward axis for the skeletal mesh, with adjustments made to the linked asset in Unreal Engine. To work with legacy assets configured for an X-Forward axis, uncheck the box ...

Last updated