Windows 11 Optimization for Realtime Applications
This document outlines recommended optimizations for a Motive PC operating in real-time interactive applications.
Last updated
This document outlines recommended optimizations for a Motive PC operating in real-time interactive applications.
Last updated
General Purpose Operating Systems (GPOS) like Windows are designed to maintain user responsiveness with many programs and services running, while real-time operating systems (RTOS) are designed to run critical applications reliably and with precise timing. A GPOS can handle multiple tasks concurrently but is not ideal for important, time-sensitive applications due to latency and synchronization issues. A GPOS can also operate without time constraints, so tasks may sometimes fail or take longer to execute. For this reason, it may be necessary to optimize Windows 11 to improve performance in Motive.
These optimizations involve disabling various Windows security features, so it is crucial to ensure that the PC is isolated from the internet or other potential sources of malware.
Many of the recommended optimizations are completed using Window’s Local Group Policy Editor. To open this program:
From the Windows search bar, type CMD.
Run Command Prompt as administrator.
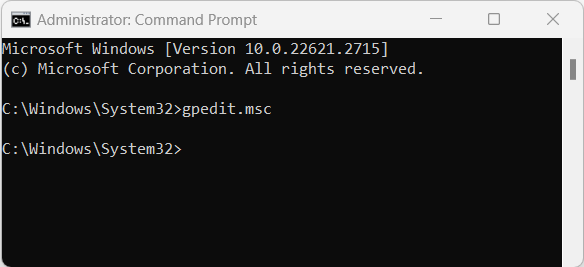
At the command line, type gpedit.msc and press enter.
This will open the Local Group Policy Editor window.
Local Group Policy Editor is available only with a Windows Professional License.
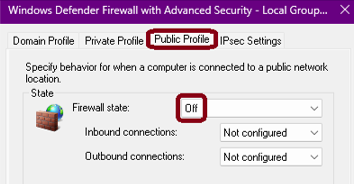
Set a Local Group Policy to disable Private, Public, and Domain firewalls.
Once these policies are implemented, the firewall cannot be re-enabled by any other means.
Open Window’s Local Group Policy Editor.
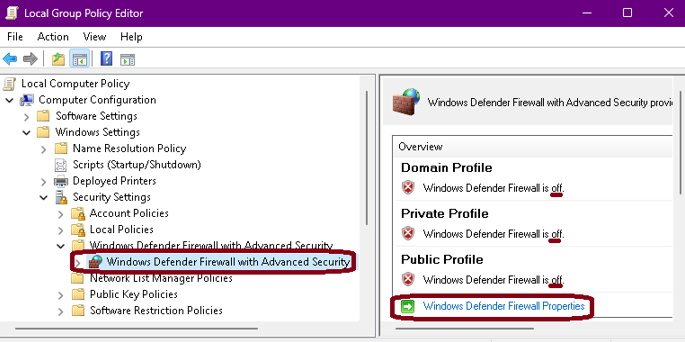
Navigate to Computer Configuration -> Windows Settings -> Security Settings -> Windows Defender Firewall with Advanced Security.
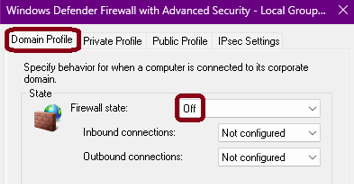
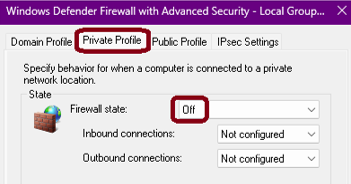
The Overview panel shows the current status of the firewall. Click Windows Defender Firewall Properties to change the state of the Domain, Private, and Public profiles to Off then click OK.
Set a Local Group Policy to disable Microsoft Defender Antivirus.
Once this policy is implemented, the Windows Defender Antivirus cannot be re-enabled in Virus & Threat Protection.
Open Window’s Local Group Policy Editor.
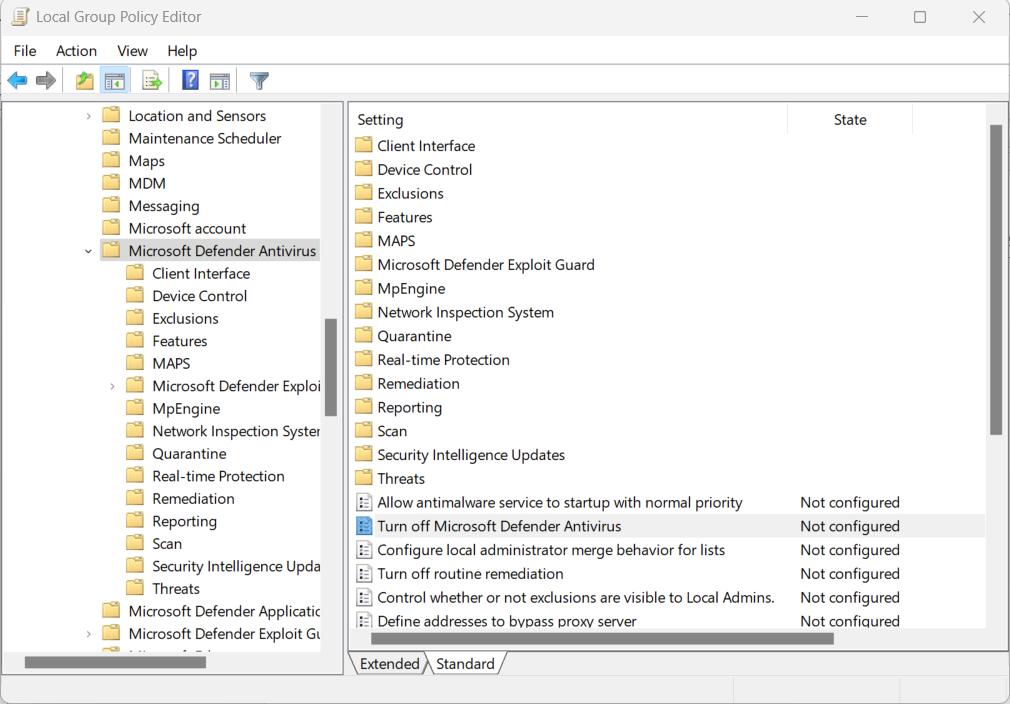
Navigate to Computer Configuration -> Administrative Templates -> Windows Components -> Microsoft Defender Antivirus.
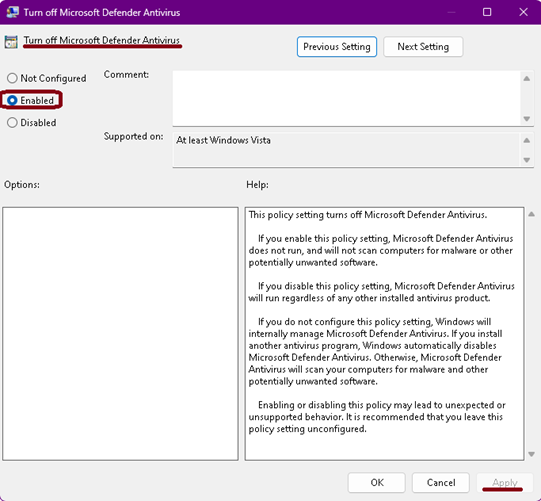
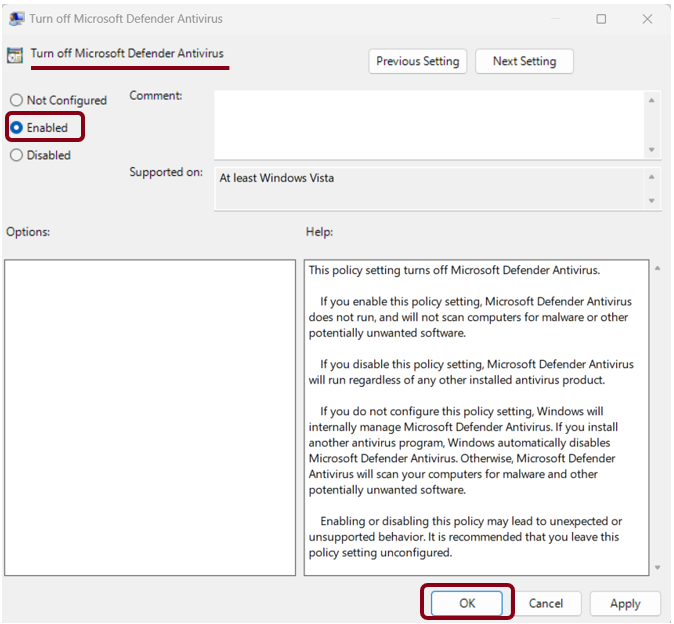
Double-click Turn Off Microsoft Defender Antivirus.
Select Enabled and click OK.
Use the following processes to disable anti-malware services.
Open Window’s Local Group Policy Editor.
Navigate to: Computer Configuration -> Administrative Templates -> Windows Components -> Microsoft Defender Antivirus -> Real-time Protection.
Double-click Turn off real-time Protection.
Set the policy to Enabled and click OK.
Save the following script to a batch file named OptiTrack_ForceDefenderOFF.bat, in the common Windows startup folder: C:\ProgramData\Microsoft\Windows\Start Menu\Programs\StartUp.
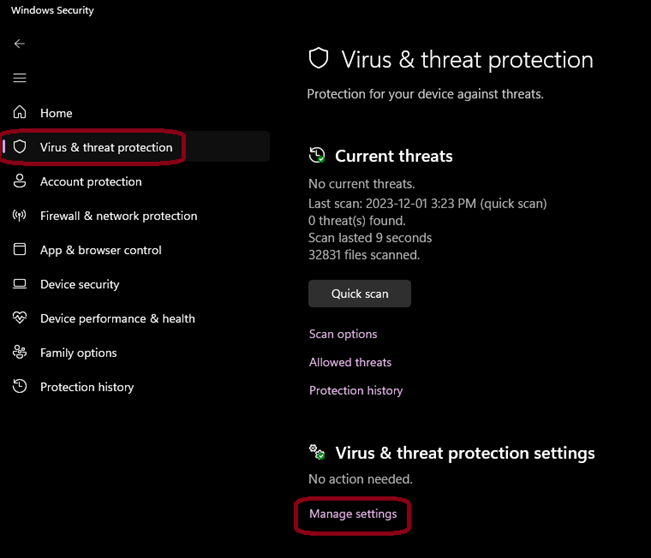
Go to Settings -> Update & security -> Windows Security -> Virus & Threat Protection.
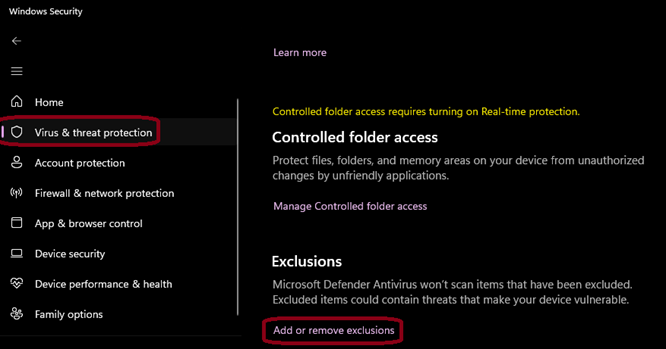
Click Manage Settings at the bottom of the screen.
Scroll to the Exclusions section and click Add or remove exclusions.
Navigate to C:\Program Files\Windows Defender.
Click the Select Folder button.
Restart the computer to decrease the RAM usage by the Antimalware Service Executable in Task Manager Processes.
Stop notifications from Windows and installed applications.
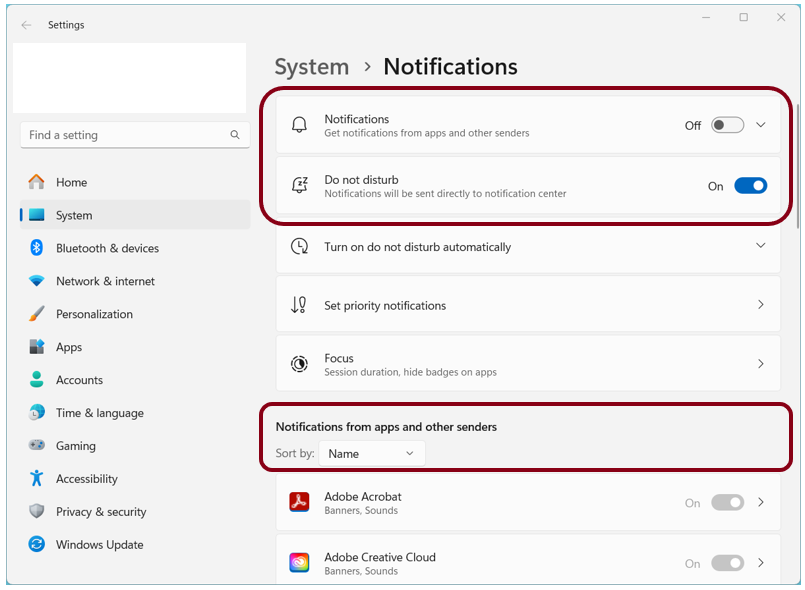
Right-click on the clock on the Task Bar to open the Notifications panel.
Select Notification Settings.
Set Notifications to Off.
Turn Do Not Disturb On.
Scroll through the list of Notifications from apps and other senders and turn Off any that are set to On.
At the bottom of the list, click Additional Settings.
Deselect all options in the Additional Settings list.
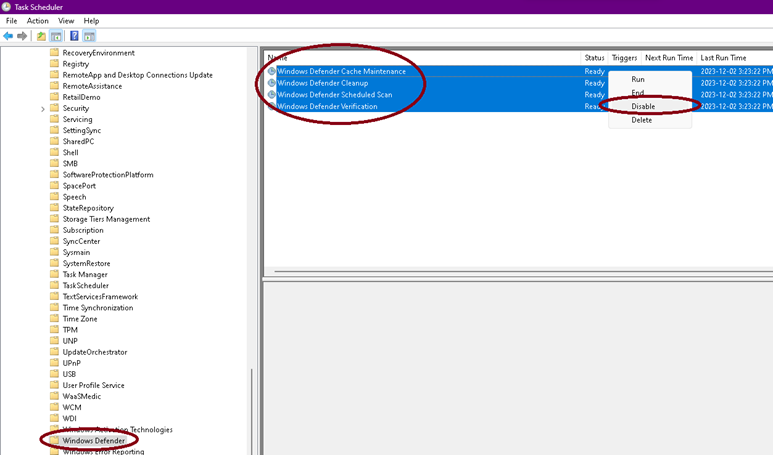
Stop scheduled tasks from running.
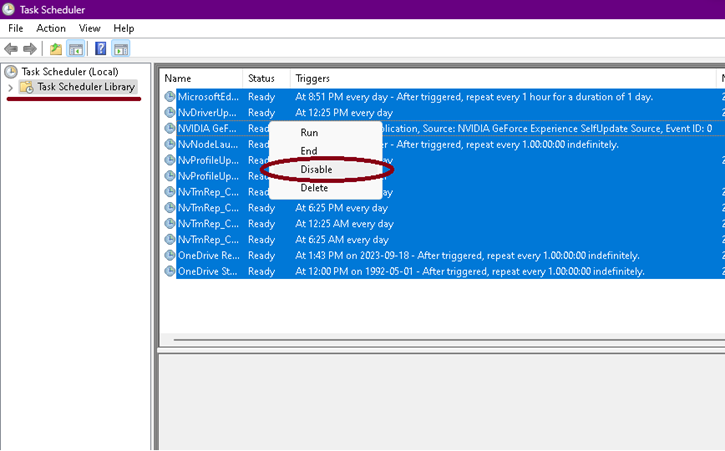
Open the Windows Task Scheduler application.
Select all the task in the Task Scheduler Library list.
Right-click and select Disable.
Open the Windows Task Scheduler application.
Navigate to Microsoft -> Windows -> Windows Defender.
Select all the tasks in the list.
Right-click and select Disable.
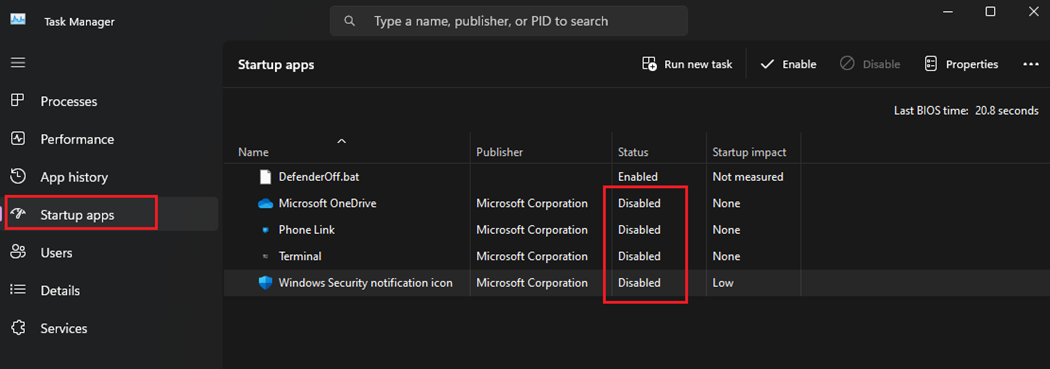
Stop unnecessary applications from loading at startup.
Open the Windows Task Manager application.
Click the Startup apps tab button.
Disable all unnecessary startup apps.
DO NOT disable OptiTrack_ForceDefenderOff.bat.
Turn off HDD/SSD Encryption (for example, BitLocker Drive Encryption Service).
Turn off HDD/SSD Compression.
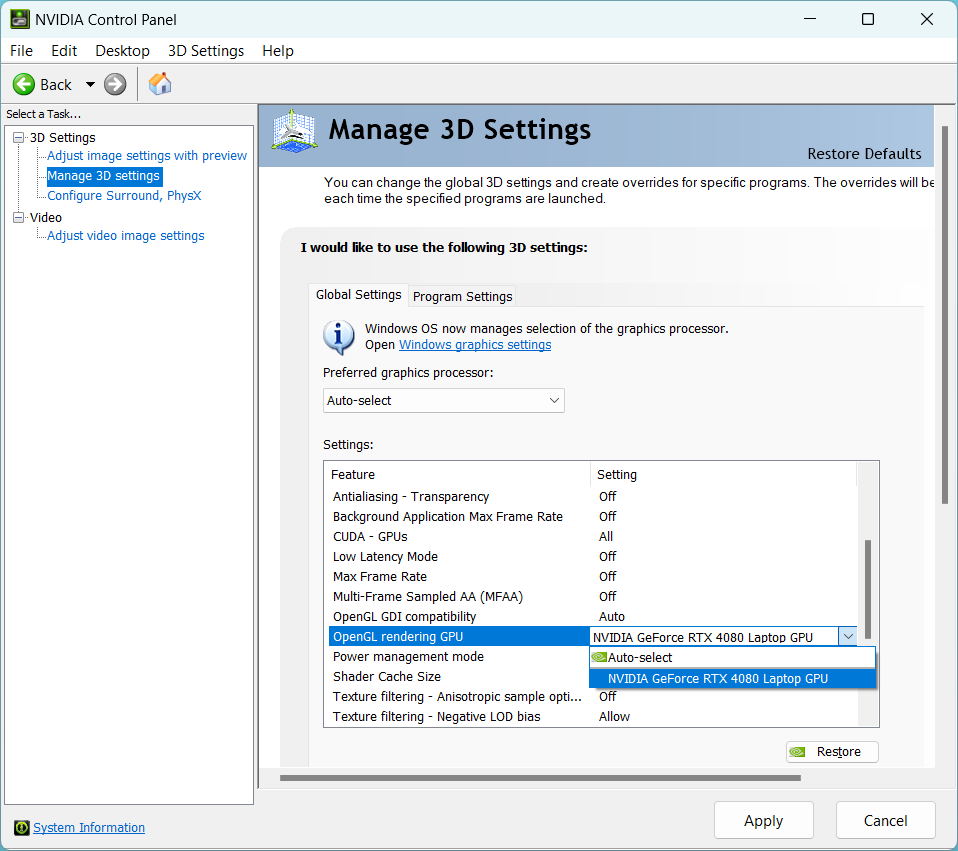
Open Nvidia Control Panel and Navigate to 3D settings -> Manage 3D Settings
Select the Global Settings tab.
Set OpenGL rendering GPU to the dedicated GPU card.
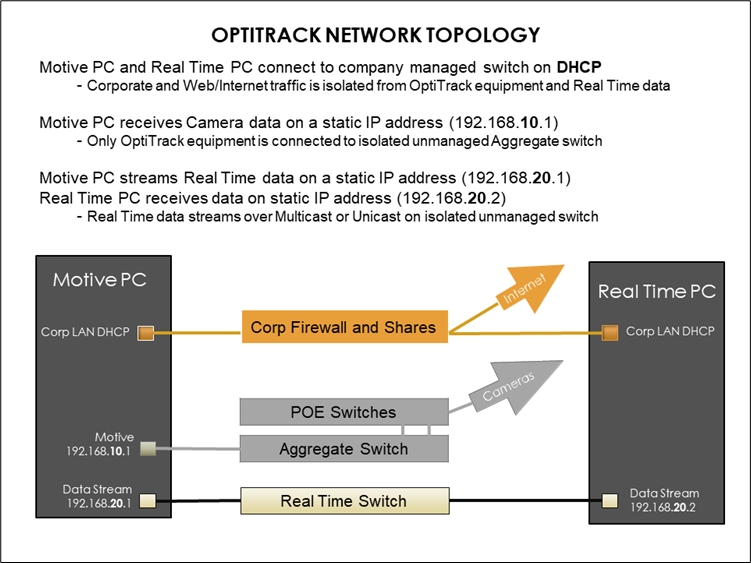
Use the recommended network configuration.
Use Static IPs for Camera and Streaming Network Interface Cards (NICs)
Isolate the following on three different NICs:
Local Area Network
Incoming camera data
Outgoing streaming data
Type Network in the Windows search bar to find and open the Control Panel to View Network Connections. The image below shows the three NICs specified above.
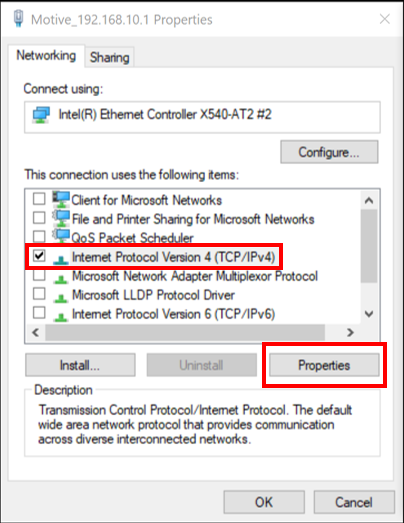
Double-click or right-click the NIC you wish to configure and select Properties.
From the Properties screen, disable all protocols except IPv4.
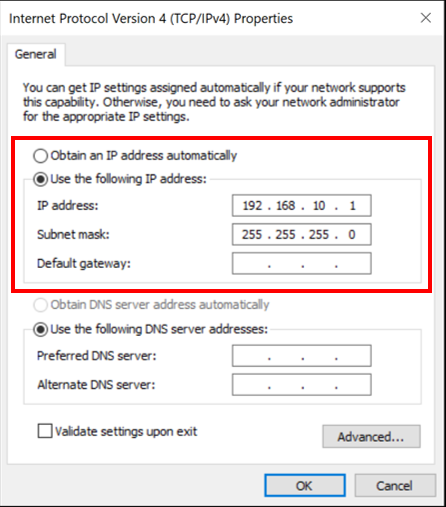
With IPv4 selected, click the Properties button.
Select Use the following IP address:
For the NIC connected to the Camera network, enter IP address 192.168.10.1
For the NIC connected to the realtime network, enter IP address 192.168.20.1
Enter 255.255.255.0 for the Subnet mask.
Click OK to save and return to the Properties window.
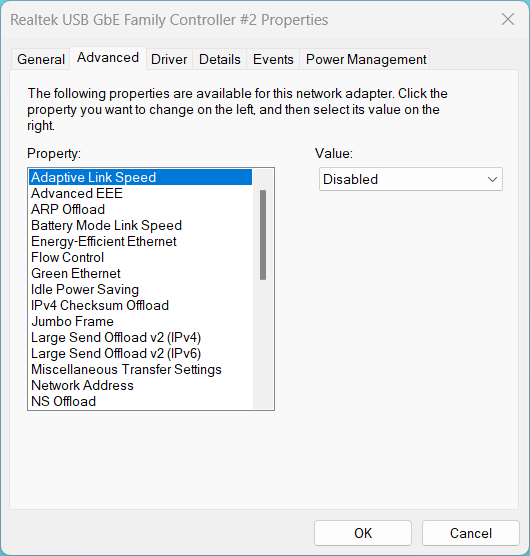
Set the following properties to the value specified:
Interrupt Moderation = Disabled
Interrupt Moderation Rate = Disabled
Jumbo Packets = Disabled
Max Number RSS Queues = 16
Receive Buffers = 4096 (max)
Receive Side scaling = Enabled
Speed and Duplex = Auto-Negotiate
Transmit Buffers = 16384 (max)
Steps:
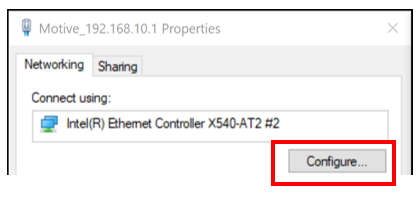
From the Properties window, click the Configure... button to customize NIC settings.
Click the Advanced tab.
To update a setting, select it from the Property: list and update the Value field on the right.
Update all of the settings listed above.
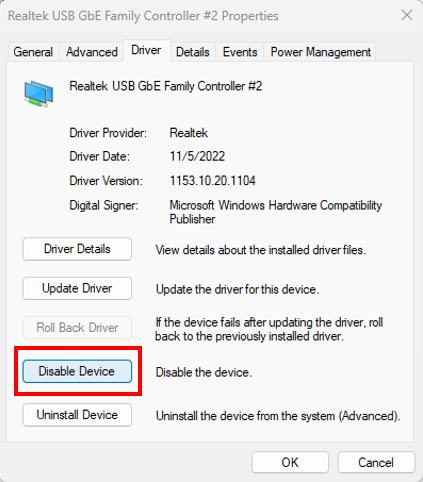
Click the Driver tab.
Click Disable, then Enable to restart the NIC with the new settings.
Use the settings supplied by your IT department to connect to corporate or institutional networks.
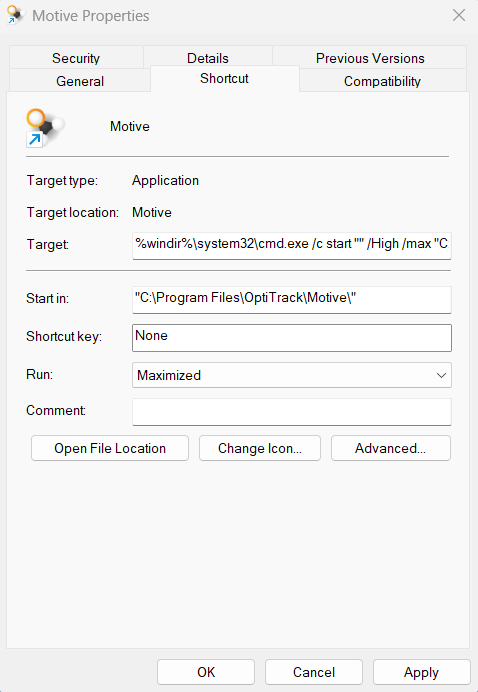
Customize the Motive desktop shortcut to launch the program with high priority.
On the desktop, right-click the Motive shortcut and select Properties.
Select the Shortcut tab.
Copy and paste the text below into the Target field:
Set the Run property to Maximized.
Click OK to save your changes and close the window.