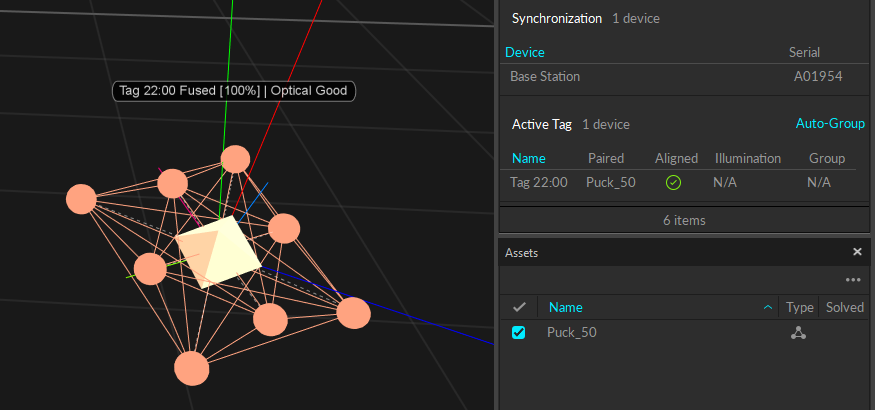
Rigid body (Puck) with sensor fusion.

Rigid body (Puck) with sensor fusion.
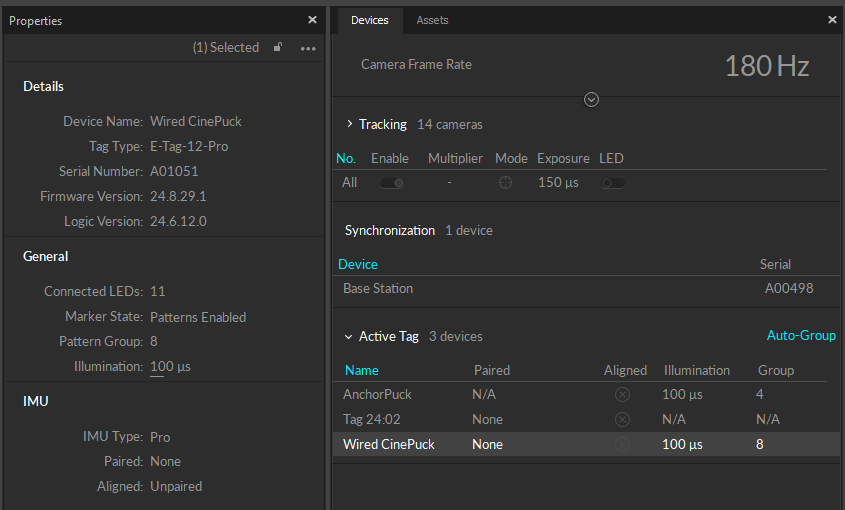
Properties pane and Devices pane for an unpaired IMU (Wired CinePuck).
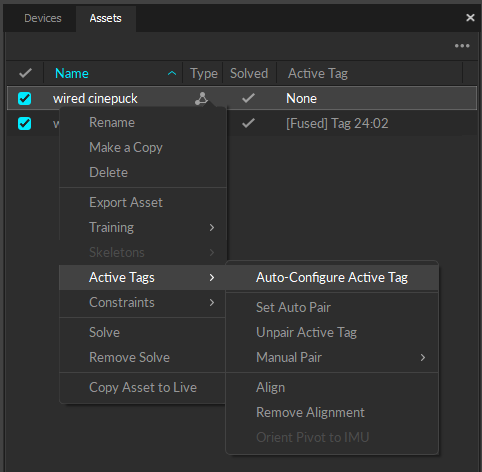
Context Menu from the Assets pane.
 . The IMU label will also display the status in the Viewport.
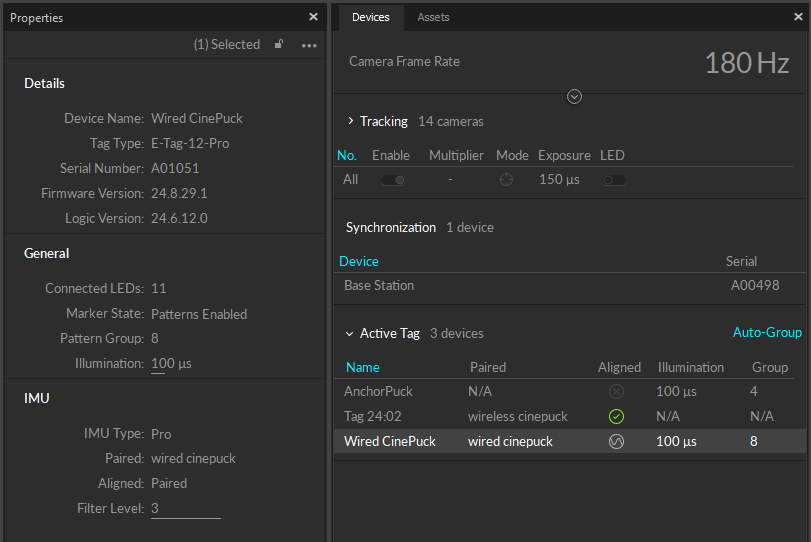
Active Tag status and Properties during alignment.
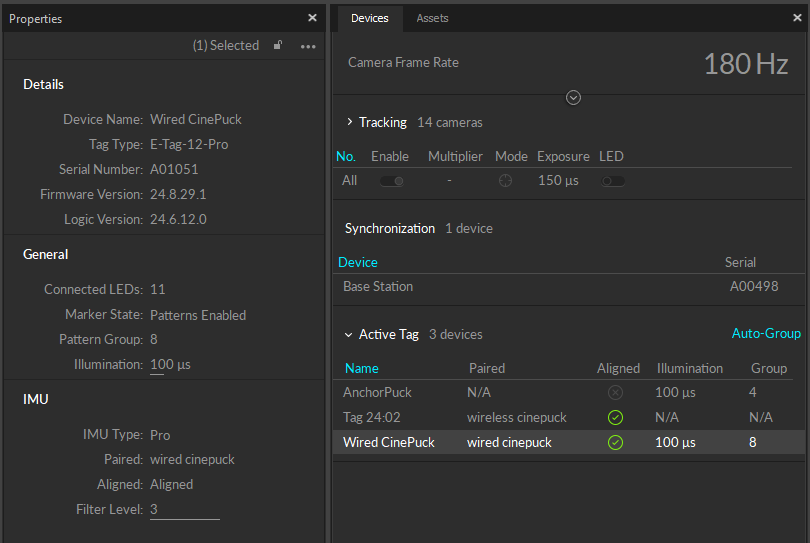
Properties for an Active Tag that is successfully fused to the Rigid Body.
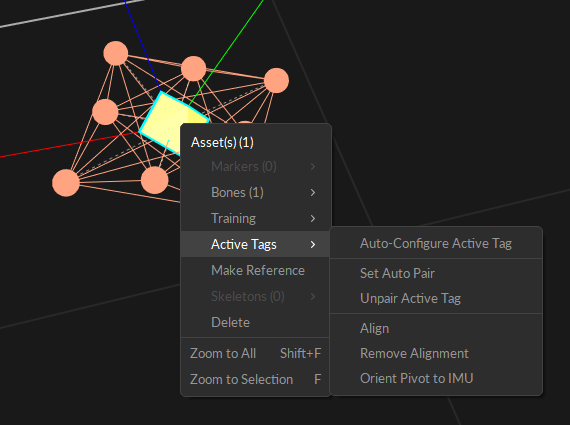
The Active Tag context menu from the Viewport.
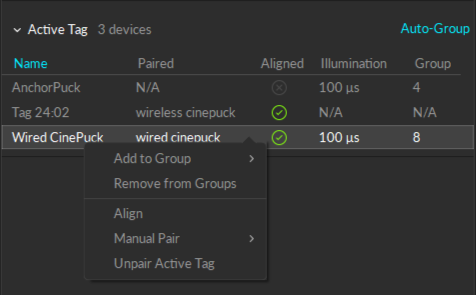
The Active Tag context menu from the Devices pane.
 button at the top of the *Devices pane* to select from the list of available [Device Groups](https://docs.optitrack.com/motive-ui-panes/devices-pane#device-groups-panel).
{% endhint %}
#### Add to Group
Add selected devices to a new or existing group with the *Add to Group* option.
#### Remove from Groups
Removes the selected devices from all groups.
#### Manual Pair
If manually pairing from the *Devices* pane:
* Choose the Rigid Body you would like to pair to the selected Tag in the *Devices* pane.
If manually pairing from the *Assets* pane:
* Choose the Active Tag you would like to pair to the selected Rigid Body in the *Assets* pane.
## Assets Pane
#### Active Tag Column
Right click the header of the *Assets* pane to add columns. For this IMU workflow, we recommend adding the Active Tag column. The Active Tag column will display the status along with the ID of the paired device.
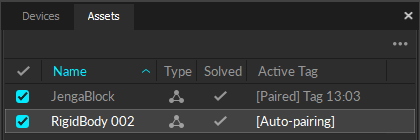
The Active Tag column in the Assets pane.
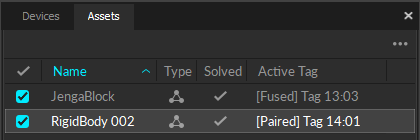
Fused and Paired IMUs in the Assets pane.
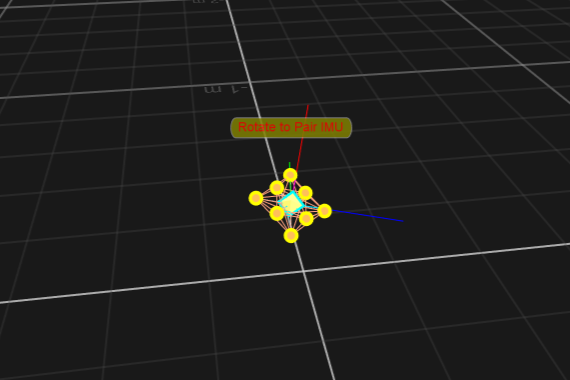
Stage 1 of Sensor Fusion: IMU is paired but alignment has not started.
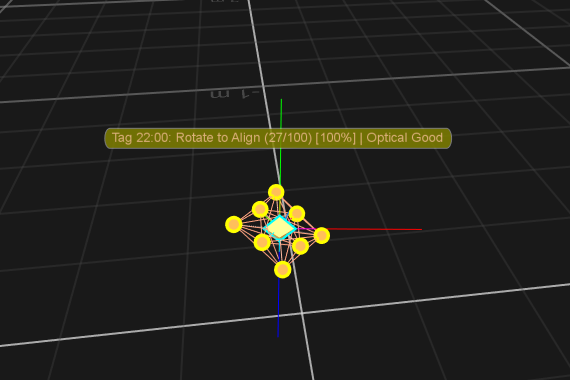
Alignment progress displayed in the IMU label.
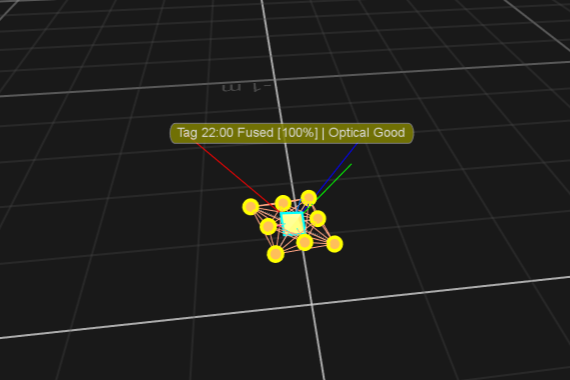
An Active Puck with a successful Sensor Fusion.

Active Tag section of the Devices pane.
 * If the tag is aligning with a rigid body, the circle with the wave icon will appear. 
* If the tag is paired and aligned, the green circle with green check icon will appear. 
#### Illumination
The amount of time the LEDs are on for each frame. This setting applies only to Wired CinePuck and the Anchor Puck at this time.
This value should be aligned with the exposure of the cameras for maximum brightness.
#### Group
The active pattern grouping currently applied to the device.
## Properties Pane for Tag and Rigid Body
### Active Tag Properties
Click any tag in the Devices Pane to display its properties in the Properties pane. In Live mode, these properties can be edited for Wired tags. For wireless devices, these values are read-only.
For wireless devices, the RF Channel and Uplink ID can be changed using [ Active Batch Programmer](https://docs.optitrack.com/active-components/configuration/active-batch-programmer).
* If the tag is aligning with a rigid body, the circle with the wave icon will appear. 
* If the tag is paired and aligned, the green circle with green check icon will appear. 
#### Illumination
The amount of time the LEDs are on for each frame. This setting applies only to Wired CinePuck and the Anchor Puck at this time.
This value should be aligned with the exposure of the cameras for maximum brightness.
#### Group
The active pattern grouping currently applied to the device.
## Properties Pane for Tag and Rigid Body
### Active Tag Properties
Click any tag in the Devices Pane to display its properties in the Properties pane. In Live mode, these properties can be edited for Wired tags. For wireless devices, these values are read-only.
For wireless devices, the RF Channel and Uplink ID can be changed using [ Active Batch Programmer](https://docs.optitrack.com/active-components/configuration/active-batch-programmer).
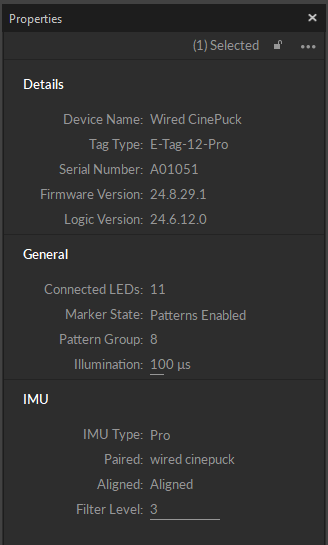
Active Tag properties pane.
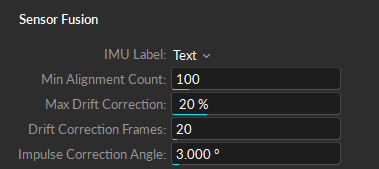
Sensor Fusion section of the Rigid Body properties.
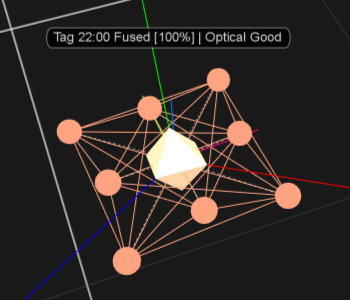
Text visual in 3D Viewport.
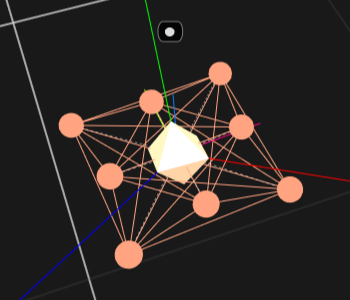
Icon visual in 3D Viewport.
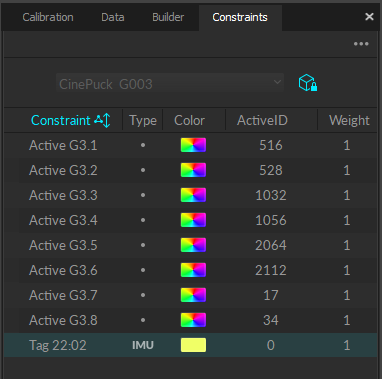
Constraints tab.
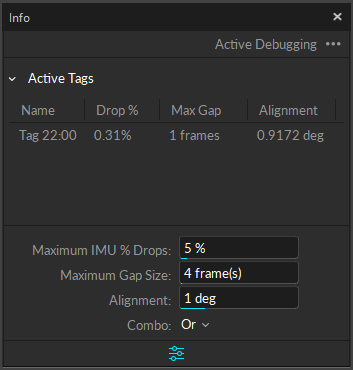
Active Debugging Info pane: within parameters.
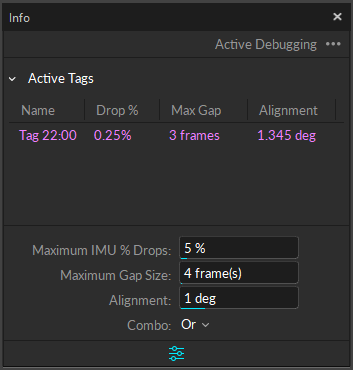
Active Debugging Info pane: outside parameters.
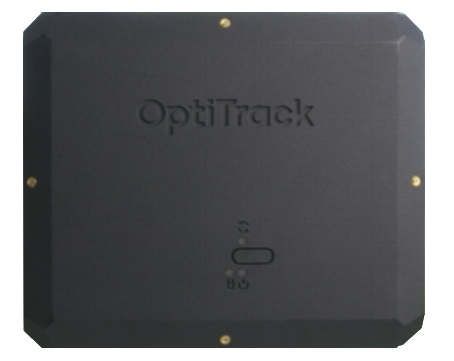
Wireless CinePuck, powered down.
| Color | Description | Troubleshooting |
|---|---|---|
Bottom Right: Orange | Powered ON and Booting | N/A |
| Top: Flashing Red/Green | Calculating bias. Please set on level surface. | N/A |
| Top: Fast flashing Green Bottom Right: Slow flashing Green | Bias has been successfully calculated and Puck is connected to BaseStation | N/A |
| Top: Solid Red then no light Bottom Right: Slow flashing Green | After powering on, the top light turns a solid red then turns off. This means that it is not paired to a BaseStation. The slow flashing Green indicates that it is still ON. | Please check your RF Channel on both devices to ensure they match. |
| Top: Solid Green then no light Bottom Right: Slow flashing Green | The puck is disconnected from the BaseStation WHILE powered ON. | Please check your BaseStation and ensure it is powered ON and receiving a signal from the network cable/switch. |
| Top: Fast Flashing Green Bottom Right: Orange | Battery power is below half. | Please connect device to power or let charge before continuing. |
| Bottom Right: Flashing Red | Battery is nearly depleted. | Please connect device to power or let charge before continuing. |
| Bottom Left: Red | Plugged in and charging. | N/A |