Info Pane
Last updated
Last updated
This page provides information on the Info pane, which can be accessed from the View tab or by clicking on the icon in the toolbar.
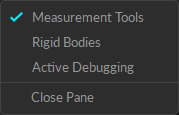
The Info pane can be used to check tracking in Motive. There are four different tools available from this pane: measurement tools, Rigid Body information, continuous calibration, and active debugging. You can switch between different types from the context menu. The measurement tool allows you to use a calibration wand to check detected wand length and the error when compared to the expected wand length.
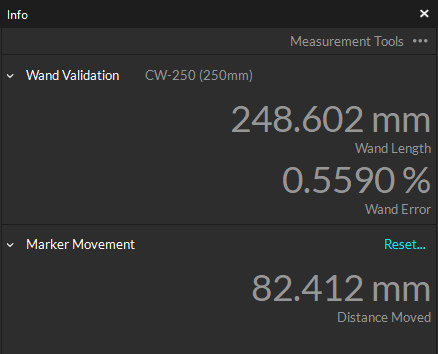
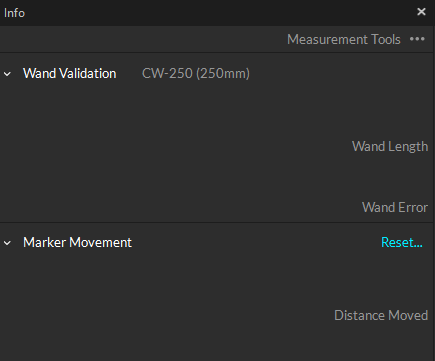
The Measurement Tool is used to check calibration quality and tracking accuracy of a given volume. There are two tools in this: the Wand Validation tool and the Marker Movement tool.
This tool works only with a fully calibrated capture volume and requires the calibration wand that was used during the process. It compares the length of the captured calibration wand to its known theoretical length and computes the percent error of the tracking volume. You can analyze the tracking accuracy from this.
In Live mode, open the Measurements pane under the Tools tab.
Access the Accuracy tools tab.
Under the Wand Measurement section, it will indicate the wand that was used for the volume calibration and its expected length (theoretical value) depending on the type of wand that was used during the system calibration.
Bring the calibration wand into the volume.
Once the wand is in the volume, detected wand length (observed value) and the calculated wand error will be displayed accordingly.
This tool calculates the measured displacement of a selected marker. You can use this tool to compare the calculated displacement in Motive against how much the marker has actually moved to check the tracking accuracy of the system.
Place a marker inside the capture volume.
Select the marker in Motive.
Under the Marker Measurement section, press Reset. This zeroes the position of the marker.
Slowly translate the marker, and the absolute displacement will be displayed in mm.
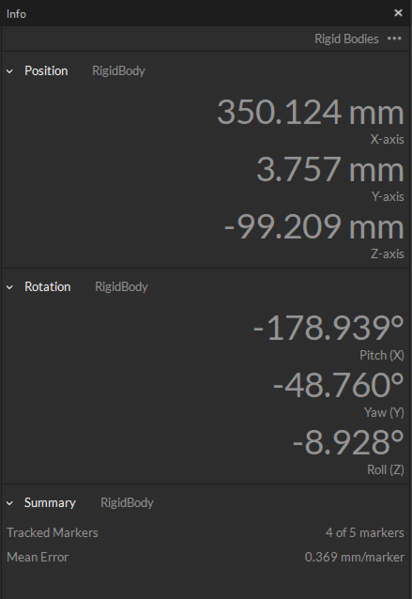
The Rigid Bodies tool under Info pane in Motive displays real-time tracking information of a Rigid Body selected in Motive. Reported data includes a total number of tracked Rigid Body markers, mean errors for each of them, and the 6 Degree of Freedom (position and orientation) tracking data for the Rigid Body.
Euler Angles
There are many potential combinations of Euler angles so it is important to understand the order in which rotations are applied, the handedness of the coordinate system, and the axis (positive or negative) that each rotation is applied about. The following conventions are used for representing Euler orientation in Motive:
Rotation order: XYZ
All coordinates are *right-handed*
Pitch is degrees about the X axis
Yaw is degrees about the Y axis
Roll is degrees about the Z axis
Position values are in millimeters
Continuous Calibration allows for the update of Calibrations in real-time. See the article Continuous Calibration (Info Pane) for details on using this tool.
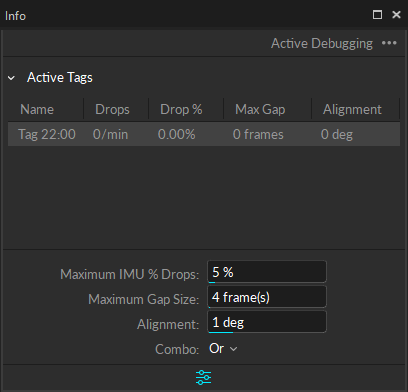
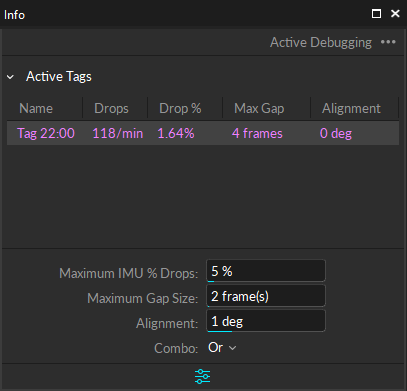
Active Debugging is a troubleshooting tool that shows the number of IMU data packets dropped along with the largest gap between IMU data packets being sent.
When either column exceeds the Maximum settings, the text will turn magenta depending on the logic setup in the Maximum settings at the bottom of the pane.
This column denotes the number of IMU packet drops that an IMU Tag is encountering over 60 frames.
Max Gap Size denotes the number of frames between IMU data packets sent where the IMU packets were dropped. i.e. in the image above on the left, the maximum gap is a 1 frame gap where IMU packets were either not sent or received. The image on the right has a gap of 288 frames where the IMU packets were either not sent or received.