Data Export
Various types of files, including the tracking data, can be exported out from Motive. This page provides information on what file formats can be exported from Motive and instructions on how to export them.
Tracking Data Export
Once captures have been recorded into Take files and the corresponding 3D data have been reconstructed, tracking data can be exported from Motive in various file formats.
Exporting Tracking Data
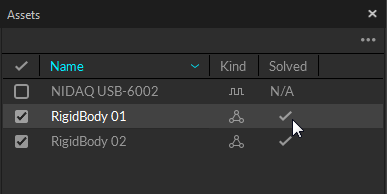
Reconstruction is required to export Marker data, Auto-label is required when exporting Markers labeled from Assets, and Solving is required prior to exporting Assets.
If the recorded Take includes Rigid Body or Skeleton trackable assets, make sure all of the Rigid Bodies and Skeletons are Solved prior to exporting. The solved data will contain positions and orientations of each Rigid Body and Skeleton. If changes have been made to either the Rigid Body or Skeleton, you will need to solve the assets again prior to exporting.
Please note that if you have Assets that are unsolved and just wish to export reconstructed Marker data, you can toggle off Rigid Body and Skeleton Bones from the Export window (see image below).
Export Settings
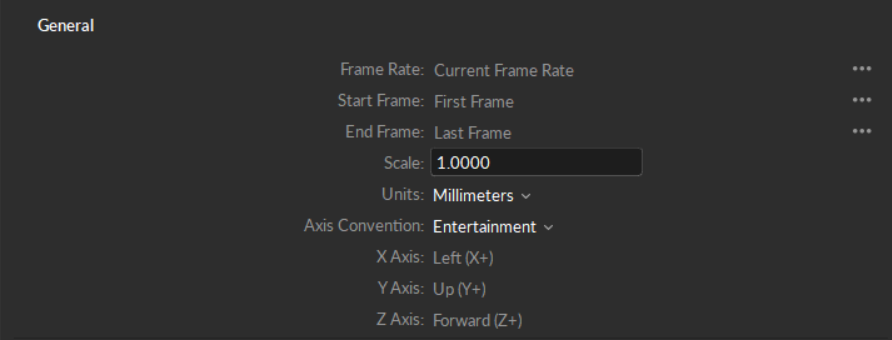
In the export dialog window, the frame rate, the measurement scale and type (meters, centimeters or millimeters), the Axis convention, and the frame range of exported data can be configured. Additional export settings are available for each export file formats. Read through below pages for details on export options for each file format:
Tracking Data Export Steps
Exporting a Single Take
Step 1. Open and select a Take to export from the Data pane. The selected Take must contain reconstructed 3D data.
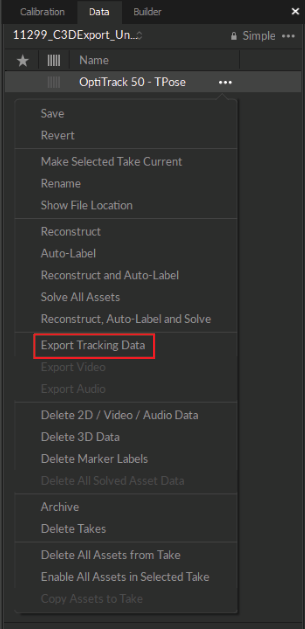
Step 2. Under the File tab on the command bar, click File → Export Tracking Data. This can also be done by right-clicking on a selected Take from the Data pane and clicking Export Tracking Data from the context menu.
Step 3. On the export dialogue window, select a file format and configure the corresponding export settings.
To export the entire frame range, set Start Frame and End Frame to Take First Frame and Take Last Frame.
To export a specific frame range, set Start Frame and End Frame to Start of Working Range and End of Working Range.
Step 4. Click Save.
Working Range:
The working range (also called the playback range) is both the view range and the playback range of a corresponding Take in Edit mode. Only within the working frame range will recorded tracking data be played back and shown on the graphs. This range can also be used to output specific frame ranges when exporting tracking data from Motive.
The working range can be set from the following places:
In the navigation bar of the Graph View pane, you can drag the handles on the scrubber to set the working range.
You can also use the navigation controls on the Graph View pane to zoom in or zoom out on the frame ranges to set the working range. See: Graph View pane page.
Start and end frames of a working range can also be set from the Control Deck when in the Edit mode.

Exporting Multiple Takes
Step 1. Under the Data pane, shift + select all the Takes that you wish to export.
Step 2. Right-click on the selected Takes and click Export Tracking Data from the context menu.
Step 3. An export dialogue window will display to batch export tracking data.
Step 4. Select the desired output format and configure the corresponding export settings.
Step 5. Select frame ranges to export under the Start Frame and the End Frame settings. You can either export entire frame ranges or specified frame ranges on all of the Takes. When exporting specific ranges, desired working ranges must be set for each respective Takes.
To export entire frame ranges, set Start Frame and End Frame to Take First Frame and Take Last Frame.
To export specific frame ranges, set Start Frame and End Frame to Start of Working Range and End of Working Range.
Step 6. Click Save.
Motive Batch Processor:
Exporting multiple Take files with specific options can also be done through a Motive Batch Processor script. For example, refer to the FBXExporterScript.cs script found in the MotiveBatchProcessor folder.
File Formats
Motive exports reconstructed 3D tracking data in various file formats and exported files can be imported into other pipelines to further utilize capture data. Available export formats include CSV, C3D, FBX, BVH, and TRC. Depending on which options are enabled, exported data may include reconstructed marker data, 6 Degrees of Freedom (6 DoF) Rigid Body data, or Skeleton data. The following chart shows what data types are available in different export formats:
Reconstructed 3D Marker Data
•
•
•
•
6 Degrees of Freedom Rigid Body Data
•
•
Skeleton Data
•
•
•
•
•
CSV and C3D exports are supported in both Motive Tracker and Motive Body licenses. FBX, BVH, and TRC exports are only supported in Motive Body.
Camera Calibration Export
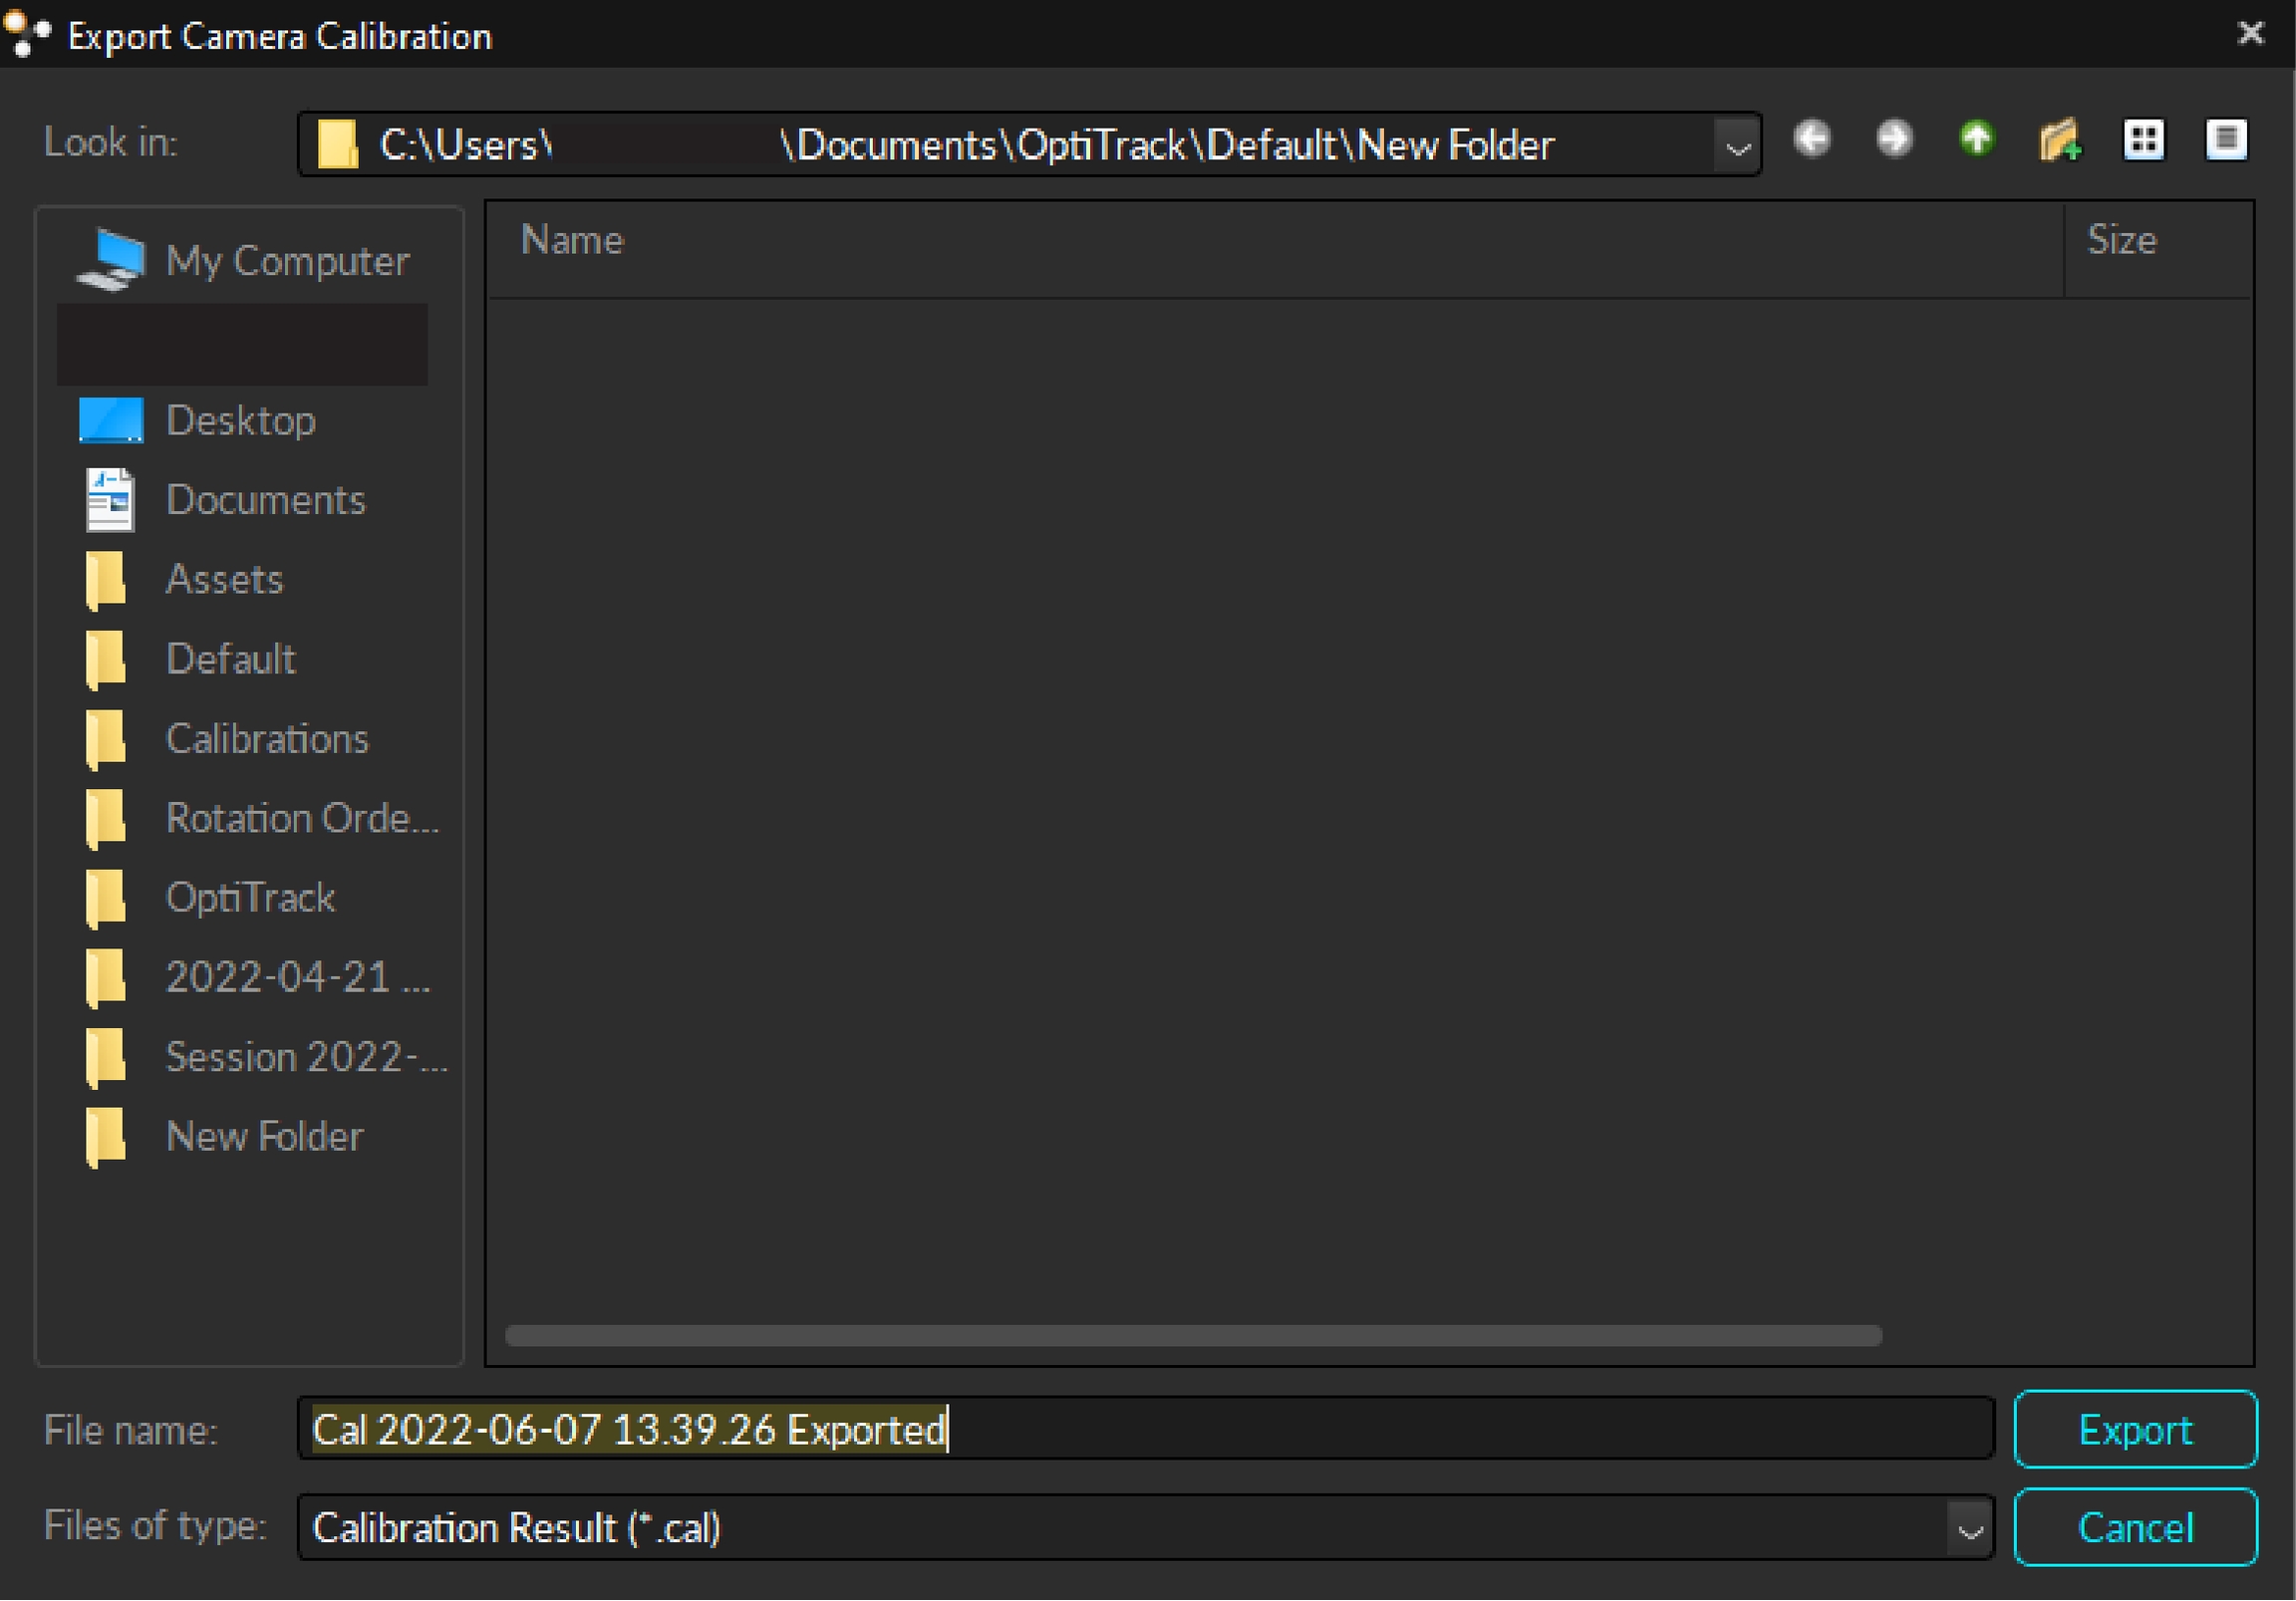
A calibration definition of a selected take can be exported from the Export Camera Calibration under the File tab. Exported calibration (CAL) files contain camera positions and orientations in 3D space, and they can be imported in different sessions to quickly load the calibration as long as the camera setup is maintained.
Read more about calibration files under the Calibration page.
Export Assets Definition
Assets can be exported into the Motive user profile (.MOTIVE) file if it needs to be re-imported. The user profile is a text-readable file that contains various configuration settings in Motive, including the asset definitions.
When an asset definition is exported to a MOTIVE user profile, it stores marker arrangements calibrated in each asset, and they can be imported into different takes without creating a new one in Motive. Note that these files specifically store the spatial relationship of each marker, and therefore, only the identical marker arrangements will be recognized and defined with the imported asset.
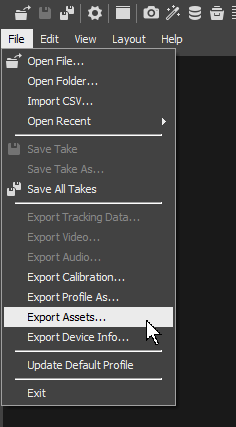
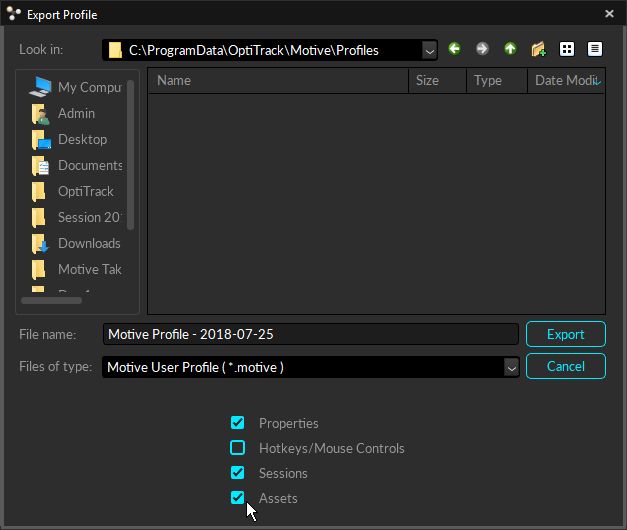
To export the assets, go to the File menu and select Export Assets to export all of the assets in the Live-mode or in the current TAK file(s). You can also use File → Export Profile to export other software settings including the assets.
Analog Data Export
Recorded NI-DAQ analog channel data can be exported into C3D and CSV files along with the mocap tracking data. Follow the tracking data export steps outlined above and any analog data that exists in the TAK will also be exported.
C3D Export: Both mocap data and the analog data will be exported onto a same C3D file. Please note that all of the analog data within the exported C3D files will be logged at the same sampling frequency. If any of the devices are captured at different rates, Motive will automatically resample all of the analog devices to match the sampling rate of the fastest device. More on C3D files: https://www.c3d.org/
CSV Export: When exporting tracking data into CSV, additional CSV files will be exported for each of the NI-DAQ devices in a Take. Each of the exported CSV files will contain basic properties and settings at its header, including device information and sample counts. The voltage amplitude of each analog channel will be listed. Also, mocap frame rate to device sampling ratio is included since analog data is usually sampled at higher sampling rates.
Common Axis Conventions
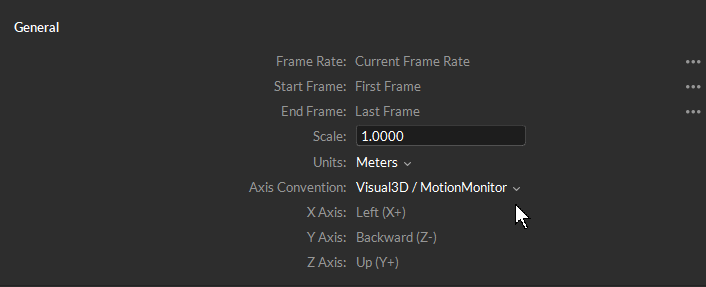
Motive uses a different coordinate system than the system used in common biomechanics applications. To update the coordinate system to match your 3D analysis software during export, select the appropriate Axis Convention from the Export window.
For CSV, BVH, TRC formats, select Entertainment, Measurement, or Custom
For C3D format, select Visual 3D/Motion Monitor, MotionBuilder, or Custom
FBX formats do not include the option to change the Axis Convention.
Custom Axis

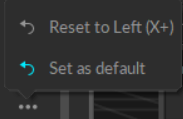
Select the Custom axis convention to open up the X/Y/Z axis for editing. This creates a drop-down menu next to each axis that allows you to change it.
Click the curved arrow to the right of the field to reset the axis to its previous value, or to make your selection the default option.
Reference Video Export
When there is an MJPEG reference camera or a color camera in a Take, its recorded video can be exported into an AVI file or into a sequence of JPEG files. The Export Video option is located under the File menu, or you can also right-click on a TAK file from the Data pane and export from there. Read more about recording reference videos on the Data Recording page.
Reference Video Type: Only compressed MJPEG reference videos or color camera videos can be recorded and exported from Motive. Export for raw grayscale videos is not supported.
Media Player: The exported videos may not be playable on Windows Media Player, please use a more robust media player (e.g. VLC) to play the exported video files.
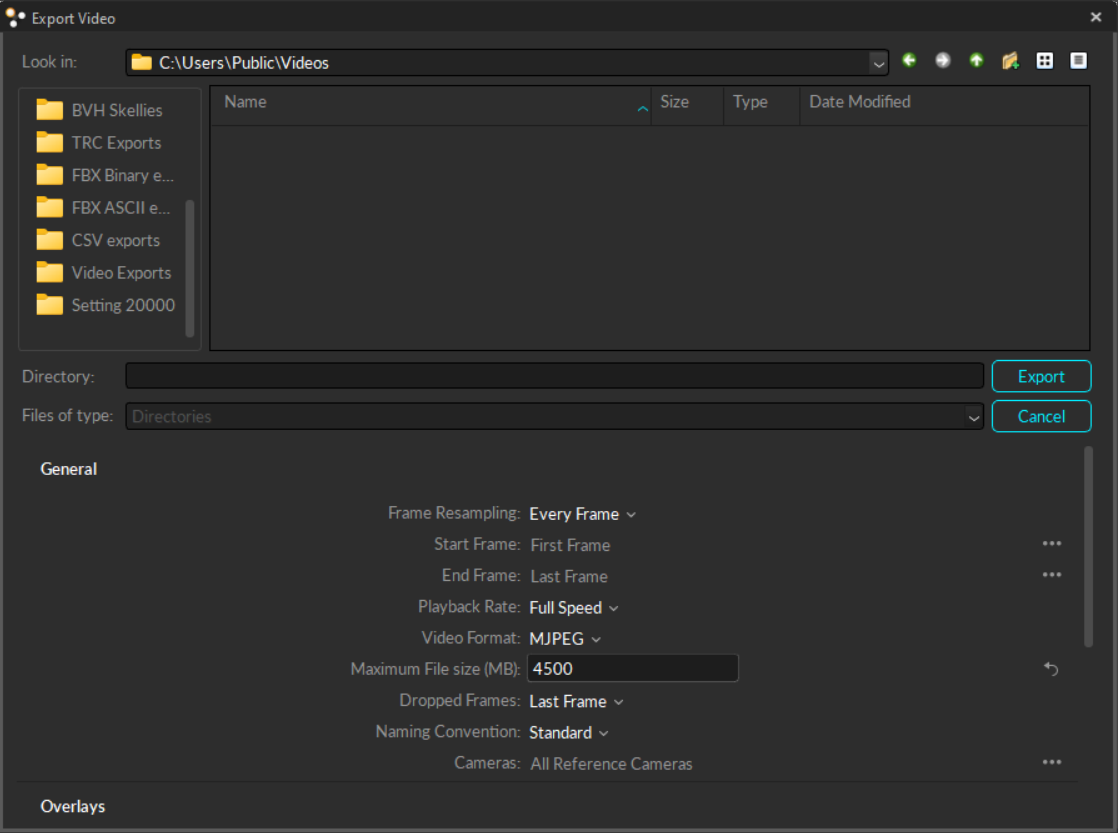
Video Export General Options
Frame Resampling
Adjusts the frame rate of the exported video from full (every frame) to half, quarter, 1/8 or 1/16 of the original.
Start Frame
Start frame of the exported data. You can set it to the recorded first frame of the exported Take (the default option), to the start of the working range (or scope range), as configured under the Control Deck or in the Graph View pane, or select Custom to enter a specific frame number.
End Frame
End frame of the exported data. You can set it to the recorded end frame of the exported Take (the default option), to the end of the working range (or scope range), as configured under the Control Deck of in the Graph View pane, or select Custom to enter a specific frame number.
Playback Rate
Sets the playback speed for the exported video. Options are Full Speed (default), half speed, quarter speed, and 1/8 speed.
Video Format
Reference videos can be exported into AVI files using either H.264 or MJPEG compression formats, or as individual JPEG files (JPEG sequence). The H.264 format will allow faster export of the recorded videos and is recommended.
Maximum File size (MB)
Sets the maximum size for video export files, in megabytes. Large videos will be separated into multiple files, which will not exceed the size value set here.
Dropped Frames
Determines how dropped frames will be handled in the video output. Last Frame (the default) will display the last good frame through the end of the video. Black Frame will replace each dropped frame with a black frame. Both of these options will preserve the original video length, whereas Drop Frame will truncate the video at the first dropped frame.
Naming Convention
Sets the naming convention for the video export. The Standard naming convention is Take_Name (Camera Serial Number) e.g., Skeleton_Walking (M21614). The Prefix Camera ID convention will include the number assigned to the camera in Motive at the beginning, followed by the Take name e.g., Cam_1_Skeleton_Walking. This latter option will also create a separate folder for each camera's AVI file.
Camera
Select the camera(s) for the video export: All reference cameras, or custom.
Video Export Overlay Options
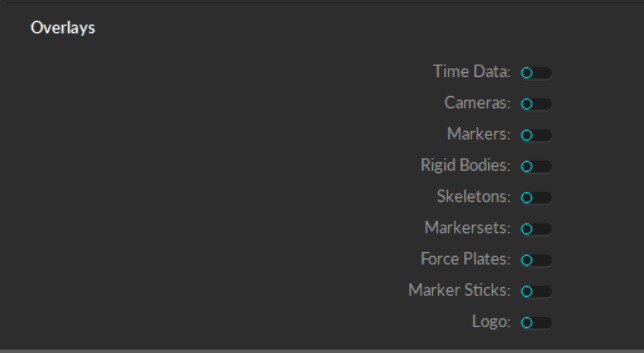
Overlay options add layers of information to the exported video.
Time Data
Includes the frame reference number in the bottom left corner.
Cameras
Labels all cameras visible in the reference video with the Motive-assigned number.
Markers
Displays markers using the color scheme assigned in Motive.
Rigid Bodies
Shows the Rigid Body bone and constraints for all solved Rigid Bodies in the take.
Skeletons
Displays bones for all solved skeletons.
Markersets
Displays bones for all solved trained markersets.
Force Plates
Displays force plate(s) used in the take.
Marker Sticks
Displays the marker sticks for all solved assets used in the take.
Logo
Adds the OptiTrack logo to the top right corner of the video.
Audio Export
When a recorded capture contains audio data, an audio file can be exported through the Export Audio option on the File menu or by right-clicking on a Take from the Data pane.
Export Skeleton Marker Labels
Skeletal marker labels for Skeleton assets can be exported as XML files (example shown below) from the Data pane. The XML files can be imported again to use the stored marker labels when creating new Skeletons.
For more information on Skeleton XML files, read through the Skeleton Tracking page.
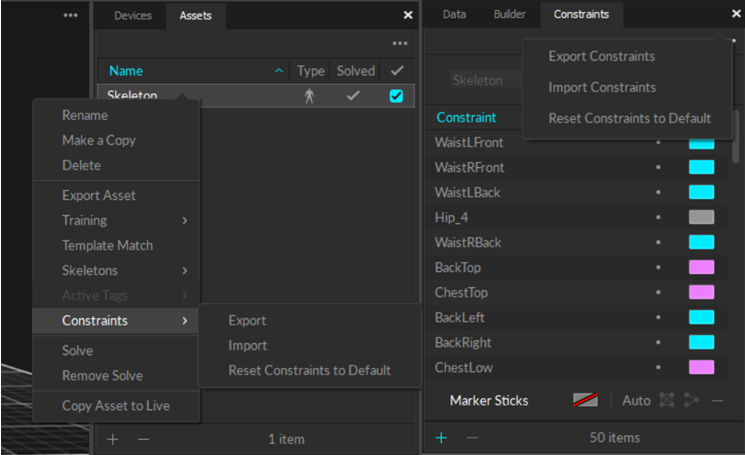
Sample Skeleton Label XML File
Export Device Info
Cameras and other devices can now be exported to a CSV file. From the File menu, select Export Device Info...
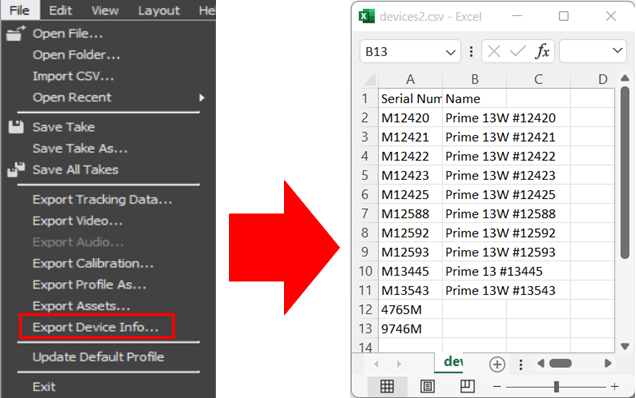
The CSV file includes the device serial number and name.
For Cameras, the name is pre-defined and includes the camera model and serial number.
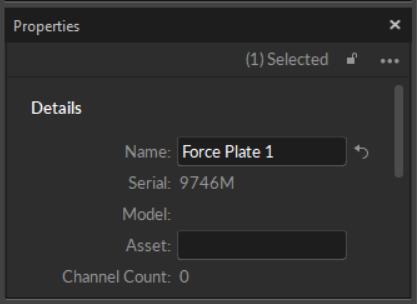
For all other devices, Motive will export the product serial number along with the name assigned in the device's properties. If no name is entered, the field will be left blank.
Was this helpful?

