Reconstruction and 2D Mode
An in-depth explanation of the reconstruction process and settings that affect how 3D tracking data is obtained in Motive.
Was this helpful?
An in-depth explanation of the reconstruction process and settings that affect how 3D tracking data is obtained in Motive.
Was this helpful?
Reconstruction is the process of deriving 3D points from 2D coordinates obtained by captured camera images. When multiple synchronized images are captured, the 2D centroid locations of detected marker reflections are triangulated on each captured frame and processed through the solver pipeline to be tracked. This involves the trajectorization of detected 3D markers within the calibrated capture volume and the booting process for the tracking of defined assets.
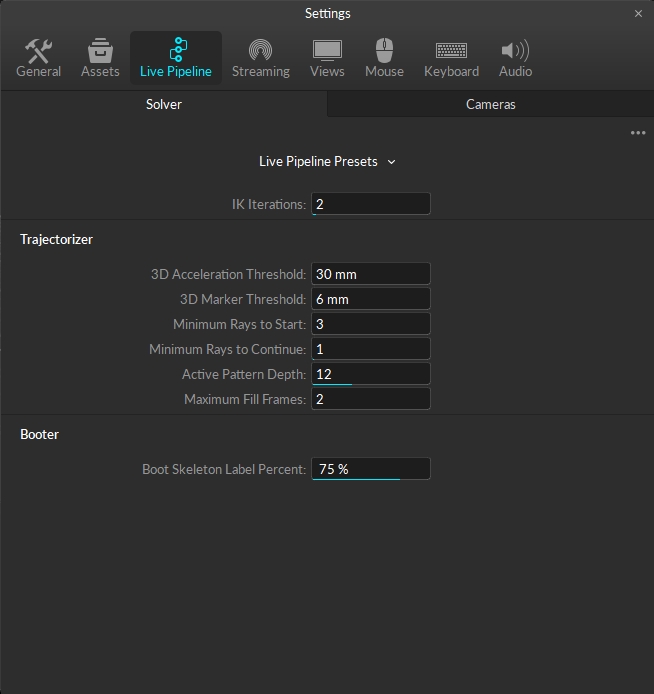
For real-time tracking in Live mode, settings are configured under the Live-Pipeline tab in the Application Settings. Click the icon on the main toolbar to open the Settings panel.
When post-processing recorded Takes in Edit mode, the solver settings are found under the corresponding Take properties.
The optimal configuration may vary depending on the capture application and environmental conditions. For most common applications, the default settings should work well.
In this page, we will focus on:
Key system-wide settings that directly impact the reconstruction outcome under the Live Pipeline settings;
Camera Settings that apply to individual cameras;
Visual Aids related to reconstruction and tracking;
the Real-Time Solve process; and
Post-production Reconstruction.
When a camera system captures multiple synchronized 2D frames, the images are processed through two filters before they are reconstructed into 3D tracking: first through the camera hardware then through a software filter. Both filters are important in determining which 2D reflections are identified as marker reflections and reconstructed into 3D data.
The Live Pipeline settings control tracking quality in Motive. Adjust these settings to optimize the 3D data acquisition in both live-reconstruction and post-processing reconstruction of capture data.
Motive processes markers rays based on the camera system calibration to reconstruct the respective markers. The solver settings determine how 2D data is trajectorized and solved into 3D data for tracking Rigid Bodies, Trained Markersets, and/or Skeletons. The solver combines marker ray tracking with pre-defined asset definitions to provide high-quality tracking.
The default solver settings work for most tracking applications. Users should not need to modify these settings.
These settings establish the minimum number of tracked marker rays required for a 3D point to be reconstructed (to Start) or to continue being tracked (to Continue) in the Take. In other words, this is the minimum number of calibrated cameras that need to see the marker for it to be tracked.
Increasing the Minimum Rays value may prevent extraneous reconstructions. Decreasing it may prevent marker occlusions from occurring in areas with limited camera coverage.
In general, we recommend modifying these settings only for systems with either a high or very low camera count.
Additional Settings
There are other reconstruction settings on the Solver tab that affect the acquisition of 3D data. For a detailed description of each setting, please see the Application Settings: Live Pipeline page.
The 2D camera filter is applied by the camera each time it captures a frame of an image. This filter examines the sizes and shapes of the detected reflections (IR illuminations) to determine which reflections are markers.
Camera filter settings apply to Live tracking only as the filter is applied at the hardware level when the 2D frames are captured. Modifying these settings will not affect a recorded Take as the 2D data has already been filtered and saved.
These values can be modified in a recorded Take and the 3D data reconstructed during post-processing. See the section Post-Processing Reconstruction for more information.
Minimum / Maximum Pixel Threshold
The Minimum and Maximum Pixel Threshold settings determines the lower and upper boundaries of the size filter. Only reflections with pixel counts within the range of these thresholds are recognized as marker reflections, and reflections outside the range are filtered out.
For common applications, the default range should suffice. In a close-up capture application, marker reflections appear bigger on the camera's view. In this case, you may need to adjust the maximum threshold value to allow reflections with more thresholded pixels to be considered as marker reflections.
The camera looks for circles when determining if a given reflection is a marker, as markers are generally spheres attached to an object. When captured at an angle, a circular object may appear distorted and less round than it actually is.
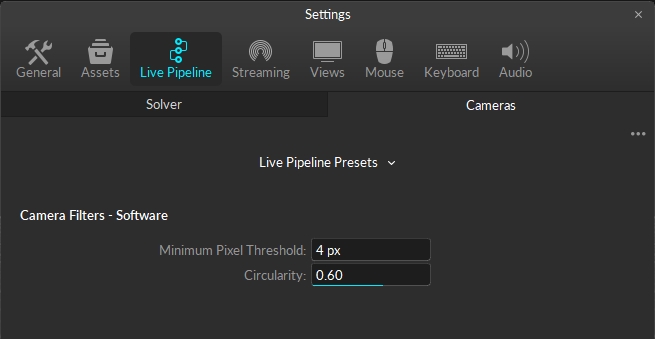
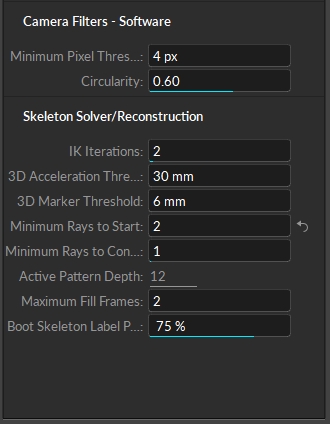
The Circularity value establishes the degree (as a percentage) to which a reflection can vary from circular for the camera to recognize it as a marker. Only reflections with circularity values greater than the defined threshold will be identified as marker reflections.
The valid range is between 0 and 1, with 0 being completely flat and 1 being perfectly round. The default value of .60 requires a reflection to be at least 60% circular to identify it as a marker.
The default value is sufficient for most capture applications. This setting may require adjustment when tracking assets with alternative markers (such as reflective tape) or whose shape and/or movement creates distortion in the capture.
In general, the overall quality of 3D reconstructions is determined by the quality of the captured camera images.
Ensure the cameras are focused on the tracking volume and markers are clearly visible in each camera view.
Adjust the F-Stop on the camera if necessary.
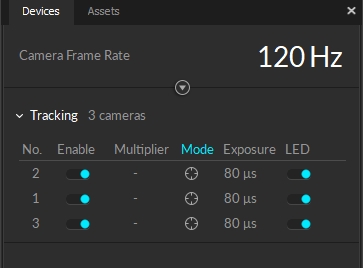
Camera settings are configured under the Devices pane or under the Properties pane when one or more camera is selected. The following section highlights settings directly related to 3D reconstruction.
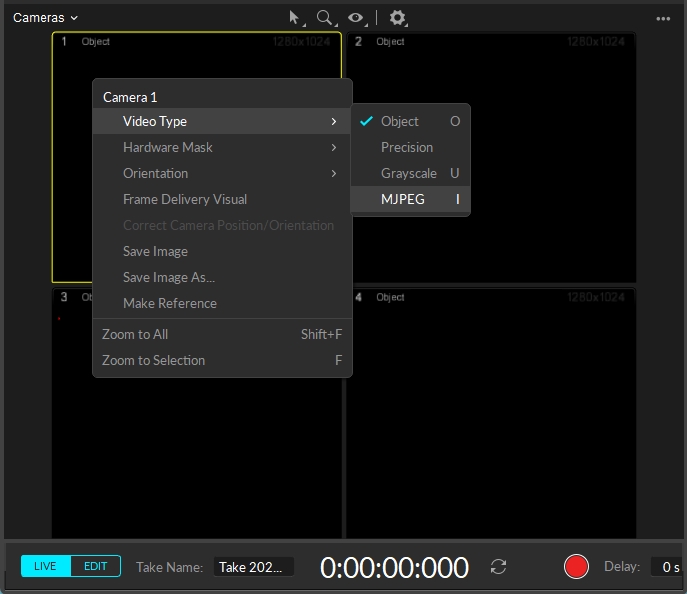
Tracking mode vs. Reference mode: Only cameras recording in tracking mode (Object or Precision) contribute to reconstructions; Cameras in reference mode (MJPEG or Grayscale) do NOT contribute. For more information, please see the Camera Video Types page.
There are three methods to switch between camera video types:
Click the icon under Mode for the desired camera in the Devices pane until the desired mode is selected.
Right-click the camera in the Cameras view of the viewport and select Video Type, then select the desired mode from the list.
Select the camera and use the O, U, or I hotkeys to switch to Object, Grayscale, or MJPEG modes, respectively.
Object mode vs. Precision Mode
Object Mode and Precision Mode deliver slightly different data to the host PC:
In object mode, cameras capture 2D centroid location, size, and roundness of markers and transmit that data to the host PC.
In precision mode, cameras send the pixel data from the capture region to the host PC where additional processing to determine the centroid location, size, and roundness of the reflections takes place .
The Threshold value determines the minimum brightness level required for a pixel to be tracked in Motive, when the camera is in tracking mode.
Pixels with a brightness value that exceeds the configured threshold are referred to as thresholded pixels and only they are captured and processed in Motive. All other pixels that do not meet the brightness threshold are filtered out. Additionally, clusters of thresholded pixels are filtered through the 2D Object Filter to determine if any are possible marker reflections.
The Threshold setting is located in the camera properties.
We do not recommend lowering the threshold below the default value of 200 as this can introduce noise and false reconstructions in the data.
The Viewport has an array of Visual Aids for both the 3D Perspective and Cameras Views. This next section focuses on Visual Aids that display data relevant to reconstruction.
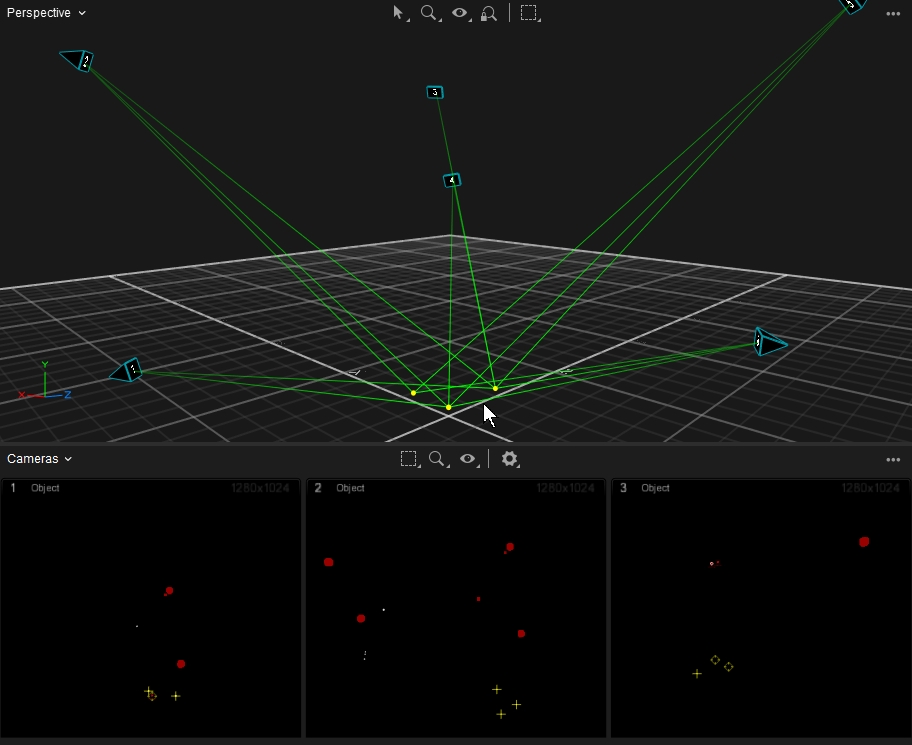
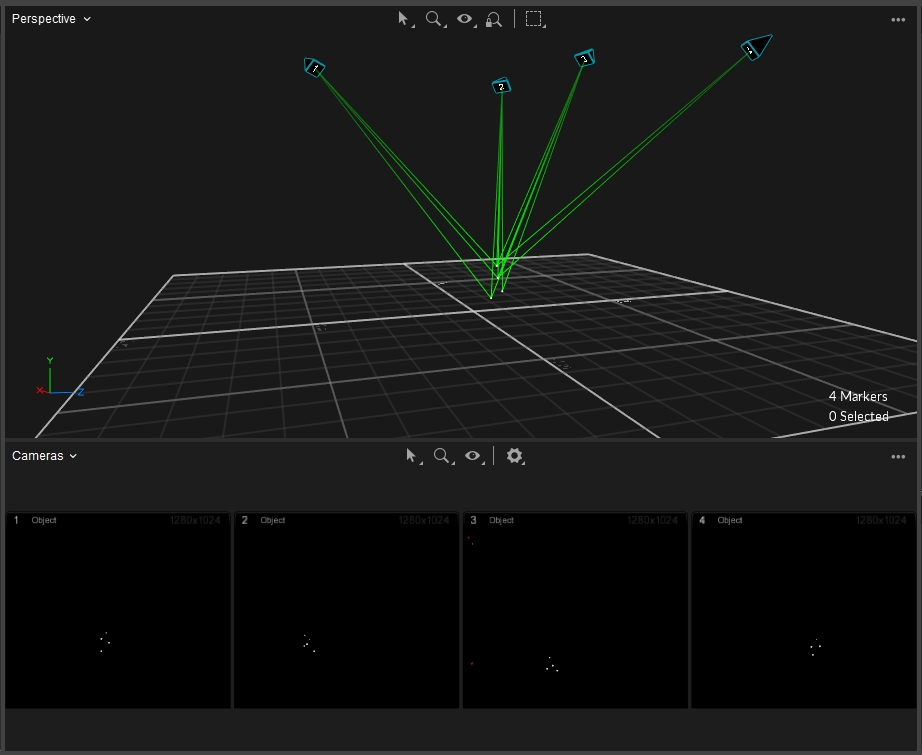
After the 2D camera filter has been applied, each 2D centroid captured by a camera forms a 3D vector ray, known as a Marker Ray in Motive. The Marker Ray connects the centroid to the 3D coordinates of the camera. Marker rays are critical to reconstruction and trajectorization.
Trajectorization is the process of using 2D data to calculate 3D marker trajectories in Motive. When the minimum required number of rays (as defined in the Minimum Rays setting) converge and intersect within the allowable maximum offset distance, trajectorization of the 3D marker occurs. The maximum offset distance is defined by the 3D Marker Threshold setting on the Solver tab of the Live Pipeline settings.
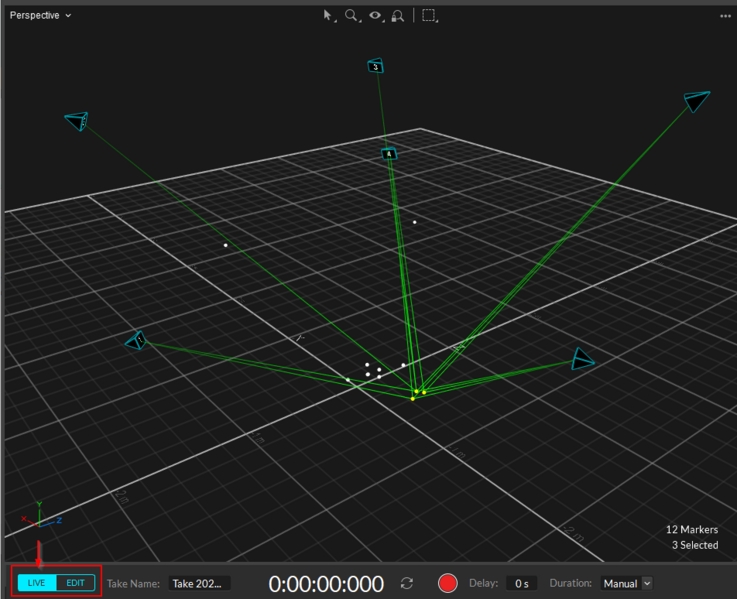
Monitoring marker rays using the Visual Aids in the 3D Viewport is an efficient way of inspecting reconstruction outcomes by showing which cameras are contributing to the reconstruction of a selected marker.
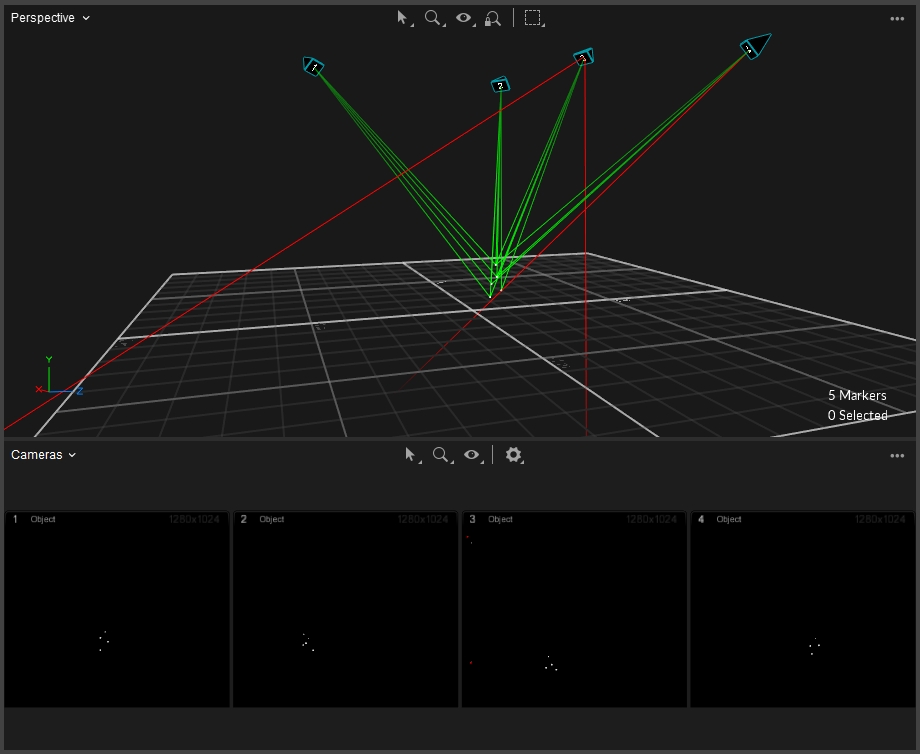
There are two different types of marker rays in Motive: tracked rays and untracked rays.
Tracked rays are marker rays that contribute to 3D reconstructions within the volume.
There are three Visual options for tracked rays:
Show Selected: Only the rays that contribute to the reconstruction of the selected marker(s) are visible, all others are hidden. If nothing is selected, no rays are shown.
Show All: All tracked rays are displayed, regardless of the selection.
Hide All: No rays are visible.
Untracked Ray (Red)
An untracked ray does not contribute to the reconstruction of a 3D point. Untracked rays occurs when reconstruction requirements, such as the minimum ray count or the max residuals, are not met.
Untracked rays can occur from errant reflections in the volume or from areas with insufficient camera coverage.
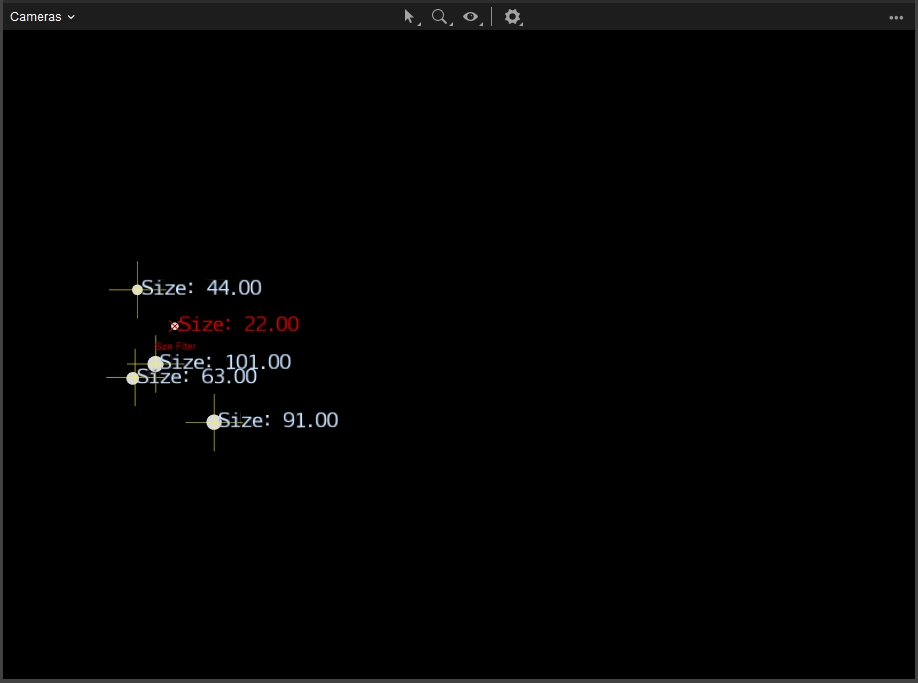
Click the Visual Aids button in the Cameras View to select the Marker Size visual. This will add a label to each centroid that shows the size, in pixels, and indicates whether it falls inside or outside the boundaries of the size filter (too small or too large).
Markers that are within the minimum and maximum pixel threshold are marked with a yellow crosshair at the center. The size label is shown in White.
Markers that are outside the boundaries of the size filter are shown with a small red X and the text Size Filter. The label is red.
Only markers that are close to the size boundaries but not within them will display in the Camera view in red. Markers with a significant size variance from the limits will be filtered out of the Camera view.
Circularity
As noted above, the Camera Software Filter also identifies marker reflections based on their shape, specifically, the roundness. The filter assumes all marker reflections have circular shapes and filters out all non-circular reflections detected.
The allowable circularity value is defined under the Circularity setting on the Cameras tab of the Live Pipeline settings in the Applications Setting panel.
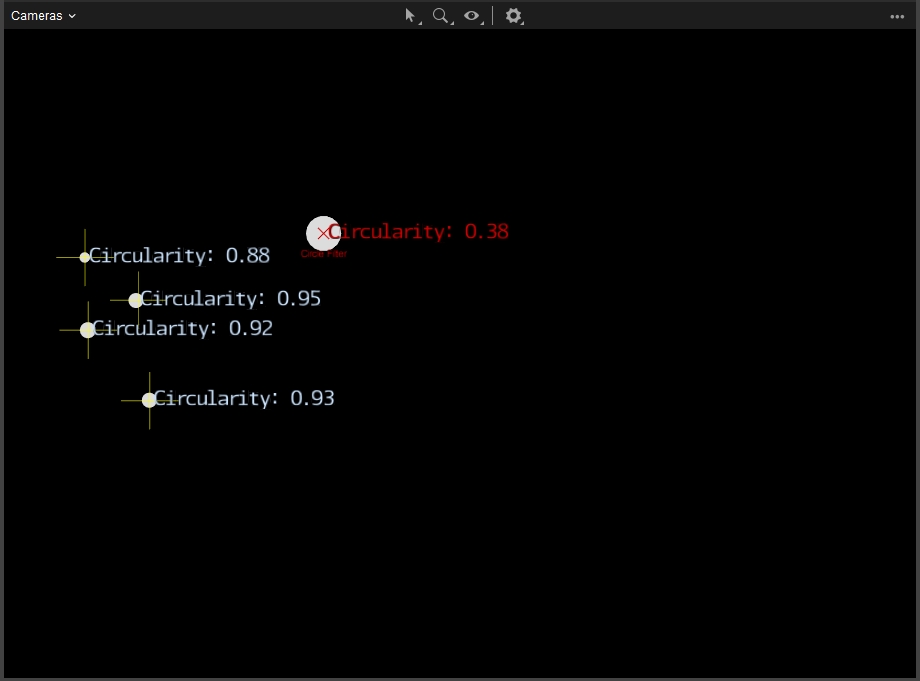
Click the Visual Aids button in the Cameras View to select the Circularity visual.
Markers that exceed the Circularity threshold are marked with a yellow crosshair at the center. The Circularity label is shown in White.
Markers that are below the Circularity threshold are shown with a small red X and the text Circle Filter. The label is red.
Technically a mouse tool rather than a visual aid, the Pixel Inspector displays the x, y coordinates and, when in reference mode, the brightness value for individual pixels in the 2D camera view.
Drag the mouse to select a region in the 2D view for the selected camera, zooming in until the data is visible. Move the mouse over the region to display the values for the pixel directly below the cursor and the eight pixels surrounding it. Average values for each column and row are displayed at the top and bottom of the selected range.
If the Brightness values display 0 for illuminated pixels, it means the camera is in tracking mode. Change the video mode to Grayscale or MJPEG to display the brightness.
Motive performs real-time reconstruction of 3D coordinates from 2D data in:
Live mode (using live 2D data capture)
2D Edit mode (using recorded 2D data)
When Motive is processing in real-time, you can examine the marker rays and other visuals from the viewport, review and modify the Live-Pipeline settings, and otherwise optimize the 3D data acquisition.
In Live mode, Any changes to the Live Pipeline settings (on either Solver or Camera tabs) are reflected immediately in the Live capture.
When a capture is recorded in Motive, both 2D camera data and reconstructed 3D data are saved into the Take file. By default, the 3D data is loaded when the recorded Take file is opened.
Recorded 3D data contains the 3D coordinates that were live-reconstructed at the moment of capture and is independent of the 2D data once it's recorded. However, You can still view and edit the recorded 2D data to optimize the solver parameters and reconstruct a fresh set of 3D data from it.
2D Edit Mode is used in the post-processing of a captured Take. Playback in Edit 2D performs a live reconstruction of the 3D data, immediately reflecting changes made to settings or assets. These changes are not applied to the recording until the Take is reprocessed and saved.
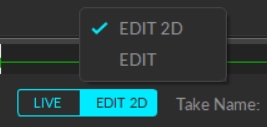
Click the Edit button in the Control Deck and select EDIT 2D from the list.
Changes made to the Solver or Camera filter configurations in the Live Pipeline settings do not affect the recorded data. Instead, these values are adjusted in a recorded Take from the Take Properties.
Select the Take in the Data pane to display the Camera Filter values and Solver properties that were in effect when the recording was made. These values can be adjusted and the 3D data reconstructed as part of the post-processing workflow.
Once the reconstruction/solver settings are optimized for the recorded data, it's time to perform the post-processing reconstruction pipeline on the Take to reconstruct a new set of 3D data.
This step overwrites the existing 3D data and discards all of the post-processing edits completed on that data, including edits to the marker labels and trajectories.
Additionally, recorded Skeleton marker labels, which were intact during the live capture, may be discarded, and the reconstructed markers may not be auto-labeled correctly again if the Skeletons are never in well-trackable poses during the captured Take. This is another reason to always start a capture with a good calibration pose (e.g., a T-pose).
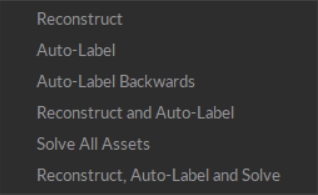
Right-click the take in the Data Pane to open the menu. post-processing options are in the third section from the top.
There are three options to Reconstruct 3D data:
Reconstruct: Creates a new 3D data set.
Reconstruct and Auto-Label: Creates a new 3D data set and auto-labels markers in the Take based on existing asset definitions. To learn more about the auto-labeling process, please see the Labeling page.
Reconstruct, Auto-Label and Solve: Creates a new 3D data set, auto-labels and solves all assets in the Take. When an asset is solved, Motive stores the tracking data for the asset in the Take then reads from that Solved data to recreate and track the asset in the scene.
Post-processing reconstruction can be performed on the entire frame range in a Take or applied to a specified frame range by selecting the range under the Control Deck or in the Graph pane. When nothing is selected, reconstruction is applied to all frames.
Multiple Takes can be selected and processed together by holding the shift key while clicking the Takes in the Data pane. When multiple takes are selected, the reconstruction will apply to the entire frame range of every Takes in the selection .
To open the Applications Settings panel, click the button on the main toolbar to open. Click the Live Pipeline settings, which contains two tabs: Solver and Cameras.
Maximum Pixel Threshold is an advanced setting. Click the button in the upper right corner of the Cameras tab and select Show Advanced to access this setting.
To select a Visual Aid from either view, click the button on the pane's toolbar.
To enable, click the button in the Cameras View to open the Mouse Actions menu and select Pixel Inspector.
Alternately, you can click the button in the top right corner of the Data pane to select 2D Mode.
To see additional settings not shown here, click the button in the top right corner of the pane and select Show Advanced.
