Was this helpful?
Was this helpful?
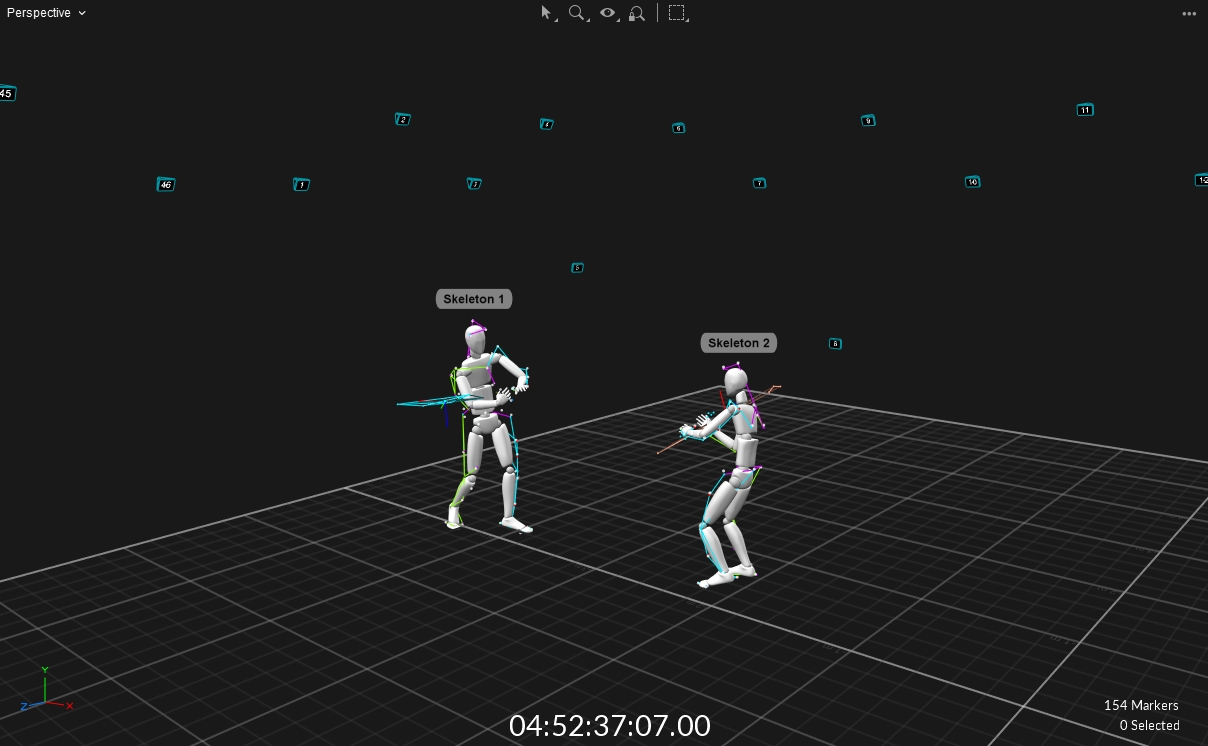
When using Motive, the main Viewport will always be docked in the center. The Viewport can be divided into two, three, or four panes. If desired, additional Viewer panes can be opened by clicking the icon on the main toolbar.
The following actions are useful for when navigating using the viewport. All of the mouse actions and keyboard hotkeys can be customized in the panel.
To set the floor plane to match the volume size, go to Settings --> View --> 3D Tab --> and adjust the Grid Width and Grid Length values.
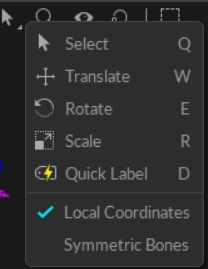
Translate: manually adjust the location of Rigid Body pivot points and Skeleton bones with the translate tool. In recorded data, you can also select a group of reconstructed 3D markers in the scene and apply translation along the global x-y-z axis. When the change is made to a Skeleton, the segment hierarchy will be modified and reflected on exported Skeleton bone data but the marker locations will remain the same.
Rotate: This tool rotates the orientation of Rigid Body pivot points and Skeleton bones.
Local Coordinates: When enabled, translation, rotation, and scaling changes will be applied with respect to the local coordinate axis of the selected asset. When disabled, all changes will be applied to the global coordinate axis.
Symmetric Bones: When enabled, any modifications on bone lengths and orientations are applied symmetrically on both the left and right side of a Skeleton.
Actions for zooming in to a selected object or zooming out to fit all. You can also use "F" and "Shift + F" hotkeys for this.
Opens a menu to enable or disable visuals in the perspective viewport. From this menu, you can show or hide markers, marker labels, Rigid Bodies, Skeletons, tracked rays, and more.
Visible
Select what to show in the 3D Viewport.
Markers:
Show: Display all markers.
Hide for Disabled Assets: Hide markers for assets that are not selected in the Asset pane.
Hide all: do not display any markers.
Cameras: Display all visible cameras.
Rigid Bodies: Display the marker sticks, constraints, and bones of rigid bodies.
Marker Constraints: Constraints are the calculated marker positions for assets.
Current Properties: Constraints will be displayed only if the option to display them is selected in the properties for the selected asset.
Show All: Display all constraints regardless of the setting in the asset properties.
Hide All: Hide all constraints regardless of the setting in the asset properties. Markers will still be visible.
Skeletons:
Current Properties: Skeletons will display with the visual aid set in the properties for the selected asset. Options are Segment, Avatar (by gender), or none.
Bones Only: Display all skeletons as bone segments regardless of the setting in the asset properties.
Segments Only: Display all skeletons as geometric segments regardless of their individual properties.
Avatars Only: Display skeletons as avatars regardless of their individual properties.
Hide All: Hide all skeletons. Skeleton markers will still be visible.
Marker
Labels: Show marker labels for selected markers. Marker labels include the name of the asset unless Simplify Labels is turned on.
Simplify Labels: Show the marker label for selected markers without including the asset name in the label.
Info: Show marker x/y/z coordinates and the diameter of the marker.
Active IDs: Adds the Active ID number to the marker label. Marker labels must be turned on to see this information.
Color: When checked, each marker will display with the color shown on the constraints tab. When unchecked, markers will display as white.
History: Show marker trajectory history. Includes a trail for selected markers in playback.
Distance: Show marker distance information when two markers are selected.
Angle: Show angle information when three markers are selected.
Rays
Tracked Rays: Tracked rays are the marker centroid rays from each camera that contribute to the 3D reconstructions.
Untracked Rays: Untracked Rays are the marker centroid rays that do not contribute to the 3D reconstructions because the reconstruction requirements, usually the ray count, are not met.
Heads Up Display
Marker Count: Show total and selected marker counts at the bottom right corner.
Coordinate Axis: Show the global coordinate axis at the bottom left corner.
Other
Capture Volume: Display a 3D grid to show where 3 or more cameras converge in the volume.
Constraint Graph: Display an overlay of marker sticks connecting the constraints of an asset.
Floor Plane: Display the floor plane of the volume in light gray.
Shadow: Add a projected shadow graphic to the floor pane for objects in the take. The Floor Plane visual must be on to see shadows.
This tool locks the focus on the selected object(s), moving the viewport to follow the selection throughout the capture.
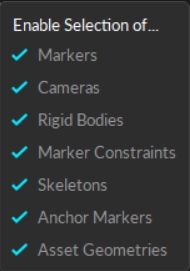
Enables selection of specific objects in the 3D view. Only the items checked in the menu will be selectable in the perspective view.
Right-click an asset, marker, or camera in the Perspective Viewport to open a context menu specific to the selection. The menu displays the number of objects (markers, rigid bodies, etc.) that will be affected by any changes made.
Motive will stack the context menus if multiple object types are selected.
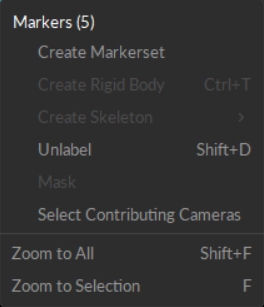
The following context menus appear when 3D reconstructed markers are selected.
Unlabel: remove the assigned labels to the selected markers.
Mask: mask the selection so it is no longer detected.
Select Contributing Cameras: Selects all the cameras in both the 3D Viewport and the Cameras Viewport that contribute to the 3D reconstruction of the marker location.
Zoom to All: Quickly zoom out to fit everything into the view.
Zoom to Selection: Quickly zoom to the selected objects.
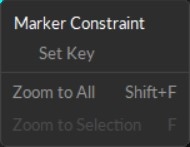
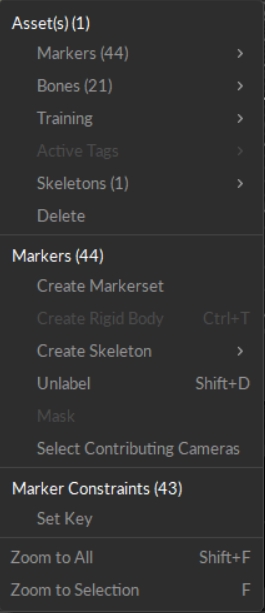
The following context menus appear when marker constraints are selected.
Set Key: Align the marker with its constraint.
Zoom to All: Quickly zoom out to fit everything into the view.
Zoom to Selection: Quickly zoom to the selected objects.
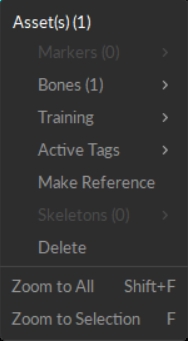
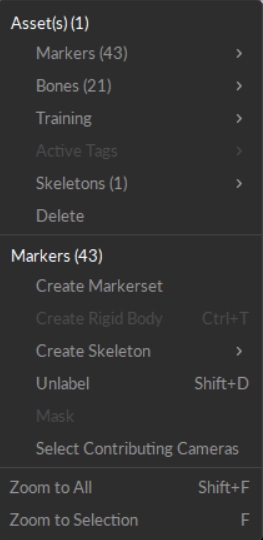
The following context menus appear when an asset (skeleton, rigid body, or trained markerset) is selected. If markers are also selected, the Markers context menu is included. If marker constraints are selected, the Marker Constraints menu is included.
Markers: When markers are selected along with an asset, the Markers menu option will be available, along with the number of markers selected. Click this to access Marker options:
Add Constraint: Add the selected marker(s) to the asset.
Remove Constraint: Remove the selected constraint(s) from the asset.
Set Bone Position: Align the bone or pivot point of the asset with the selected marker. If multiple markers are selected, align to the marker selected last.
Bones: In Motive, a Bone is a virtual structure that connects two joints and represents a segment of a virtual skeleton or Trained Markerset or the pivot point of a rigid body.
Add from Marker(s): Create a new bone segment from the selected markers.
Remove: Delete the selected bone(s).
Add Bone Chain: Add a bone chain between two selected bones. Whichever bone is selected first becomes the parent bone, the second becomes the child bone.
Unparent Bone(s): Unparent the selected bone or bones. This removes the bone chain between the bones.
Reroot Bones: Reroot the selected child bone and make it the parent in the bone chain.
Align to Camera: Align the bone or pivot point of a rigid body to the selected camera. Camera must be selected in the 3D viewport.
Align to Other Bone: Align the bone or pivot point of a rigid body to another. The asset to be aligned must be unsolved; right-click the asset in the Assets Pane and select Remove Solve if necessary. Select the bone or rigid body to be aligned first, and the alignment bone or rigid body last.
Reset Location: Restore the bone to its original location.
Auto-Generate Asset: Add marker training and Auto-Generate Marker Sticks. This function only needs to be performed once after a Markerset has been created.
Add Marker Training: Add a learned model of the Markerset.
Remove Marker Training: Remove all marker training previously applied.
Auto-Generate Bones: Automatically generate bones at flex points. This is why recording a full range of motion of your object is important so these bones can be added correctly.
Refine Bone Positions: Apply another round of Marker Training and refine Bone positions based on new training information.
Refine Constraint Positions: Apply another round of Marker Training and refine Constraint positions based on new training information.
Auto Configure Active Tags: Pair and align the Rigid Body to the IMU Tag all in one step.
Set Auto Pair: The Rigid Body will search for an IMU pair. Once paired, this will be indicated in the 3D Viewport IMU visual as 'IMU Paired', the Devices pane Active Tag 'Paired Asset' column, and in the Assets pane's 'Active Tag' column.
Unpair Active Tag: Remove a paired Tag from the Rigid Body.
Align: Manually align the Tag to the Rigid Body after they are paired.
Remove Alignment: Remove alignment from the Rigid Body while still paired to the IMU.
Orient Pivot to IMU: Set the Pivot orientation of the Rigid Body to reflect the orientation of the (internal) IMU.)
Make Reference: Set the 3D Viewport to the perspective of the selected Asset.
Skeletons:
Recalibrate from Selection: Update the skeleton's calibration based on the current positions of the selected markers, using the same skeleton template.
Remove Calibration Markers: Remove markers from the skeleton calibration.
Delete: Delete the selected asset(s).
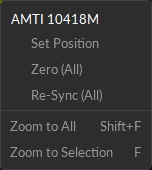
The following context menu appears when a force plate is selected.
Zero (all): Zero, or tare, all selected force plates.
Re-Sync (all): For triggered synchronization protocols, (e.g. force plates that sync using the record trigger), this feature re-synchronizes force plates within the camera system. This will remove any sync offsets that may have increased gradually since the trigger.
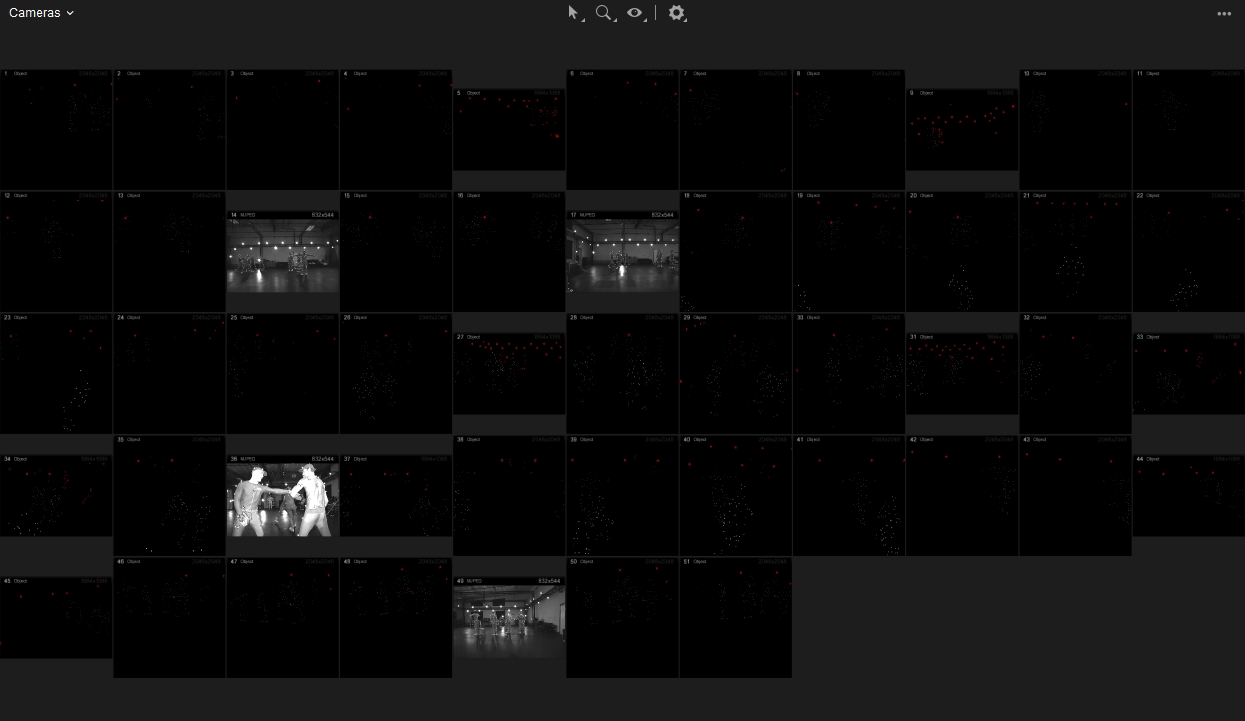
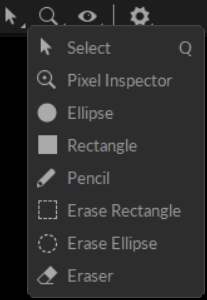
From this icon, you can switch between different mouse interaction modes in the camera viewport. This allows you to select objects, inspect pixels, and add or remove masks from the camera view.
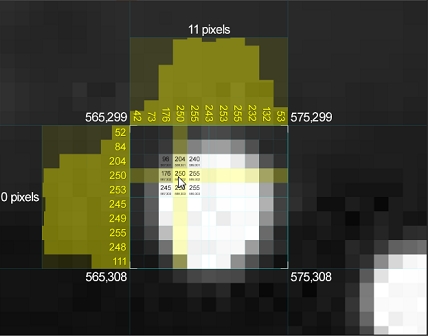
In pixel inspection mode, the camera viewport displays the X,Y coordinates of the cursor location, and pixel brightness for selected pixels when a region is drag-selected. Inspecting pixel brightness can be useful during camera focusing, tuning, and aiming.
To mask an area not previously masked, select Ellipse, Rectangle, or Pencil. When using Ellipse or Rectangle, click and drag to select the area to be masked. Pencil mode creates a fine line following the cursor movement.
To unmask a previously masked area, use the Erase Rectangle, Erase Ellipse, or Eraser functions.
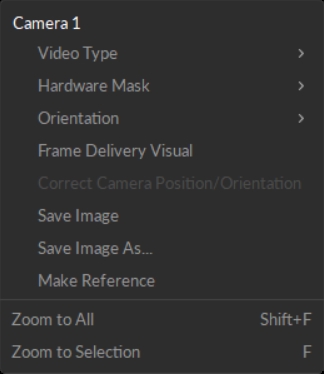
Zoom to All: Zooms all cameras to fit the pane. (default hotkey: Shift + F)
Zoom to Selection: Zooms into selected cameras to fit the pane. (default hotkey: F)
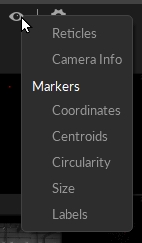
Show or hide additional camera information from the camera viewport.
Reticles: Show marker reticles to indicate where the reconstructed markers are located in respect to the camera view.
Camera Info: Show camera specific information, including camera models, camera setting values, time, data transfer rate, frame ID, and sync methods. For Prime series cameras, image board temperature information is also available. If there are any synchronization or hardware issues, they will also be indicated in the camera info.
Markers
Zoom in to a camera in object mode to view the following marker data in the 3D Viewport. Information is shown for all markers in the Viewport.
Coordinates: Show (x,y) coordinate information for the reflections that satisfy the 2D object filter.
Centroids: Show centroid crosshairs for the reflections that satisfy the 2D object filter.
Circularity: Show circularity value labels for detected reflections. The label will appear red if the reflection does not satisfy the 2D filter setting.
Size: Show number of pixels involved in each reflection. The label will appear red if the reflection does not satisfy the 2D filter setting.
Labels: Show whether the markers detected in the camera view are passive retroreflective marker or active markers. When the camera detects an active LED marker the corresponding label ID for each marker will be shown.
Using the masking settings context menu, you can re-apply auto-masking feature, clear masks, and/or perform other actions related to applying masks in the camera view.
Mask All: Apply auto-masking to all of the connected cameras.
Mask Selected: Apply auto-masking to the selected cameras only.
Mask Cameras: Detect and mask camera LED ring lights.
Masking is Additive: When selected, new masks are added to existing masks. If this setting is unchecked, Motive will remove and replace all masks each time a mask is applied.
Clear All: Clear all masks from all of the connected cameras.
Clear Selected: Clear masks from the selected cameras only.
Right-click on a camera in either the Cameras Viewport or the 3D Viewport to open the Camera Settings menu.
By default, Motive labels cameras by location. To use custom labeling, go to Settings --> General --> Camera Settings and select Custom Number from the dropdown list. This will open the Camera Number field for editing in the camera properties pane.
Tracking: Tracking modes capture the 2D marker data used in the reconstruction of 3D data.
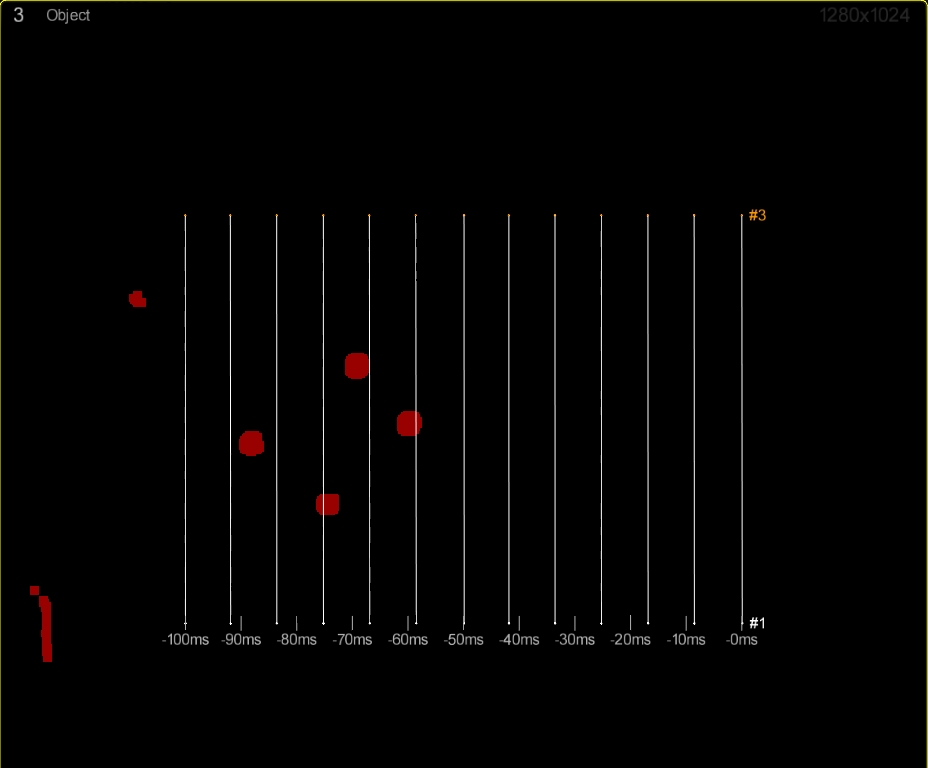
Object mode: Performs on-camera detection of centroid location, size, and roundness of the markers, and sends respective 2D object metrics to Motive to calculate the 3D data. Recommended as the default mode for recording.
Precision mode: Performs on-camera detection of marker reflections and their centroids and sends the respective data to Motive to determine the precise centroid location. Precision mode is more processing intensive than Object mode.
Reference Modes: Reference modes capture grayscale video as a visual aid during the take. Cameras in these modes do not contribute to the reconstruction of 3D data.
Grayscale: Raw grayscale is intended for aiming and monitoring the camera views and diagnosing tracking problems and includes aiming crosshairs by default. Grayscale video cannot be exported.
Mask Selected: Mask all the current IR data/reflections for the selected camera.
Clear Selected: Clear masks from the selected camera's view.
Mask Camera Light: Mask other cameras in the volume.
Angle: Change the angle of the camera's view.
Auto: Automatically change the angle of the camera's view.
Clear: Reset the camera's orientation angle to 0.
Overlay the frame delivery of each camera in the volume onto the selected camera's view. This information is useful to diagnose latency issues. Straight lines indicate that frames are being delivered at the same time as other cameras. Lines that are wavy or have spikes between cameras point to an issue with synchronization.
Auto correct the camera's position/orientation. This is often grayed out and is unnecessary for most workflows.
Save an image of the camera's view as a Bitmap file to the file name and location of your choice.
Makes the selected camera a reference camera. Set the video type for reference cameras to MJPEG, grayscale, or color video if using a Prime Color Camera. Only MJPEG and Color videos are exportable.
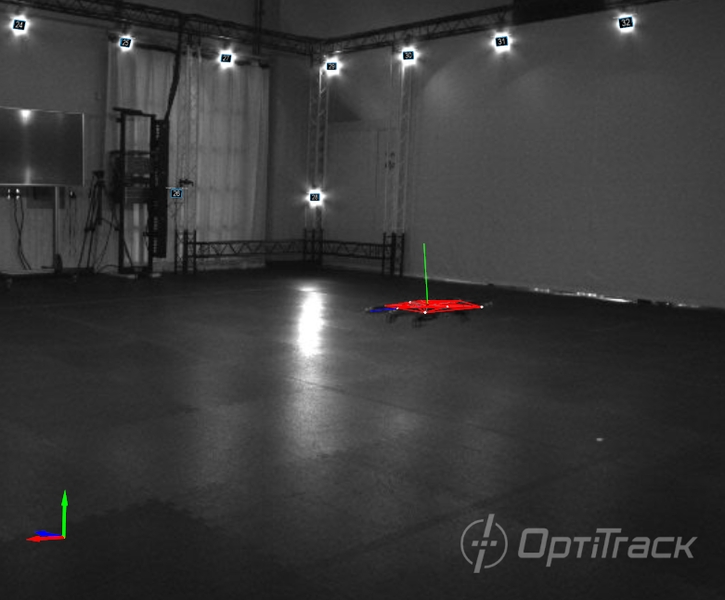
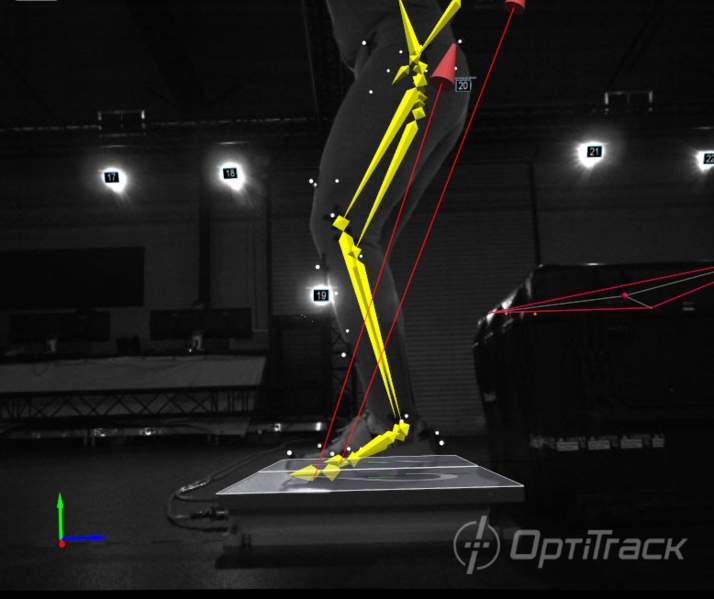
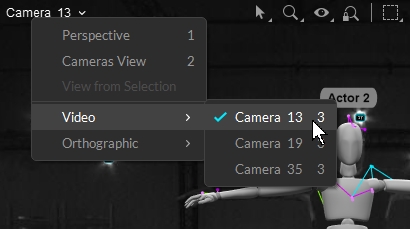
Reference View mode is used to monitor captured videos from the reference cameras. Reference cameras must be recording in either MJPEG or color video mode (Prime Color). In this mode, cameras, markers, and trackable assets can be overlaid over the reference view. To monitor the reference view, select one of the cameras and use the Number 3 hotkey to view from the selected camera. All of the assets and trajectory histories under the Perspective view pane can be overlaid on the reference videos.
Allows you to switch between different mouse interaction modes in the 3D viewport. Please see for more information on using the translate, rotate and scale tools, and for more information on the quick label tool.
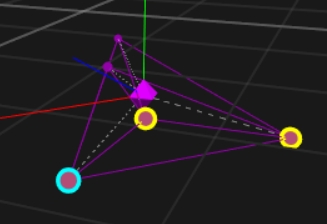
Select: In selection mode, left-click to select an object in the Viewport. left-click and drag or use shift + left-click to select multiple objects. The currently selected object will display a cyan border. If multiple objects are selected, the final one selected will have the cyan border and the others will have a yellow border. Properties for the selected objects are shown in the .
Scale: Proportionately increases or decreases the length of Skeleton bones or the size of the attached to a Rigid Body.
Quick Label: The tool allows users to easily reassign marker labels in post-processing.
Pro Tip: Use the Hide for Disabled Assets option then disable assets when you are done labeling and editing them to better focus on the remaining unlabeled assets. To disable an asset, uncheck the box to the left of the asset name in the Asset pane.
Sticks: Show marker sticks. connect markers to each other and can be used to define the shape of an asset (e.g., connecting a knee marker to a hip marker but not to an elbow marker).
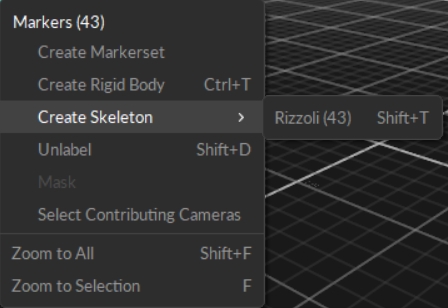
Create Markerset: Create a from the selected markers. This option will be available on the menu if at least one marker is selected.
Create Rigid Body: Create a asset from the selected markers. This option is grayed out if the markers are already part of an existing asset.
Create Skeleton: Create a asset from the selected markers. This option is grayed out unless Motive detects the minimum number of markers needed to create a skeleton asset. Click Create Skeleton for a pop-out menu of skeleton templates that match the marker layout.
The of Marker Constraints must be enabled to see this menu.
Training: Use the to show Motive how a markerset moves through 3D space. Read the page on for more details on the options below.
Active Tags: Active tags provide synchronized tracking through active LED markers and an internal Inertial Measurement Unit (IMU). Read the articles and for more details on the actions below.
Set Position: Reposition a force plate asset according to the location of the calibration square. This is used to calibrate the position of a selected force plate within Motive. For more information, please see the page.
Select from :
MJPEG: A reference mode that captures grayscale frames, compressed on-camera for scalable reference videos. MJPEG videos can be along with overlay information such as markers, rigid bodies, and skeleton data.
Save an image of the camera's view as a Bitmap file to a folder called Screenshots in the .
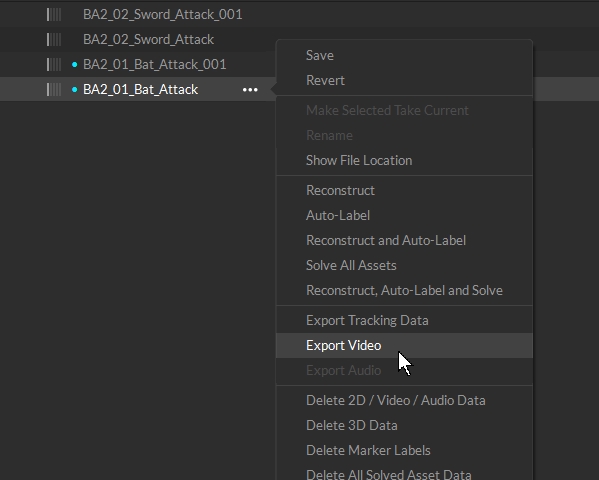
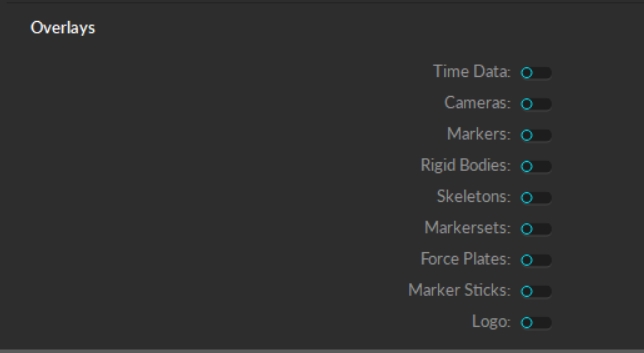
Reference video can be exported from Motive with the asset overlay. To export, right-click the Take and select Export Video. In the export options, select the assets to overlay in the video. Please see the section of the for more information on exporting reference videos.
Switch selected cameras to Object mode
O
Switch selected camera to MJPEG mode
I
Switch selected camera to Grayscale mode
U
Zoom
F: Quickly zoom into a selected camera(s) in the view.
Shift + F: Quickly zoom out to fit all of the cameras into the view.
Rotate view
Right + Drag
Pan view
Middle (wheel) click + drag
Zoom in/out
Mouse Wheel
Select in view
Left mouse click
Select multiple objects in view
CTRL + left mouse click
Switch to Perspective View
Number 1
Switch to Camera View
Number 2
Switch to Reference View
Number 3, while a camera is selected.
Split View
Shift + 1: Show only one viewport.
Shift + 2: Split the viewport into two horizontally.
Shift + 3: Split the viewport into two vertically.
Shift + 4: Split the Viewport into four.
Zoom
F: Quickly zoom into a selected object(s) or camera(s) in the view. Shift + F: Quickly zoom out to fit everything into the view.
Additional options are available by clicking the button on the top-right corner.
