Data Pane
Was this helpful?
Was this helpful?
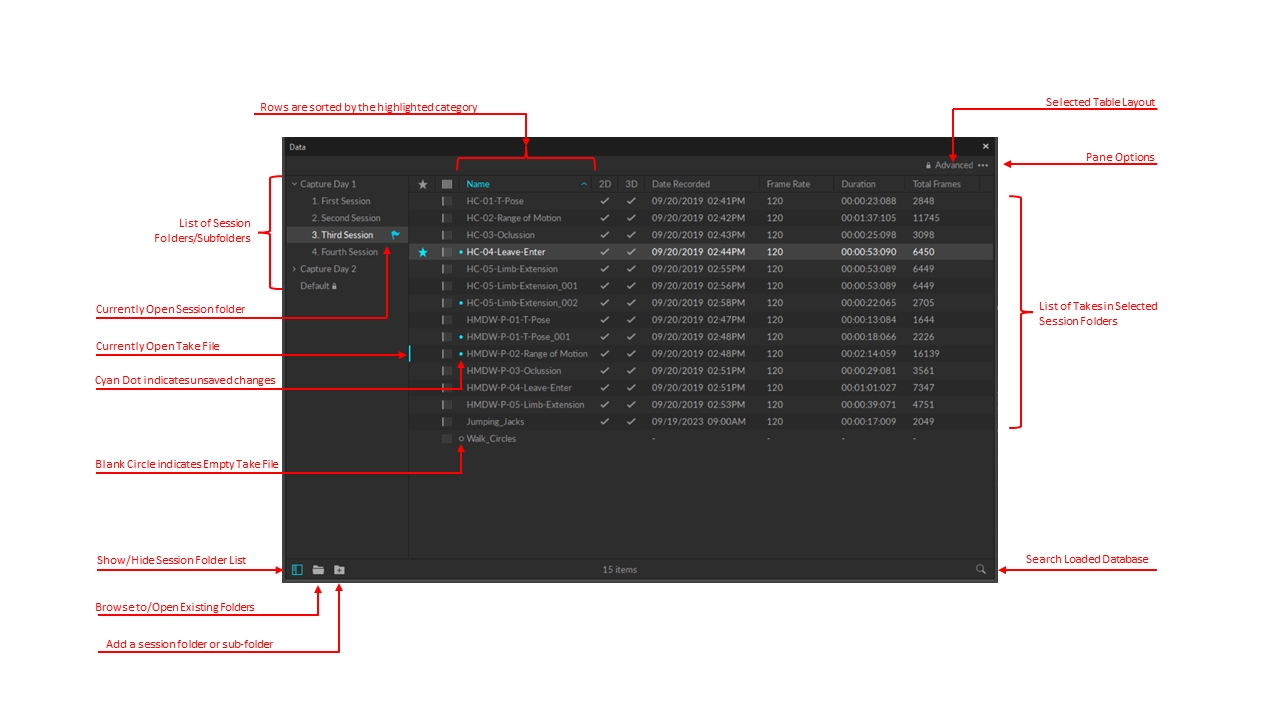
The Data pane is used to manage the Take files. This pane can be accessed under the View tab in Motive or by clicking the icon on the main toolbar.
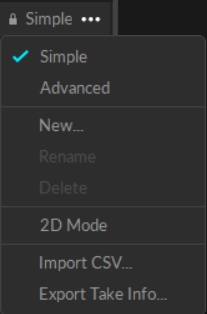
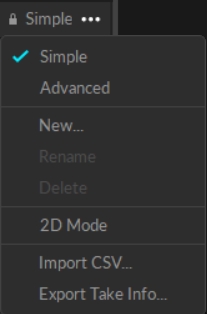
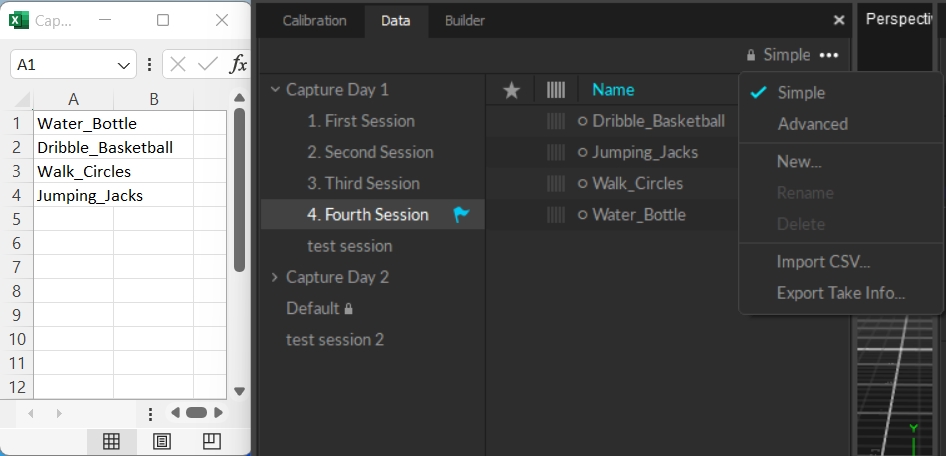
Simple
Use the simplest data management layout.
Advanced
Additional column headers are added to the layout.
New...
Create a new customizable layout.
Rename
Rename a custom layout.
Delete
Delete a custom layout.
2D Mode
Import CSV...
Import a list of empty Take names from a CSV file. This is helpful when you plan a list of shots in advance to the capture.
Export Take Info...
Exports a list of Take information into an XML file. Included elements are name of the session, name of the take, file directory, involved assets, notes, time range, duration, and number of frames included.
Action Items
What happened to the Project TTP Files?
The TTP project file format is deprecated starting from the 2.0 release. Now, recorded Takes will be managed by simply loading the session folders directly onto the new Data pane. For exporting and importing the software setting configurations, the Motive profile file format will replace the previous role of the TTP file. In the Motive profile, software configurations such as reconstruction settings, application settings, data streaming settings, and many other settings will be contained. Camera calibration will no longer be saved in TTP files, but they will be saved in the calibration file (CAL) only. TTP files can still be loaded in Motive 2.0. However, we suggest moving away from using TTP files.
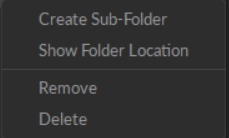
Right-click on any session folder to see the following options:
Create Sub-Folder
This creates a new folder under the selected directory.
Opens the session folder from Windows File Explorer.
Removes the selected session folder from the list without deleting them.
Deletes the session folder. All of its contents will be deleted as well.
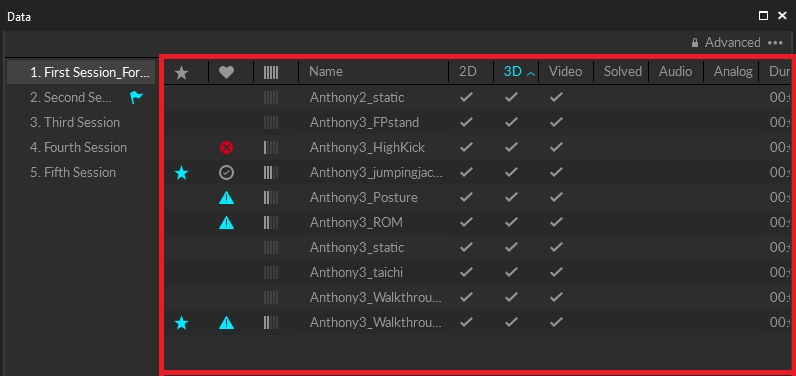
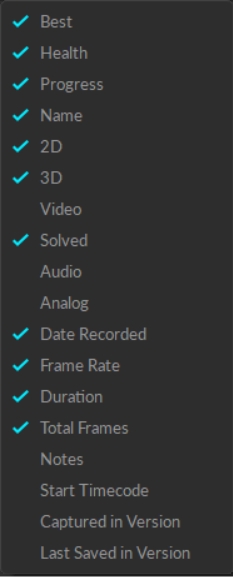
When a session folder is selected, associated Take files and their descriptions are listed in a table format on the right side of the Data pane. For each Take, general descriptions and basic information are shown in the columns of the respective row. To view additional fields, click on the pane menu, select new to create a custom view, and all of the possible fields will be available to add to the new view. Right-click on the column header to select the columns to display. For each of the enabled columns, you can click on the arrow next to it to sort up/down the list of Takes depending on the category.
Best
Health
Progress
The progress indicator can be used to track processing of the Takes. Use the indicators to track down the workflow specific progress of theTakes. Right-click to select:
Ready
Recorded
Reviewed
Labeled
Cleaned
Exported
Name
Shows the name of the Take.
2D
3D
Video
Solved
Audio
Analog
Date Recorded
Shows the time and the date when the Take was recorded.
Frame Rate
Shows the camera system frame rate which the Take was recorded in.
Duration
Time length of the Take.
Total Frames
Total number of captured frames in the Take.
Notes
Section for adding commenting on each Take.
Start Timecode
Captured in Version
Motive version used to record the Take.
Last Saved in Version
Motive version used to edit or save the Take.
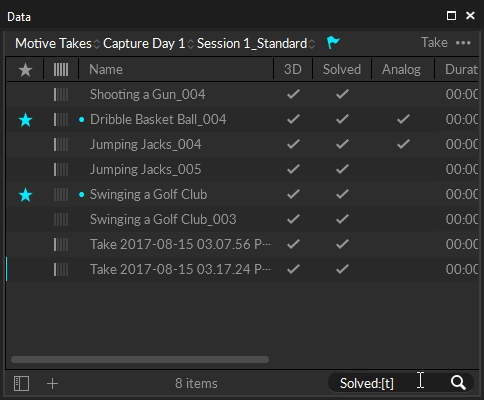
A search bar is located at the bottom of the Data pane, and you can search a selected session folder using any number of keywords and search filters. Motive will use the text in the input field to list out the matching Takes from the selected session folder. Unless otherwise specified, the search filter will scope to all of the columns.
Search for exact phrase
Wrap your search text in quotation marks.
e.g., Search "shooting a gun" for searching a file named Shooting a Gun.tak.
Search specific fields
To limit the search to specific columns, type field:, plus the name of a column enclosed with quotation marks, and then the value or term you're searching for.
Multiple fields and/or values may be specified in any order.
e.g. field:"name" Lizzy, field:"notes" Static capture.
Search for true/false values
To search specific binary states from the Take list, type the name of the field followed by a colon (:), and then enter either true ([t], [true], [yes], [y]) or false ([f], [false], [no], [n]).
e.g. Best:[true], Solved:[false], Video:[T], Analog:[yes]
The table layout can also be customized. To do so, go to the pane menu and select New or any of the previously customized layouts. Once you are in a customizable layout, right-click on the top header bar and add or remove categories from the table.
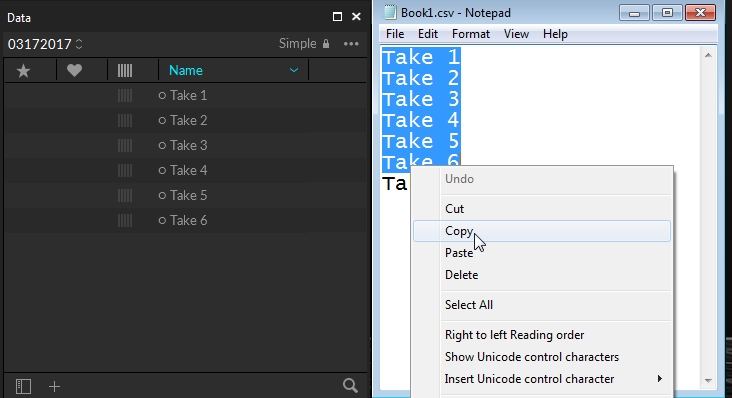
A list of take names can be imported from either a CSV file or carriage return texts that contain a take name on each line. Using this feature, you can plan, organize, and create a list of capture names ahead of actual recording. Once take names have been imported, a list of empty takes with the corresponding names will be listed for the selected session folder.
From a Text
Take lists can be imported by copying a list of take names and pasting them onto the Data pane. Take names must be separated by carriage returns; in other words, each take name must be in a new line.
From a CSV File
Excel has several CSV file formats to choose from. Make sure to select CSV (Comma Delimited) when saving your file for import.
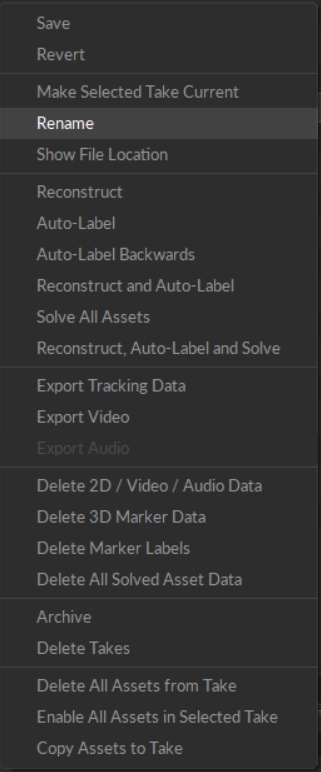
Saves the selected take.
Reverts any changes that were made. This does not work on the currently opened Take.
Selects the current take and loads it for playback or editing.
Allows the current take to be renamed.
Opens an Explorer window to the current asset path. This can be helpful when backing up, transferring, or exporting data.
Separate reconstruction pipeline without the auto-labeling process. Reconstructs 3D data using the 2D data. Reconstruction is required to export Marker data.
Separate auto-labeling pipeline that labels markers using the existing tracking asset definitions. Available only when 3D data is reconstructed for the Take. Auto-label is required to export Markers labeled from Assets.
Combines 2D data from each camera in the system to create a usable 3D take. It also incorporates assets in the Take to auto-label and create rigid bodies and skeletons in the Take. Reconstruction is required to export Marker data and Auto-label is required when exporting Markers labeled from Assets.
Solves 6 DoF tracking data of skeletons and rigid bodies and bakes them into the TAK recording. When the assets are solved, Motive reads from recorded Solve instead of processing the tracking data in real-time. Solving is required prior to exporting Assets.
Performs all three reconstruct, auto-label, and solve pipelines in consecutive order. This basically recreates 3D data from recorded 2D camera data.
Opens the Export dialog window to select and initiate file export. Valid formats for export are CSV, C3D, FBX, BVH.
Reconstruction is required to export Marker data, Auto-label is required when exporting Markers labeled from Assets, and Solving is required prior to exporting Assets.
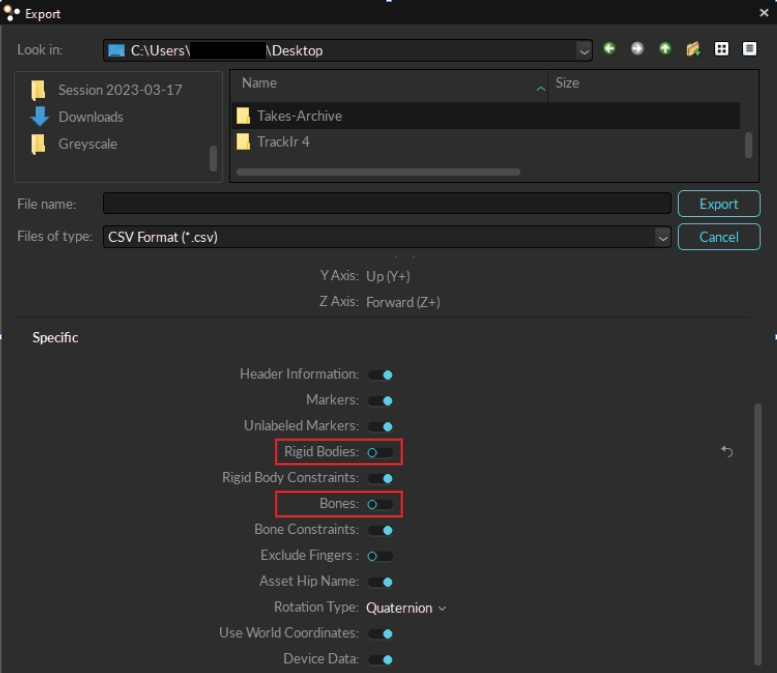
Please note that if you have Assets that are unsolved and just wish to export reconstructed Marker data, you can toggle off Rigid Bodies and Bones (Skeletons) from the Export window (see image below). For more information please see our Data Export page.
Opens the export dialog window to initiate scene video export to AVI.
Exports an audio file when selected Take contains audio data.
Opens the Delete 2D Data pop-up where you can select to delete the 2D data, Audio data, or reference video data. Read more in Deleting 2D data.
Permanently deletes the 3D data from the take. This option is useful in the event reconstruction or editing causes damage to the data.
Unlabels all existing marker labels in 3D data. If you wish to re-auto-label markers using modified asset definitions, you will need to first unlabel markers for respective assets.
Deletes 6 DoF tracking data that was solved for skeleton and rigid bodies. If Solved data doesn't exist, Motive instead calculates tracking of the objects from recorded 3D data in real-time.
Archives the original take file and creates a duplicate version. Recommended prior to completing any post-production work on the take file.
Opens a dialog box to confirm permanent deletion of the take and all associated 2D, 3D, and Joint Angle Data from the computer. This option cannot be undone.
Deletes all assets that were recorded in the take.
Enables all assets within the selected Take.
Copies the assets from the current capture to the selected Takes.
In the Edit mode, when this option is enabled, Motive will access the recorded 2D data of a current Take. In this mode, Motive will live-reconstruct from recorded 2D data and you will be able to inspect the reconstructions and marker rays from the view ports. For more information: .
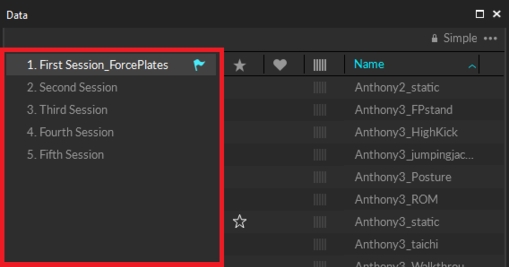
The leftmost section of the Data pane is used to list out the sessions that are loaded in Motive. Session folders group multiple associated Take files in Motive, and they can be imported simply by dragging-and-dropping or importing a folder into the data management pane. When a session folder is loaded, all of the Take files within the folder are loaded altogether.
In the list of session folders, the currently loaded session folder will be denoted with a flag symbol , and the selected session folder will be highlighted in white.
Add a new session folder.
Collapse the session folder sidebar.
The star mark allows users to mark the best Takes. Simply click on the star icon and mark the successful Takes.
The health status column of the Takes indicates the user-selected status of each take:
: Excellent capture
: Okay capture
: Poor capture
Indicates whether exists on the corresponding Take.
Indicates whether the reconstructed exists on the corresponding Take.
If 3D data does not exist on a Take, it can be derived from 2D data by performing the reconstruction pipeline. See page for more details.
Indicates whether exist in the Take. Reference videos are recorded from cameras that are set to either MJPEG grayscale or raw grayscale modes.
Indicates whether any of the assets have baked into them.
Indicates whether synchronized audio data have been recorded with the Take. See:
Indicates whether analog data recorded using a data acquisition device exists in the Take. See: page.
Timecode stamped to the starting frame of the Take. This is available only if there was signal integrated to the system.
Take lists can be imported from a CSV file that contains take names on each row. To import, click on the top-right menu icon and select Import CSV...
In the Data pane, context menu for captured Takes can be brought up by clicking on the icon to the right of the Take name or by right-clicking on the selected Take(s). The context menu lists the options which can be used to perform corresponding pipelines on the selected Take(s). The menu contains a lot of essential pipelines such as reconstruction, auto-label, data export and many others. Available options are listed below.
