Builder Pane
Was this helpful?
Was this helpful?
The Builder pane can be accessed under the View tab or by clicking the icon on the main toolbar.
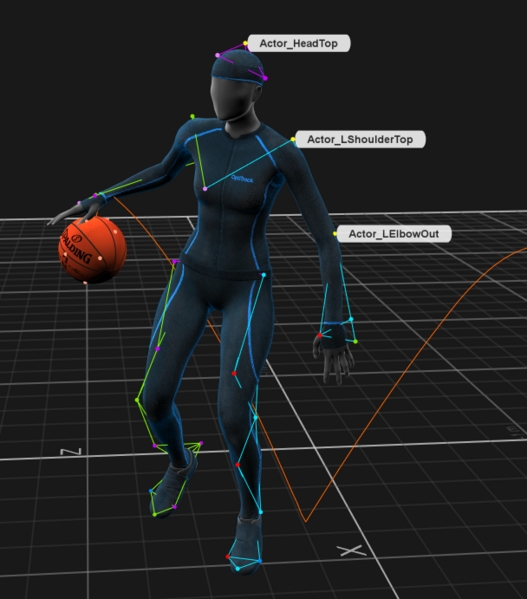
The Builder pane is used for creating and editing trackable models, also called trackable assets, in Motive. In general, Rigid Body assets are created for tracking rigid objects, and Skeleton assets are created for tracking human motions. A new feature in Motive 3.1 allows you to create Trained Markersets to track objects that are neither rigid nor human skeleton templates.
When created, trackable models store the positions of markers on the target object and use the information to auto-label the markers in 3D space. During the auto-label process, a set of predefined labels are assigned to 3D points using the solver pipeline, and the labeled dataset is then used for calculating the position and orientation of the corresponding Rigid Bodies or Skeleton segments. Auto-labeling is not available for Trained Markersets.
The trackable models can be used to auto-label the 3D capture both in Live mode (real-time) and in the Edit mode (post-processing). Each created trackable model will have its own properties which can be viewed and changed under the Properties pane. If new Skeletons or Rigid Bodies are created during post-processing, the Take will need to be auto-labeled again in order to apply the changes to the 3D data.
On the Builder pane, you can either create a new trackable asset or modify an existing one. Select the Type of asset you wish to work on, and then select whether you wish to create or make modifications to existing assets. Create and Modify tools for different Asset types will be explained in the sections below.
Edit Mode is used for playback of captured Take files. In this mode, you can playback and stream recorded data and complete post-processing tasks, such as creating and modifying assets. The Cameras View displays the recorded 2D data while the 3D Viewport represents either recorded or real-time processed data as described below.
There are two modes for editing:
Edit: Playback in standard Edit mode displays and streams the processed 3D data saved in the recorded Take. Changes made to settings and assets are not reflected in the Viewport until the Take is reprocessed.
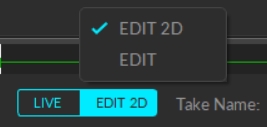
Edit 2D: Playback in Edit 2D mode performs a live reconstruction of the 3D data, immediately reflecting changes made to settings or assets. These changes are displayed in real-time but are not saved into the recording until the Take is reprocessed and saved. To playback in 2D mode, click the Edit button and select Edit 2D.
Regardless of the selected Edit mode, you must reprocess the Take to create new 3D data based on the modifications made.
Please see the Data Editing page for more information about editing Takes.
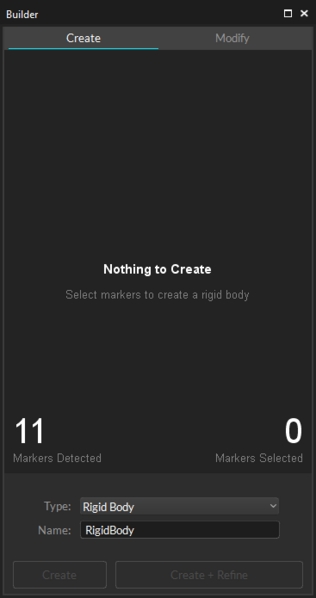
To create Rigid Bodies, select Rigid Body from the Type option and click the Create tab at the top. Here, you can create Rigid Body assets and track any markered-objects in the volume. In addition to standard Rigid Body assets, you can also create Rigid Body models for head-mounted displays (HMDs) and measurement probes as well.
Tip: The recommended number of markers per Rigid Body is 4 ~ 12 markers.
You may encounter limits if using an excessive number of markers, or experience system performance issues when using the refine tool on such an asset.
Step 1.
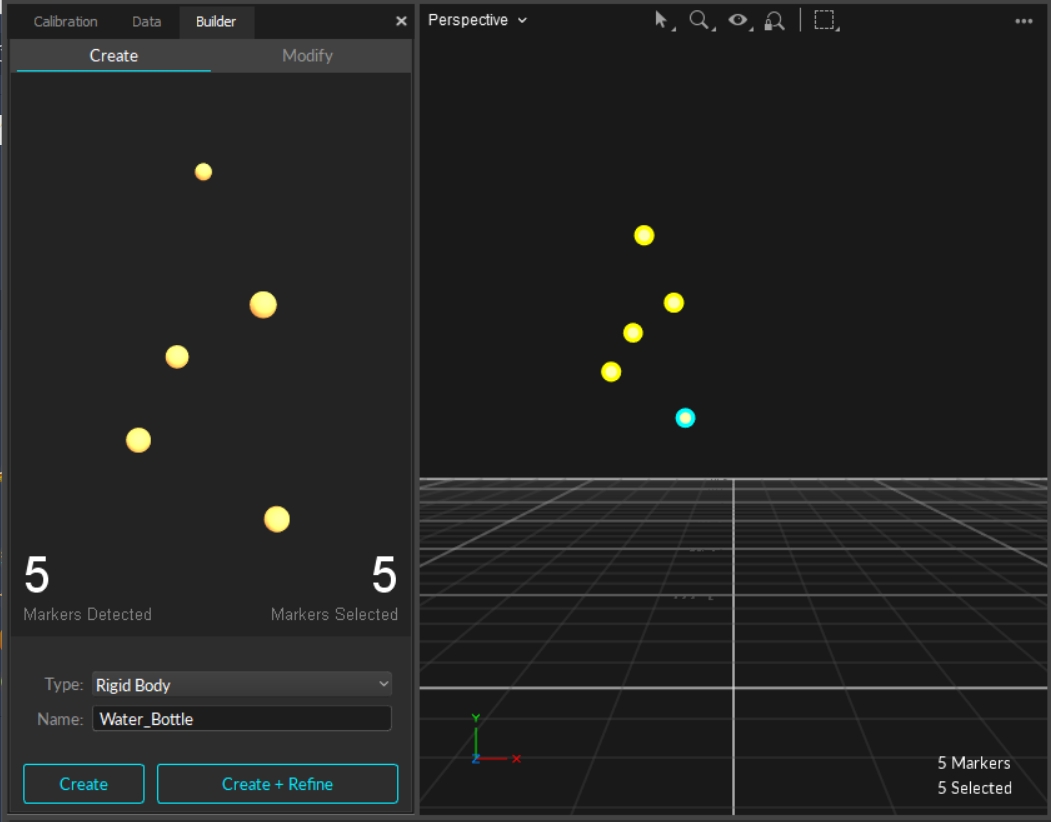
Select all associated Rigid Body markers in the 3D viewport.
Step 2.
On the Builder pane, confirm that the selected markers match those on the object you want to define as the Rigid Body.
Step 3.
Click Create to define a Rigid Body asset from the selected markers.
You can also create a Rigid Body by doing the following actions while the markers are selected:
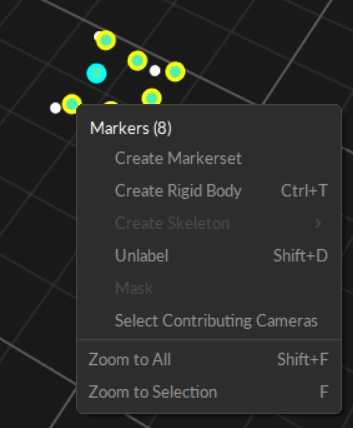
Perspective View (3D viewport): While the markers are selected, right-click on the perspective view to access the context menu. Under the Markers section, click Create Rigid Body.
Hotkey: While the markers are selected, use the create Rigid Body hotkey (Default: Ctrl +T).
Step 4.
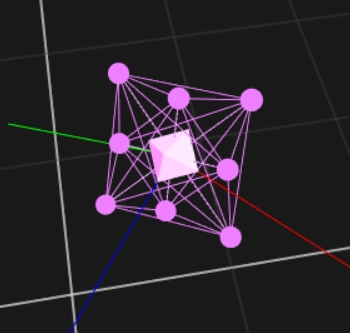
Once the Rigid Body asset is created, the markers will be colored (labeled) and interconnected to each other. The newly created Rigid Body will be listed under the Assets pane.
Defining Assets in Edit mode:
If the Rigid Bodies, or Skeletons, are created in Edit mode, the corresponding Take needs to be auto-labeled. Only then, the Rigid Body markers will be labeled using the Rigid Body asset and positions and orientations will be computed for each frame. If the 3D data have not been labeled after edits on the recorded data, the asset may not be tracked.
This feature can be used only with HMDs that have the OptiTrack Active HMD clips mounted.
For using OptiTrack system for VR applications, it is important that the pivot point of the HMD Rigid Body gets placed at the appropriate location, which is at the root of the nose in between the eyes. When using the HMD clips, you can utilize the HMD creation tools in the Builder pane to have Motive estimate this spot and place the pivot point accordingly. It utilizes known marker configurations on the clip to precisely position the pivot point and set the desired orientation.
HMDs with passive markers can utilize the External Pivot Alignment tool to calibrate the pivot point.
Make sure Motive is configured for tracking active markers.
Open the Builder pane under View tab and click Rigid Bodies.
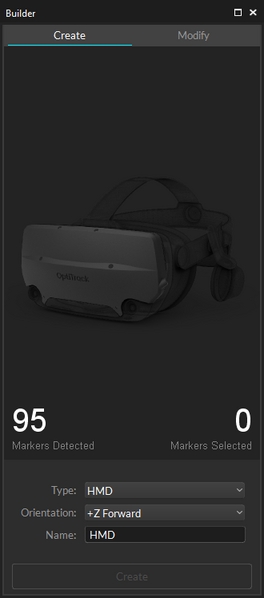
Under the Type drop-down menu, select HMD. This will bring up the options for defining an HMD Rigid Body.
If the selected marker matches one of the Active clips, it will indicate which type of Active Clip is being used.
Under the Orientation drop-down menu, select the desired orientation of the HMD. The orientation used for streaming to Unity is +Z forward and Unreal Engine is +X forward, or you can also specify the expected orientation axis on the client plugin side.
Hold the HMD at the center of the tracking volume where all of the active markers are tracked well.
Select all 8 HMD active markers in the 3D viewport.
Click Create. An HMD Rigid Body will be created from the selected markers and it will initiate the calibration process.
During calibration, slowly rotate the HMD to collect data samples in different orientations.
Once all necessary samples are collected, the calibrated HMD Rigid Body will be created.
You can also define a measurement probe using the Builder pane. The measurement probe tool utilizes the precise tracking of OptiTrack mocap systems and allows you to measure 3D locations within a capture volume. For more information, please read through the Measurement Probe Kit Guide.
Open the Builder pane under the View tab and click Rigid Bodies.
Bring the probe into the tracking volume and create a Rigid Body from the markers.
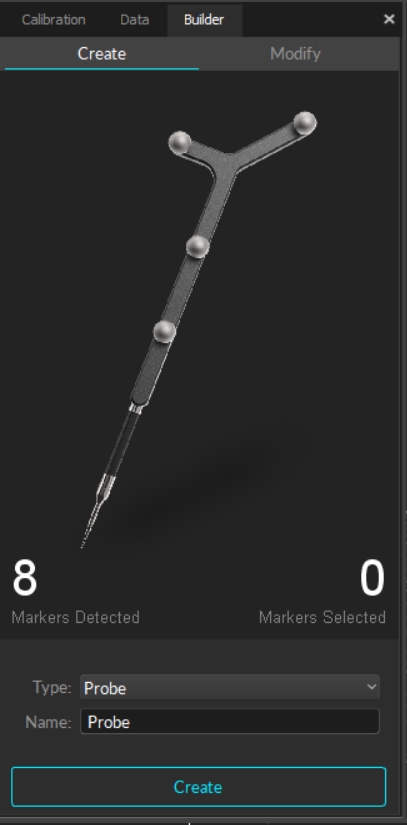
Under the Type drop-down menu, select Probe. This will bring up the options for defining a Rigid Body for the measurement probe.
Select the Rigid Body created in step 2.
Place and fit the tip of the probe in one of the slots on the provided calibration block.
Note that there will be two steps in the calibration process: refining Rigid Body definition and calibration of the pivot point. Click the Create button to initiate the probe refinement process.
Slowly move the probe in a circular pattern while keeping the tip fitted in the slot, making a cone shape overall. Gently rotate the probe to collect additional samples.
After the refinement, Motive will automatically proceed to the pivot point calibration.
Repeat the same movement to collect additional sample data for precisely calculating the location of the pivot or the probe tip.
When sufficient samples are collected, the pivot point will be positioned at the tip of the probe and the Mean Tip Error will be displayed. If the probe calibration was unsuccessful, just repeat the calibration again from step 4.
Once the probe is calibrated successfully, a probe asset will be displayed over the Rigid Body in Motive, and live x/y/z position data will be displayed under the Probe pane.
Caution
The probe tip MUST remain fitted securely in the slot on the calibration block during the calibration process.
Do not press in with the probe since the deformation from compressing could affect the result.
Note: Custom Probes
It's highly recommended to use the Probe kit when using this feature. With that being said, you can also use any markered object with a pivot arm to define a custom probe in Motive, but when a custom probe is used, it may have less accurate measurements; especially if the pivot arm and the object are not rigid and/or if any slight translation occurs during the probe calibration steps.
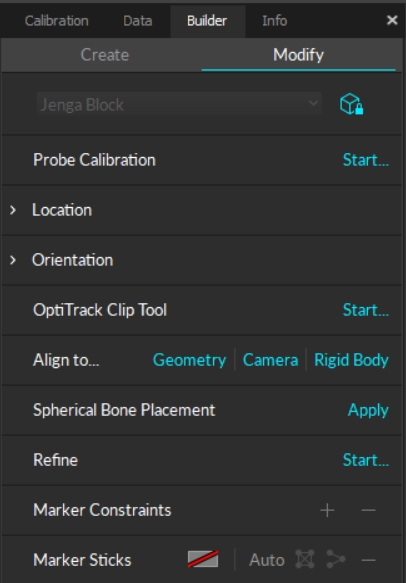
The Builder pane has tools that can be used to modify the tracking of a Rigid Body selected in Motive. To modify Rigid Bodies, select a single Rigid Body and click the Modify tab to display the options for editing a Rigid Body.
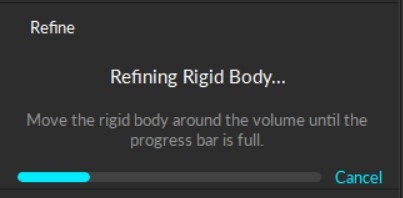
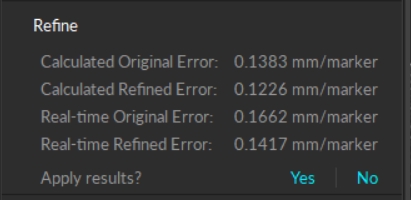
The Rigid Body refinement tool improves the accuracy of Rigid Body calculation in Motive. When a Rigid Body asset is initially created, Motive references only a single frame to define the Rigid Body. The Rigid Body refinement tool allows Motive to collect additional samples to achieve more accurate tracking results by improving the calculation of expected marker locations of the Rigid Body as well as the position and orientation of the Rigid Body itself.
Steps
Click on the Modify tab.
Select the Rigid Body to be refined in the Asset pane.
To refine the asset in Live mode, hold the physical selected Rigid Body at the center of the capture volume so that as many cameras as possible can clearly capture the markers on the Rigid Body.
In the Refine section of the Modify tab of the Builder pane, click Start...
Slowly rotate the Rigid Body to collect samples at different orientations until the progress bar is full.
You can also refine the asset in Edit mode. Motive will automatically replay the current take file to complete the refinement process.
The Probe Calibration feature under the Rigid Body edit options can be used to re-calibrate a pivot point of a measurement probe or a custom Rigid Body. This step is also completed as one of the calibration steps when first creating a measurement probe, but you can re-calibrate it under the Modify tab.
In Motive, select the Rigid Body or a measurement probe.
Bring out the probe into the tracking volume where all of its markers are well-tracked.
Place and fit the tip of the probe in one of the slots on the provided calibration block.
Click Start.
Once it starts collecting the samples, slowly move the probe in a circular pattern while keeping the tip fitted in the slot, making a cone shape overall. Gently rotate the probe to collect additional samples.
When sufficient samples are collected, the mean error of the calibrated pivot point will be displayed.
Click Apply to use the calibrated definition or click Cancel to calibrate again.
The Modify tab is used to apply translation or rotation to the pivot point of a selected Rigid Body. A pivot point of a Rigid Body represents both position (x,y,z) and orientation (pitch, roll, yaw) of the corresponding asset.
You can also use the Gizmo tools to quickly modify the pivot point of a Rigid Body.
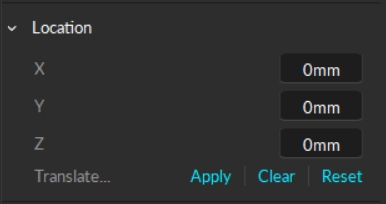
Use this tool to translate a pivot point in x/y/z axis (in mm). You can also reset the translation to set the pivot point back at the geometrical center of the Rigid Body.
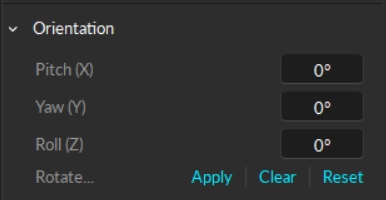
Use this tool to apply rotation to the local coordinate system of a selected Rigid Body. You can also reset the orientation to align the Rigid Body coordinate axis and the global axis. When resetting the orientation, the Rigid Body must be tracked in the scene.
The OptiTrack Clip Tool basically recalibrates an HMD with OptiTrack HMD Clips to position its pivot point at an appropriate location. The steps are basically the same as when first creating the HMD Rigid Body.
This feature is useful when tracking a spherical object (e.g., a ball). It will assume that all of the markers on the selected Rigid Body are placed on a surface of a spherical object, and the pivot point will be calculated and re-positioned accordingly. Simply select a Rigid Body in Motive, open the Builder pane to edit Rigid Body definitions, and then click Apply to place the pivot point at the center of the spherical object.
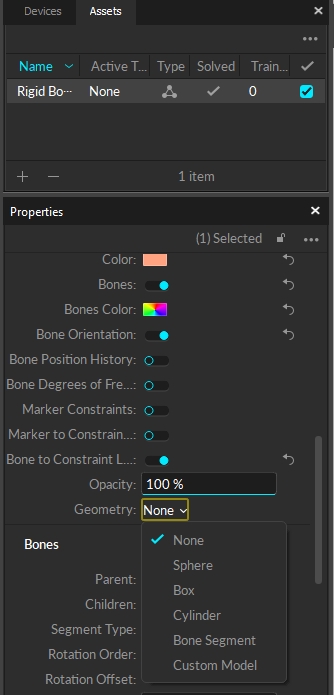
The Align to Geometry feature provides an option to align the pivot of a rigid body to a geometry offset. Motive includes several standard geometric objects that can be used, as well as the ability to import custom objects created in other applications. This allows for consistency between Motive and external rendering programs such as Unreal Engine and Unity.
Scroll to the Visuals section of the asset's properties. Under Geometry, select the object type from the list.
To import your own object, select Custom Model. This will open the Attached Geometry field. Click on the file folder icon to select the .obj or .fbx file to import into Motive.
To align an asset to a specific camera, select both the asset and the camera in the 3D ViewPort. Click Camera in the Align to... field in the Modify tab.
To align an asset to an existing Rigid Body, you must be in 2D edit mode. Click the Edit button at the bottom left and select EDIT 2D from the menu.
The asset you wish to align must also be unsolved. If necessary, right-click on the asset in the Assets pane and select Remove Solve from the context menu.
Now that your asset is unsolved, select it in the 3D Viewport, then select the rigid body that you wish to align it to. Once both assets are selected, click Rigid Body in the Align To... field.
To work with Marker Constraints and/or Marker Sticks, you must select the items you wish to modify in the 3D viewport.
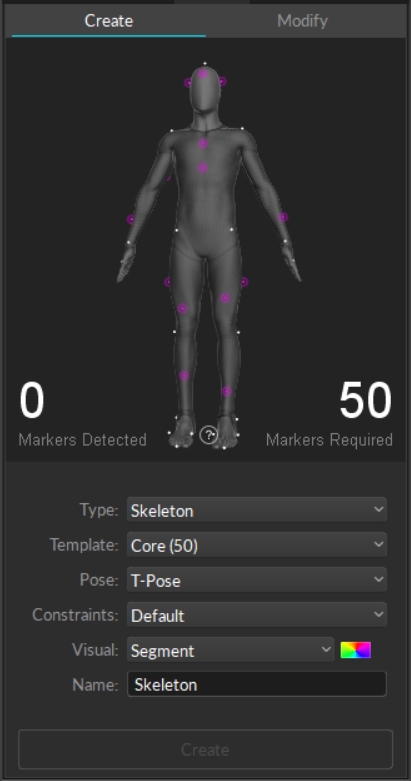
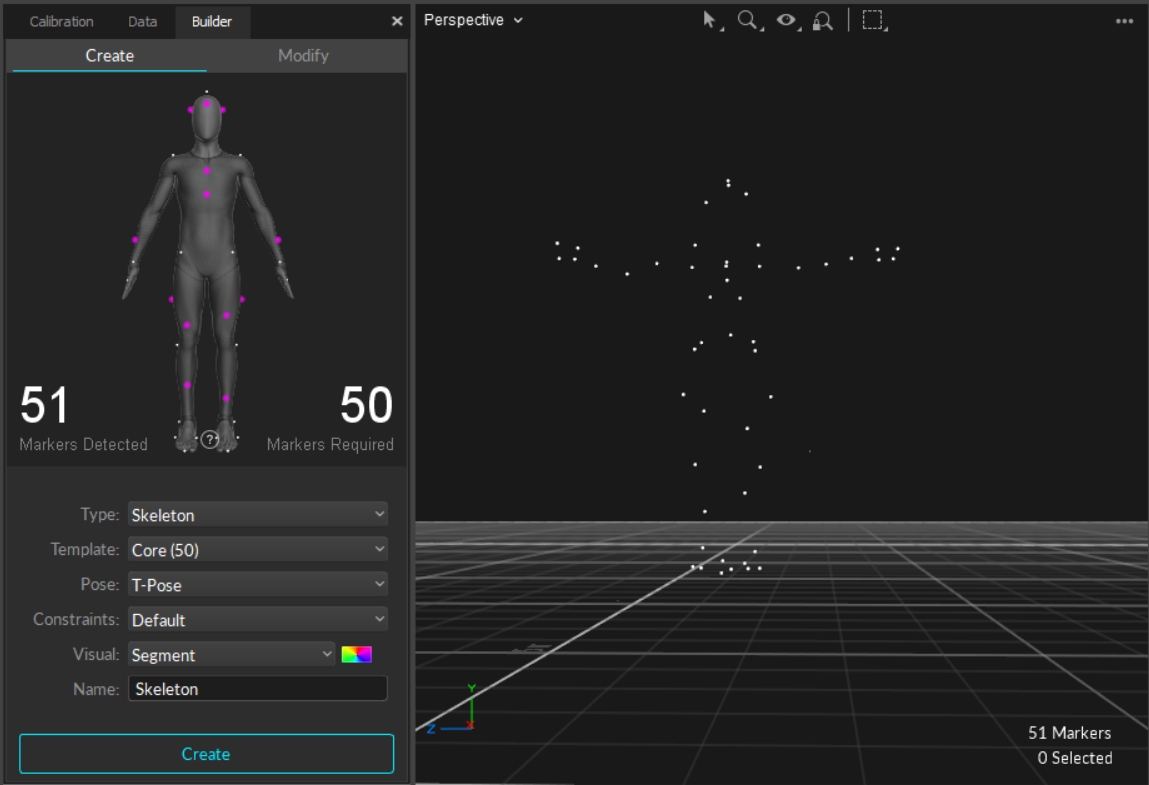
From the Create tab, select the Skeleton option from the Type dropdown menu. Here, you select which Skeleton Marker Set to use, choose the calibration pose, and create the Skeleton model.
Step 1.
Select a Skeleton Marker Set template from the Template drop-down menu. The Builder pane will display a Skeleton avatar that shows where the markers need to be placed on the subject for the selected template. When the 6 Rigid Body Skeleton template is selected, the display will show where to place the rigid bodies. Right-click and drag the mouse to rotate the model view.
Step 2.
Refer to the avatar and place the markers on the subject accordingly. For accurate placements, ask the subject to stand in the calibration pose while placing the markers. It is important that these markers get placed at the right spots on the subject's body for the best Skeleton tracking. Thus, extra attention is needed when placing the Skeleton markers.
The magenta markers indicate the segment markers that can be placed at a slightly different position within the same segment.
Step 3.
Double-check the marker counts and their placements. It may be easier to use the 3D viewport in Motive to do this. The Builder pane will track the detected markers.
Step 4.
In the Builder pane, once the number of Markers Needed and Markers Detected match, the Create button will become active. If Skeleton markers are not automatically detected, manually select them from the 3D perspective view.
Step 5.
Assign a Name to the skeleton. Motive will use this name as a prefix when creating skeleton marker labels. You can also assign custom labels by loading previously prepared marker-name XML files after the skeleton is created.
Step 6.
Next step is to select the Skeleton creation pose settings. Under the Pose section drop-down menu, select the desired calibration pose for defining the Skeleton. This is set to the T-pose by default. Note that the image in the Builder pane remains in A-pose regardless of your selection.
Step 7.
Ask the subject to stand in the selected calibration pose. Standing in a proper calibration posture is important because the pose of the created Skeleton will be calibrated from it. For more details, read the calibration poses section.
Step 8.
Click Create to create the Skeleton. Once the Skeleton model has been defined, confirm all Skeleton segments and assigned markers are located at expected locations. If any of the Skeleton segments seem to be misaligned, delete and create the Skeleton again after adjusting the marker placements and the calibration pose.
In Edit Mode
If you are creating a Skeleton in the post-processing of captured data, you will have to auto-label the Take to see the Skeleton modeled and tracked in Motive.
You can also select a Skeleton and use the CTRL + R hotkey to refresh the Skeleton tracking if needed.
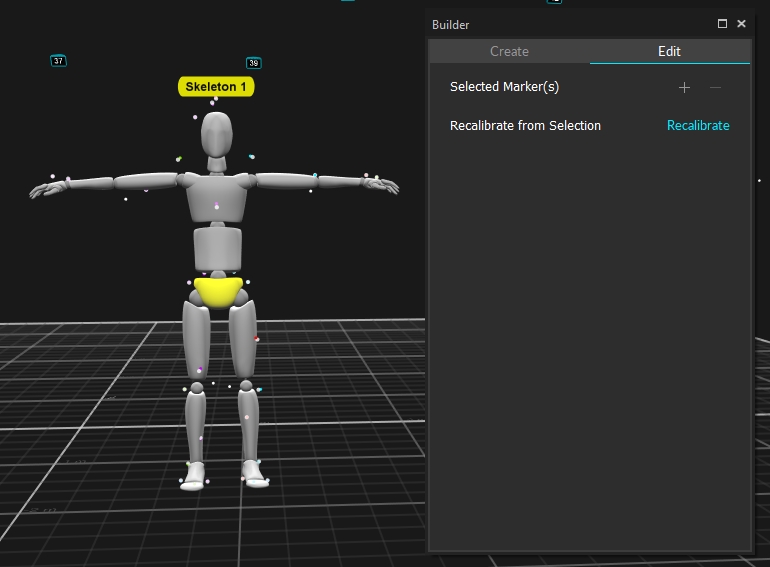
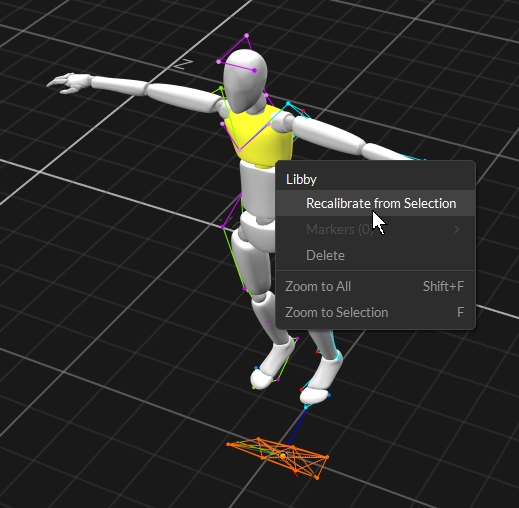
Existing Skeleton assets can be recalibrated using the existing Skeleton information. Basically, the recalibration recreates the selected Skeleton using the same Skelton Marker Set. This feature recalibrates the Skeleton asset and refreshes expected marker locations on the assets.
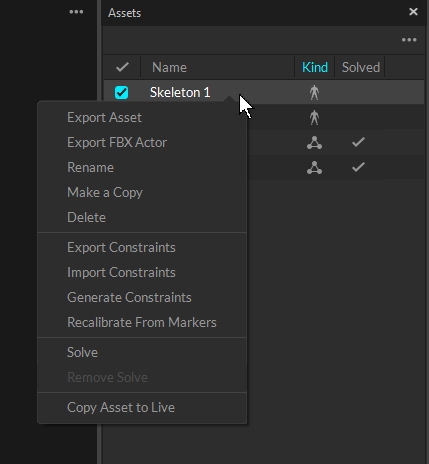
To recalibrate Skeletons, select all of the associated Skeleton markers from the perspective view along with the corresponding Skeleton model. Make sure the selected Skeleton is in a calibration pose, and click Recalibrate. You can also recalibrate from the context menu in the Assets pane or in the 3D Viewport.
Skeleton recalibration does not work with Skeleton templates with added markers.
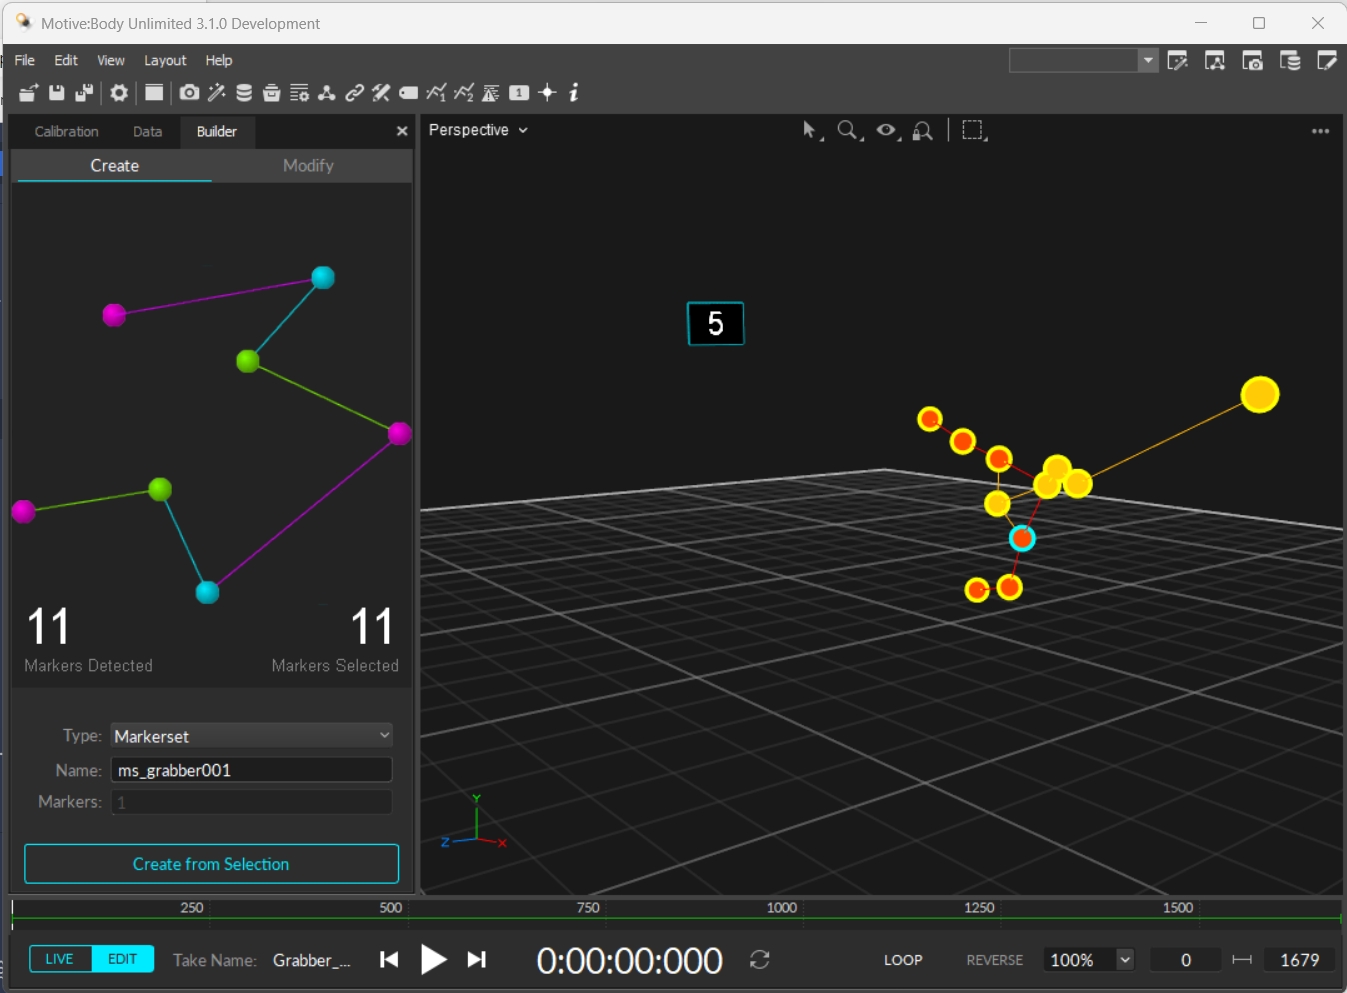
In Motive 3.1, users can create assets from any object that is not a Rigid Body or a pre-defined Skeleton using the Trained Markersets feature. This article will cover the basics of creating and modifying a Trained Markerset asset from the Builder pane. Please refer to the Trained Markersets article for more information on using this feature.
Attach an adequate number of markers to your flexible object. This is highly dependent on the object but should cover at least the outline and any internal flex points. e.g., if it's a mat, the mat should have markers along the edges as well as dispersed markers in the middle in an asymmetrical pattern.
Record the movements you want of the object, trying to get as much of the full range of motion as possible.
In Edit mode, select the markers attached to the object.
From the Create tab of the Builder pane, select Markerset as the Type. Name the asset, then click Create from Selection.
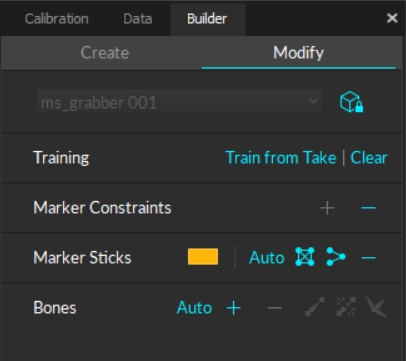
Once the asset is created, use the Training function so Motive can learn the object's full range of motion and how it moves through 3D space. Click Train from Take then playback the .tak file created in step 2 of the asset creation. Use the Clear button to remove the asset's existing training.
In Motive, a Bone is a virtual structure that connects two joints and represents a segment of a virtual skeleton or Trained Markerset. To access these functions, select either the entire asset (to use the auto-generate option), or select the specific markers or bones that you would like to modify in the 3D Viewport.
Auto-generates bones at flex points for the selected asset.
Adds (+) or Removes (-) the selected bone(s).
Adds a bone chain between two selected bones. Whichever bone is selected first becomes the parent bone, the second becomes the child bone.
Unparents the selected bone or bones. This removes the bone chain between the bones.
Reroots the selected child bone and makes it the parent in the bone chain.
You can add or remove marker constraints (referred to as asset model markers in version 3.0 and earlier) from an asset using the Builder pane.
From the Viewport visual options, enable selection of Marker Constraints.
Access the Modify tab on the Builder pane.
Select the asset whose marker constraints you wish to modify.
On the Marker Constraints section of the Builder pane, click + to add the marker to the definition or - to remove the marker.
Use the Constraints pane to modify marker label and/or colors.
Motive 3.1 includes the ability to modify Marker Sticks for all asset types, directly from the Builder pane. Select two or more of the asset's markers in the 3D Viewport to activate this tool set.
Changes the color of the selected Marker Stick(s).
Autogenerates Marker Sticks for the selected Trained Markerset asset.
Connects all of the selected Markers to each other.
Creates Marker Sticks based on the order in which the markers were selected.
Removes the selected Marker Stick(s).
Assets pane: While the markers are selected in Motive, click on the add button at the bottom of the Assets pane.
From the View menu, open the Builder pane, or click the button on the toolbar.
To use this feature, select the rigid body from the assets pane. In the Properties pane, click the button and select Show Advanced if it is not already selected.
By default, the Modify tab of the Builder pane is locked to the asset selected in the 3D Viewport. To change the asset from the Builder pane instead, click the icon at the top of the Modify tab to unlock the drop-down list.
in the 3D Viewport, CTRL + left-click on a marker constraint that's associated with the selected asset. Click the button to add the marker constraint to the asset definition. To remove it, click the button.
