Edit Tools Pane
In Motive, the Edit Tools pane can be accessed under the View tab or by clicking ![]() icon on the main toolbar.
icon on the main toolbar.
The Edit Tools pane contains the functionality to modify 3D data. Four main functions exist: trimming trials, filling gaps, smoothing trajectories and swapping data points. Trimming trials refers to the clearing of data points before and after a gap. Filling gaps is the process of filling in a markers trajectory for each frame that has no data. Smoothing trajectories filters out unwanted noise in the signal. Swapping allows two markers to swap their trajectories.
Read through the Data Editing page to learn about utilizing the edit tools.
Trim Tails

Trim on Selected
Trim on Selected trims selected trajectories within the selected time region. Gaps outside the selected time region are not trimmed. Trajectories that are not selected are untouched.
Trim on All
Trim on All trims all trajectories within the selected time region. Gaps outside the selected time region are not trimmed.
Trim Size
Leading
Default: 3 frames. The Trim Size Leading defines how many data points will be deleted before a gap.
Trailing
Default: 3 frames. The Trim Size Trailing defines how many data points will be deleted after a gap.
Smart Trim
Default: OFF. The Smart Trim feature automatically sets the trimming size based on trajectory spikes near the existing gap. It is often not needed to delete numerous data points before or after a gap, but there are some cases where it's useful to delete more data points in case jitters are introduced from the occlusion. When enabled, this feature will determine whether each end of the gap is suspicious with errors, and delete an appropriate number of frames accordingly. Smart Trim feature will not trim more frames than the defined Leading and Trailing value.
Minimum segment size
Default: 5 frames. The Minimum Segment Size determines the minimum number of frames required by a trajectory to be modified by the trimming feature. For instance, if a trajectory is continuous only for a number of frames less than the defined minimum segment size, this segment will not be trimmed. Use this setting to define the smallest trajectory that gets.
Gap size threshold
Default: 2 frames. The Gap Size Threshold defines the minimum size of a gap that is affected by trimming. Any gaps that are smaller than this value are untouched by the trim feature. Use this to limit trimming to only the larger gaps. In general it is best to keep this at or above the default, as trimming is only effective on larger trajectories.
Fill Gaps
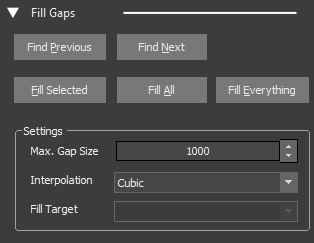
Find Previous
Find Previous searches through the selected trajectory and highlights the range and moves the cursor to the center of a gap before the current frame.
Find Next
Find Next searches through the selected trajectory and highlights the range and moves the cursor to the center of a gap after the current frame.
Fill Selected
Fills the currently selected gap.
Fill All
Fills all gaps in the currently selected track.
Fill Everything
Fills all gaps in all tracks of the timeline.
Settings
Max Gap Size
The maximum size, in frames, that a gap can be for Motive to fill. Raising this will allow larger gaps to be filled. However, larger gaps may be more prone to incorrect interpolation.
Interpolation
Sets which interpolation method to be used. Available patterns are constant, linear, cubic, pattern-based, and model-based. For more information, read Data Editing page
Fill Target
When using the pattern-base interpolation to fill gaps on a marker's the trajectory, Other reference markers are selected alongside the target marker to interpolate. This Fill Target drop-down menu specifies which marker among the selected markers to set as the target marker to perform the pattern-base interpolation.

Smooth Selection
Applies smoothing to the selected portion of the track.
Smooth Track
Applies smoothing to all frames of the track.
Smooth All Tracks
Applies smoothing to all frames on all tracks of the current selection in the timeline.
Filter Cutoff Frequency
Max. Freq (Hz)
Determines how strongly your data will be smoothed. The lower the setting, the more smoothed the data will be. High frequencies are present during sharp transitions in the data, such as foot-plants, but can also be introduced by noise in the data. Commonly used ranges for Filter Cutoff Frequency are 7-12 Hz, but you may want to adjust that up for fast, sharp motions to avoid softening transitions in the motion that need to stay sharp.
Swap Fix

Find Previous
Jumps to the most recent detected marker swap.
Find Next
Jumps to the next detected marker swap.
Markers to Swap
Selects the markers to be swapped.
Apply Swap
Swaps two markers selected in the Markers to Swap
Last updated
Was this helpful?