For the complete documentation index, see llms.txt. This page is also available as Markdown.

Settings: Assets

Overview

Use the Application Settings panel to customize Motive and set default values. This page will cover the items available on the Assets tab. Properties are Standard unless noted otherwise.

Please see the following pages for descriptions of the settings on other tabs:

Application Settings can be accessed from the View menu or by clicking the A screenshot of the Settings button from the Motive toolbar. icon on the main toolbar.

A screenshot of the basic settings on the Motive Settings: Assets pane.
Assets tab in Application Settings - basic settings shown.

Advanced Settings

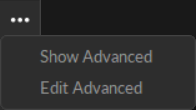
The Settings panel contains advanced settings that are hidden by default. To access these settings, click the A screenshot of the menu button from the Settings panel in Motive. button in the top right corner.

Use the Edit Advanced option to customize which settings are in the Advanced Settings category and which appear in the standard view, to show only the settings that are needed specifically for your capture application.

A screenshot of the Motive Settings panel menu: Show Advanced and Edit Advanced.
Show or Edit Advanced Settings.

To restore all settings to their default values, select Reset Settings from the Edit menu.

Assets Tab

The assets tab contains settings that apply either to all assets or to assets of a specific type, such as Rigid Body, Skeleton, and Trained Markerset assets. These values can be changed on the asset after creation from the Properties pane.

Asset Defaults

The Asset Defaults section contains settings that apply to all assets at creation.

Standard and Advanced Asset Defaults Assets settings.
Minimum Markers to Boot

The minimum number of markers that must be labeled in order for the respective asset to be booted.

Minimum Markers to Continue

The minimum number of markers that must be labeled in order for the respective asset to be tracked.

Asset Scale (Advanced)

The size of the asset in relation to the captured data, set at 100% by default for a one-to-one scale. Adjust the percentage value to increase or shrink the asset size proportionately.

Label

Toggle to enable. Displays the asset's name over the corresponding asset in the 3D viewport.

IMU Label

Select the label type to display for assets that include an IMU. Options are:

  • None. No IMU data will be displayed.

  • Text. The label will display the tag name and sensor fusion status in text form.

  • Icons. The label will display sensor fusion status as an icon.

See the IMU Sensor Fusion page for more detail about IMU labels.

The Label must be enabled in the Asset properties to see the IMU label.

Rigid Body Creation

The Rigid Body Creation section contains settings applicable to the creation of new rigid bodies. These properties are applied only when Rigid Bodies are created, and can be modified during the creation process and after the Rigid Body is created through the Properties pane.

For descriptions of the Rigid Body properties, please see the Properties: Rigid Body page.

A screenshot of the Rigid Body Creation settings from the Motive Settings panel, Assets tab.
Standard and Advanced Rigid Body Creation Assets settings.
Default Name

This setting establishes the naming convention for Rigid Bodies when they are created. For instance, if it is set to RigidBody, the first Rigid Body will be named RigidBody when created. Subsequent Rigid Bodies will be named RigidBody 001, RigidBody 002, and so on. The default is set to Rigid Body.

Creation Color

Select the default color a Rigid Body will have upon creation. Select Rainbow to cycle through a different color each time a new Rigid Body is created.

Skeleton Creation

The Skeleton Creation section contains settings applicable to the creation of new skeleton assets. These properties are applied only during creation and can be modified either during the creation process from the Builder pane or after the Skeleton is created through the Properties pane.

For descriptions of the Skeleton properties, please see the Properties: Skeleton page.

A screenshot of the Skeleton Creation settings from the Motive Settings panel, Assets tab.
Standard and Advanced Skeleton Creation Assets settings.
Default Name

This setting establishes the naming convention for Skeletons when they are created. For instance, if it is set to Skeleton (the default), the first Skeleton will be named Skeleton when created. Subsequent Skeletons will be named Skeleton 001, Skeleton 002, and so on.

Creation Color

Select the default color a Skeleton will have upon creation. Select Rainbow to cycle through a different color each time a new Skeleton is created.

Straight Arms

Straighten each arm along the line from shoulder to wrist, regardless of the position of the elbow markers.

Straight Legs

Straighten each leg along the line from hip to ankle, regardless of the position of the knee markers.

Feet On Floor

Scale the shin bone length to align the bottom of foot with the floor, regardless of the ankle marker height.

Head Upright

Create the skeleton with the head upright, removing tilt or bend, regardless of the head marker positions.

Spine Type (Advanced)

Motive includes two spine models for Skeletons:

  • The Classic model has two spine bones and one neck bone. This is the traditional model still used in many production workflows.

  • The 7 Segment Spine model has five spine bones and two neck bones. This model accounts for the natural curves in the human spine and allows for better alignment between the Skeleton in Motive and the actor.

The selected type will be the default option when creating new Skeletons, and can be changed as needed from the Builder pane.

Height Marker

Scale the skeleton model so the top of the head aligns with the top head marker.

Vertical Hand Adjustment

Apply a Height offset to hands to account for markers placed above the wrist and knuckle joints.

Spine Shrink Limit (Advanced)

Set the maximum amount of shrinkage permitted across all four of the bones that comprise the spine: Abdomen, chest, neck, and head. This property allows for the adjustment of shrinkage that can occur normally in the human spine. This property can be changed for individual Skeletons through the Solver settings in the Skeleton's Properties pane.

Shrink and Stretch Limits: A Warning

Spine Stretch Limit (Advanced)

Set the maximum amount of stretch permitted across all four of the bones that comprise the spine: Abdomen, chest, neck, and head. This property allows for the adjustment of stretching that can occur normally in the human spine. This property can be changed for individual Skeletons through the Solver settings in the Skeleton's Properties pane.

Shrink and Stretch Limits: A Warning

Shoulder Shrink Limit (Advanced)

Set the maximum amount of shrinkage permitted in the shoulder width. This property allows for the adjustment of shrinkage that can occur normally in the human shoulders. This property can be changed for individual Skeletons through the Solver settings in the Skeleton's Properties pane.

Shrink and Stretch Limits: A Warning

Shoulder Stretch Limit (Advanced)

Set the maximum amount of stretch permitted in the shoulder width. This property allows for the adjustment of stretching that can occur normally in the human shoulders. This property can be changed for individual Skeletons through the Solver settings in the Skeleton's Properties pane.

Shrink and Stretch Limits: A Warning

Markerset Creation

The Markerset Creation section contains settings applicable to the creation of new Trained Markerset assets. These properties are applied only during creation and can be modified either during the creation process from the Builder pane or after the Trained Markerset is created through the Properties pane.

For descriptions of the Trained Markerset properties, please see the Properties Pane: Trained Markerset page.

Standard and Advanced Markerset Creation Assets settings.
Default Name

This setting establishes the naming convention for Trained Markersets when they are created. For instance, if it is set to Markerset (the default), the first Markerset will be named Markerset when created. Subsequent Markerset will be named Markerset 001, Markerset 002, and so on.

Refinement Tab

The Refinement tab contains settings that apply when refining Skeleton assets.

A screenshot of the Standard settings available on the Refinement tab of the Motive Applications settings, Assets panel.
Standard settings available on the Refinement tab of the Assets pane in the Settings panel.

General Settings

The General settings affect how Motive completes the Range of Motion (ROM) calculation. These are standard settings unless otherwise noted.

For more information on the Skeleton Range of Motion (ROM), please see the Create Skeleton section of the Builder pane page.

A screenshot of the Motive Settings panel, Standard and Advanced General Settings on the Assets Tab Refinement tab.
Standard and Advanced General Refinement settings.
Start ROM Delay

Set a delay for the ROM to allow the actor to get into position before the Range of Motion (ROM) calibration begins. This is similar to setting a recording delay when capturing live data.

Record ROM

When enabled, Motive records a Take with the name of the subject each time a Range of Motion (ROM) is performed. This allows you to easily reprocess the Skeleton if needed.

Sample Count

The maximum number of samples Motive will use for the Range of Motion (ROM) calculations.

Auto Start Calculation (Advanced)

When enabled, Motive will begin calculating the Range of Motion (ROM) once sufficient samples are collected.

Calculation Thread Count

Set the maximum number of CPU threads to use to calculate the ROM. A value of 0 will allow Motive to use the maximum number of CPU cores available in PC.

Adjust this value only if the ROM calculation causes slowness issues or frame drops that impact system performance. If changes are made, we recommend setting this to a low value, e.g., 5-10.

Save Unrefined Skeleton (Advanced)

When enabled, Motive will save the original Skeleton prior to completing the Range of Motion (ROM), for comparison purposes.

Solver Settings

Solver Settings allow you to control how specific Skeleton joints are solved. Most of these are advanced settings that will not need to be adjusted, in most use cases.

A screenshot of the standard and advanced Solver Settings from the Motive Application Settings, Assets tab, refinement tab.
Standard and Advanced Solver Settings Refinement settings.
Solve Constraints Only

Calibrates the Skeleton's constraint offsets only without changing any bone offsets or lengths.

Use Constraint Weights (Advanced)

When enabled, Motive uses the weights assigned to each constraint in the Constraints pane to solve the Skeleton.

Please see the Constraints pane for more information on editing constraint weights.

Spring Weight Scale (Advanced)

Adjust the influence of default joint angles on solved pose for calibrated Skeletons. Lower values can result in a better match between the skeleton pose and the marker positions.

Straighten Elbows / Straighten Knees (Advanced)

Straighten the selected joint based on the data from the original T or A pose.

Flatten Feet (Advanced)

Set the feet parallel to the ground based on the data from the original T or A pose.

Head Upright (Advanced)

Adjust the angle of the head to be upright when in the T or A pose.

Pose Assisted Solve Settings

Pose Assisted Solve Settings allow you to customize specific parameters in the Range of Motion to accommodate variances in Skeleton assets during creation.

A screenshot of the Pose Assisted Solve Settings section of the Motive Application Settings panel, Asset Tab, Refinement Tab.
Advanced Pose Assisted Solve Settings Refinement settings.
Pose Detection Duration (Advanced)

The length of time a pose needs to be held for Motive to detect it.

Palms Together Pose (Advanced)

This value specifies how strongly the solver will enforce the Palms Together pose during the Range of Motion (ROM) calibration.

Wrist Distance (Advanced)

The distance between the wrists when the hands are in the Palms Together pose.

Wrist Angle (Advanced)

Setting to add a slight downward angle to the wrist to account for the palm being thicker at the wrist than it is at the knuckles.

Elbows Together Pose (Advanced)

This value specifies how strongly the solver will enforce the Elbows Together pose during the Range of Motion (ROM) calibration.

Elbow Distance (Advanced)

The distance between the elbows when the arms are in the Elbows Together pose.

Joint Marker Settings

Joint Marker Settings allow you to adjust specific joints in the Range of Motion to accommodate variances in Skeleton assets during creation.

The default values produce the best solve results when working with standard Skeletons. Adjust these values only if necessary to improve the Skeleton calibration.

A screenshot of the Joint Marker Settings, advanced settings from the Motive Applications Settings panel, Asset tab, Refinement tab.
Advanced Joint Marker Settings Refinement settings.
Joint From Markers (Advanced)

For each joint type, set how much the joint markers should be factored into calculating the joint's location.

Shoulder Width From Markers (Advanced)

Set how much the joint markers are factored into the shoulder width calculation.

Face Forward From Markers (Advanced)

Determine how much the head makers are used to calculate the forward direction of the Skeleton's head.

Thickness Scale (Advanced)

Scale the offset used to calculate the position of the selected joint from its joint markers. This value can be adjusted to account for a person with thicker or thinner limbs.

Last updated

Was this helpful?